Providing Self-Service Infrastructure with Terraform Enterprise
This is the second guided tutorial for Terraform Enterprise. In this tutorial there will be multiple Operators using Terraform Enterprise to create and use modules to provision infrastructure.
UPDATE: Some of this guide may be out of date. To find the most up-to-date tutorial content for Terraform Enterprise, visit the Terraform Enterprise documentation for on-premises deployments or visit HashiCorp Learn's Terraform Cloud self-service setup tutorials.
Infrastructure as Code: Terraform uses an infrastructure as code approach to provide effective, reusable, and safe infrastructure provisioning automation. This approach enables Operators to increase their productivity, move quicker, and reduce human error.
Self-service infrastructure: The Terraform Enterprise Module Registry provides a self-service workflow for Operators to publish modules and Developers to discover the versioned and validated modules to provision infrastructure. This allows Operators and Developers to leverage the work of other Operators to safely and efficeintly provision infrastructure.
Safe, Efficient Workflow: Terraform provides one consistent workflow for Developers and Operators to provision resources on any infrastructure provider. One workflow to learn increases user productivity, and also reduces organizational risk as that becomes one workflow to secure, one workflow to audit, and one workflow to govern.
Provision Any Infrastructure: Terraform providers are plug-in components to Terraform and interact with the each infrastructure provider. There are currently over 100+ providers— and this number continually increases through the support of over 1100+ contributors.
Introduction
The goal of this guide is to get a team of Operators using Terraform Enterprise to build versioned and validated portions of code called modules. Operators will create a workspace to manage their module and its life cycle. Then Operators use the Terraform Enterprise Module Registry to publish modules to a central registry where they can be discovered. Other Operators and Developers discover modules and use the Configuration Designer to combine module and then provision infrastructure.
In this guide their will two Operators (User 1 & user 2) interacting with Terraform Enterprise to demostrate how team members work together.
For planning purposes, we expect the steps in this guide to take no more than 20 minutes and where applicable links to code have been provided.
Prerequisites
- Have already gone through Getting Started with Terraform Enterprise and connected your VCS as well as set up your basic administrators
- Create or have access to an existing public VCS repo from the supported list of VCS providers
- Have a module already with the identified requirements or cloned the example
Part One— User 1
In this part, User 1 will follow the workflow for an infrastructure producer, an operator responsible for building, versioning, and validating modules of infrastructure and then publish the module to Terraform Enterprise Module Registry, a service registry of pre-defined infrastructure.
Create a Workspace
Navigate to your workspace dashboard https://app.terraform.io/app/yourorganizationhere
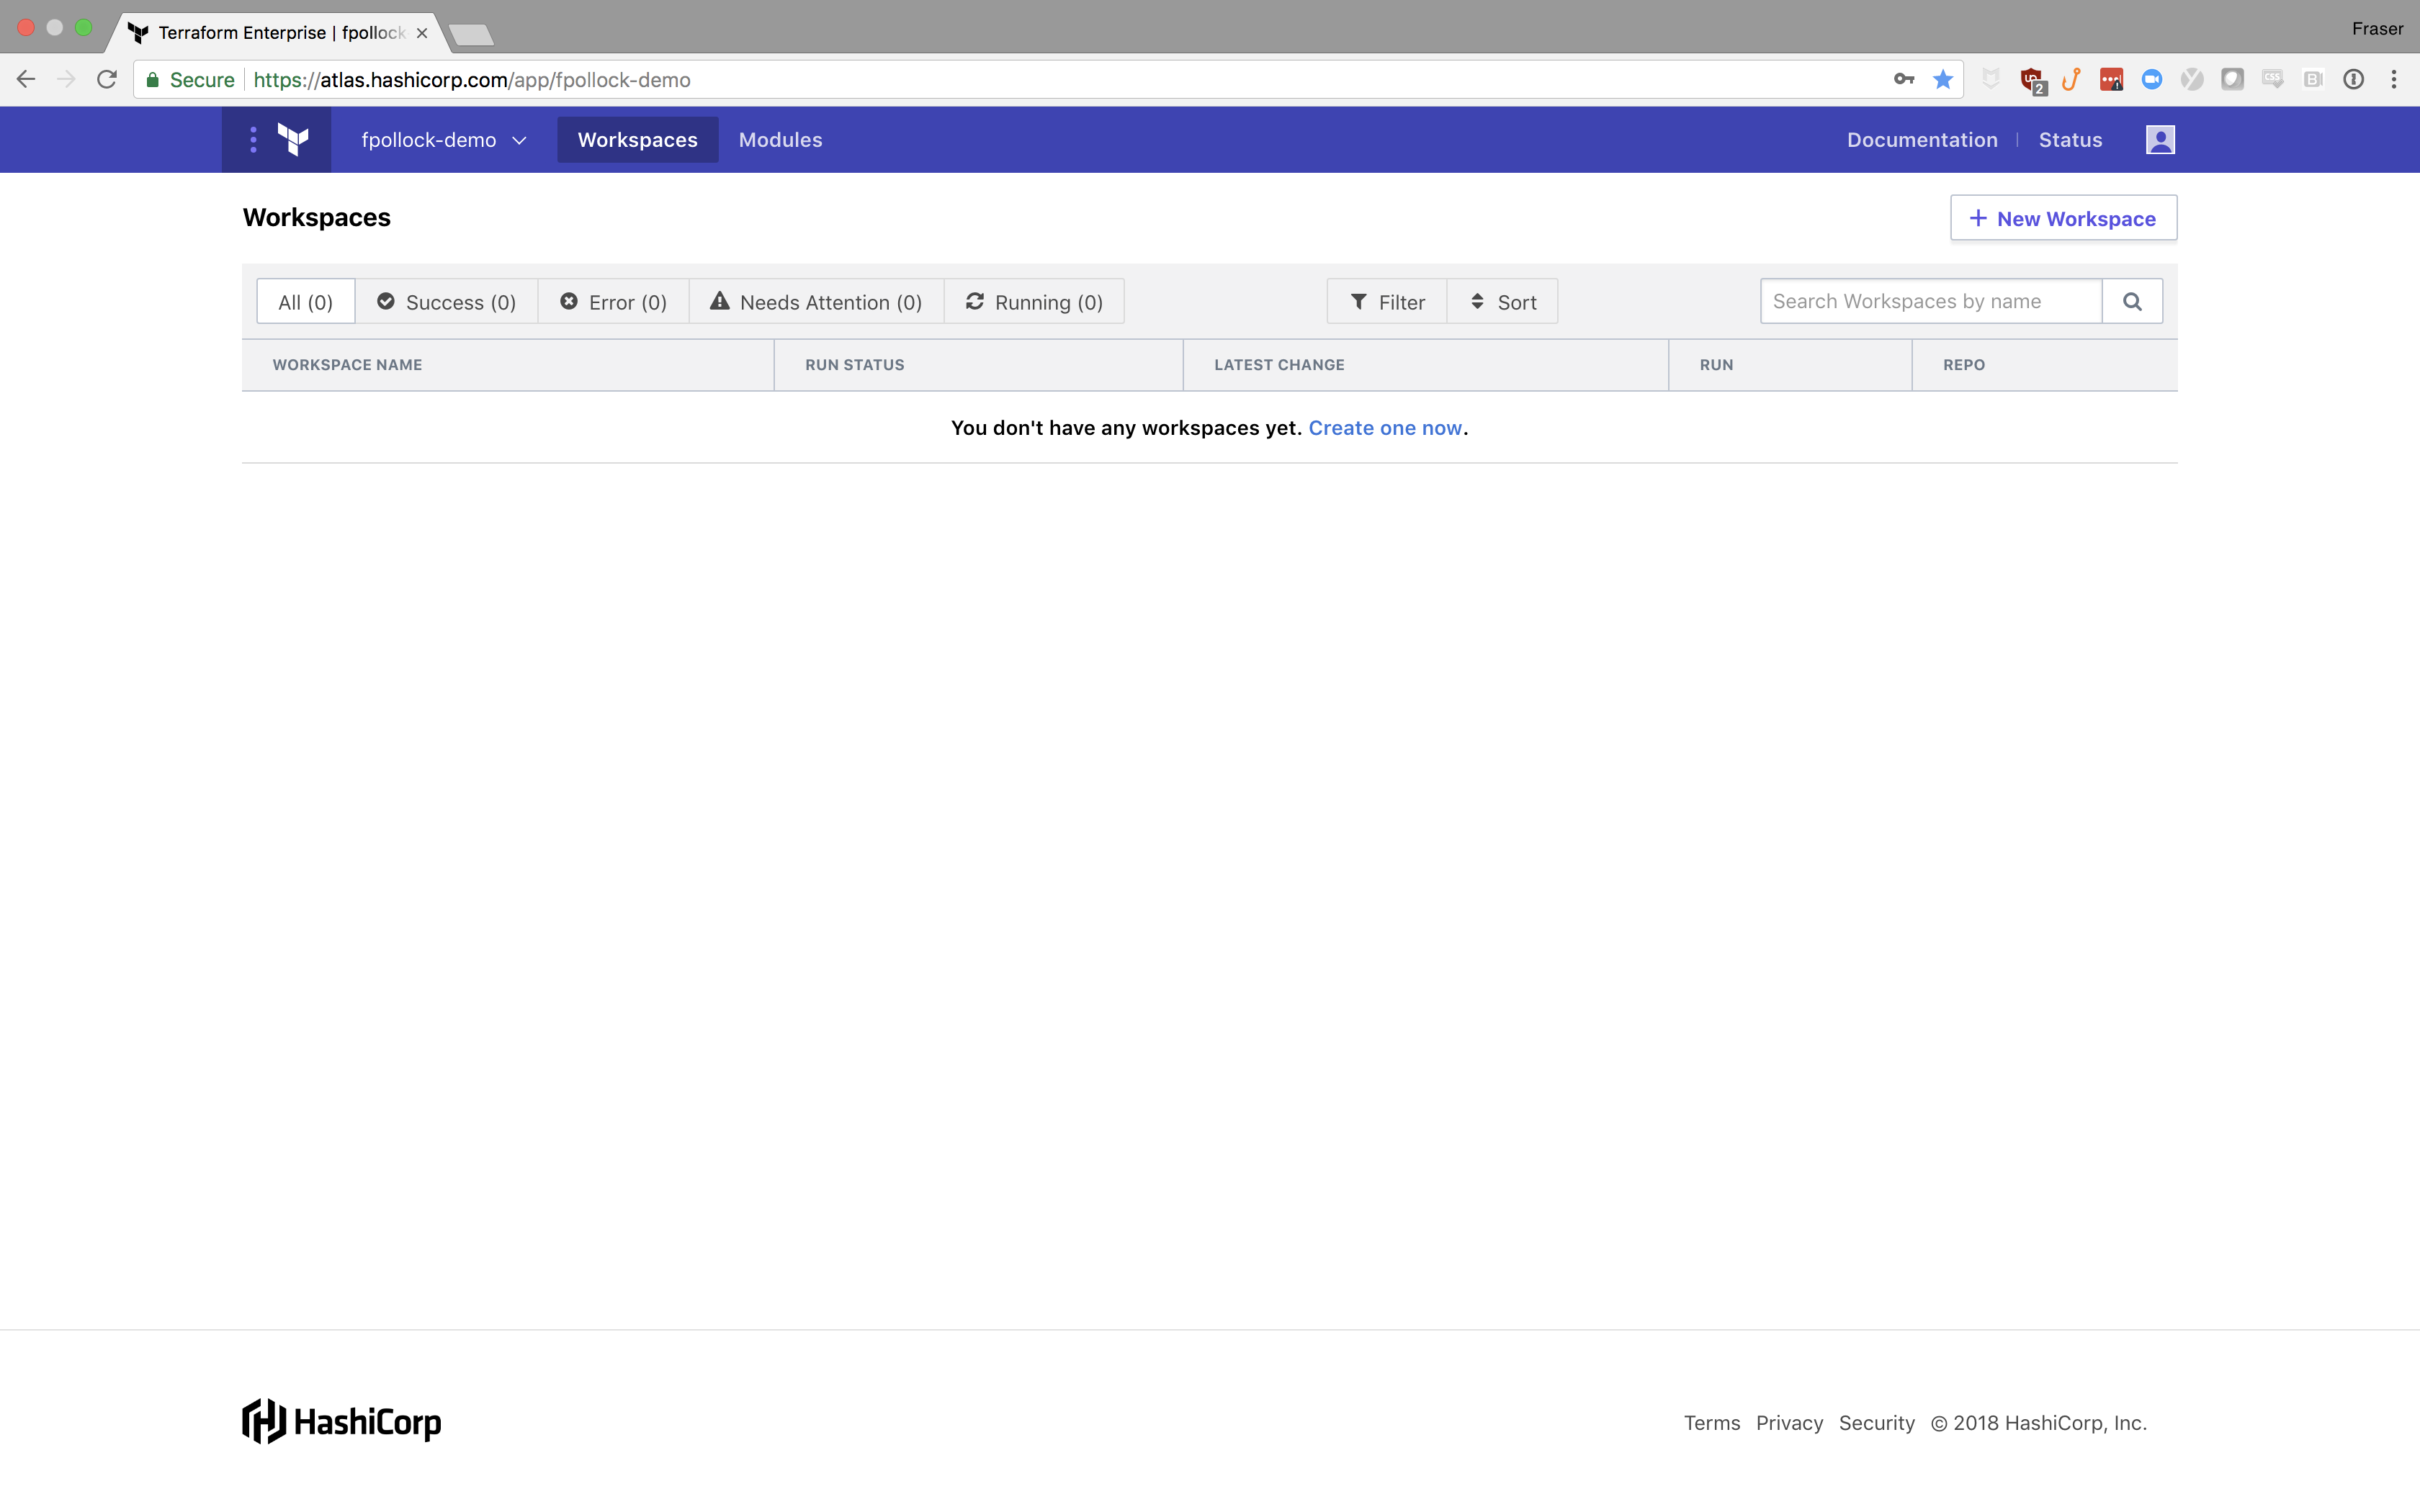
Once on your dashboard select the "+ New Workspace” button in the top right. This will take you to the Create a new Workspace page at https://app.terraform.io/app/yourorganizationhere/workspaces/new
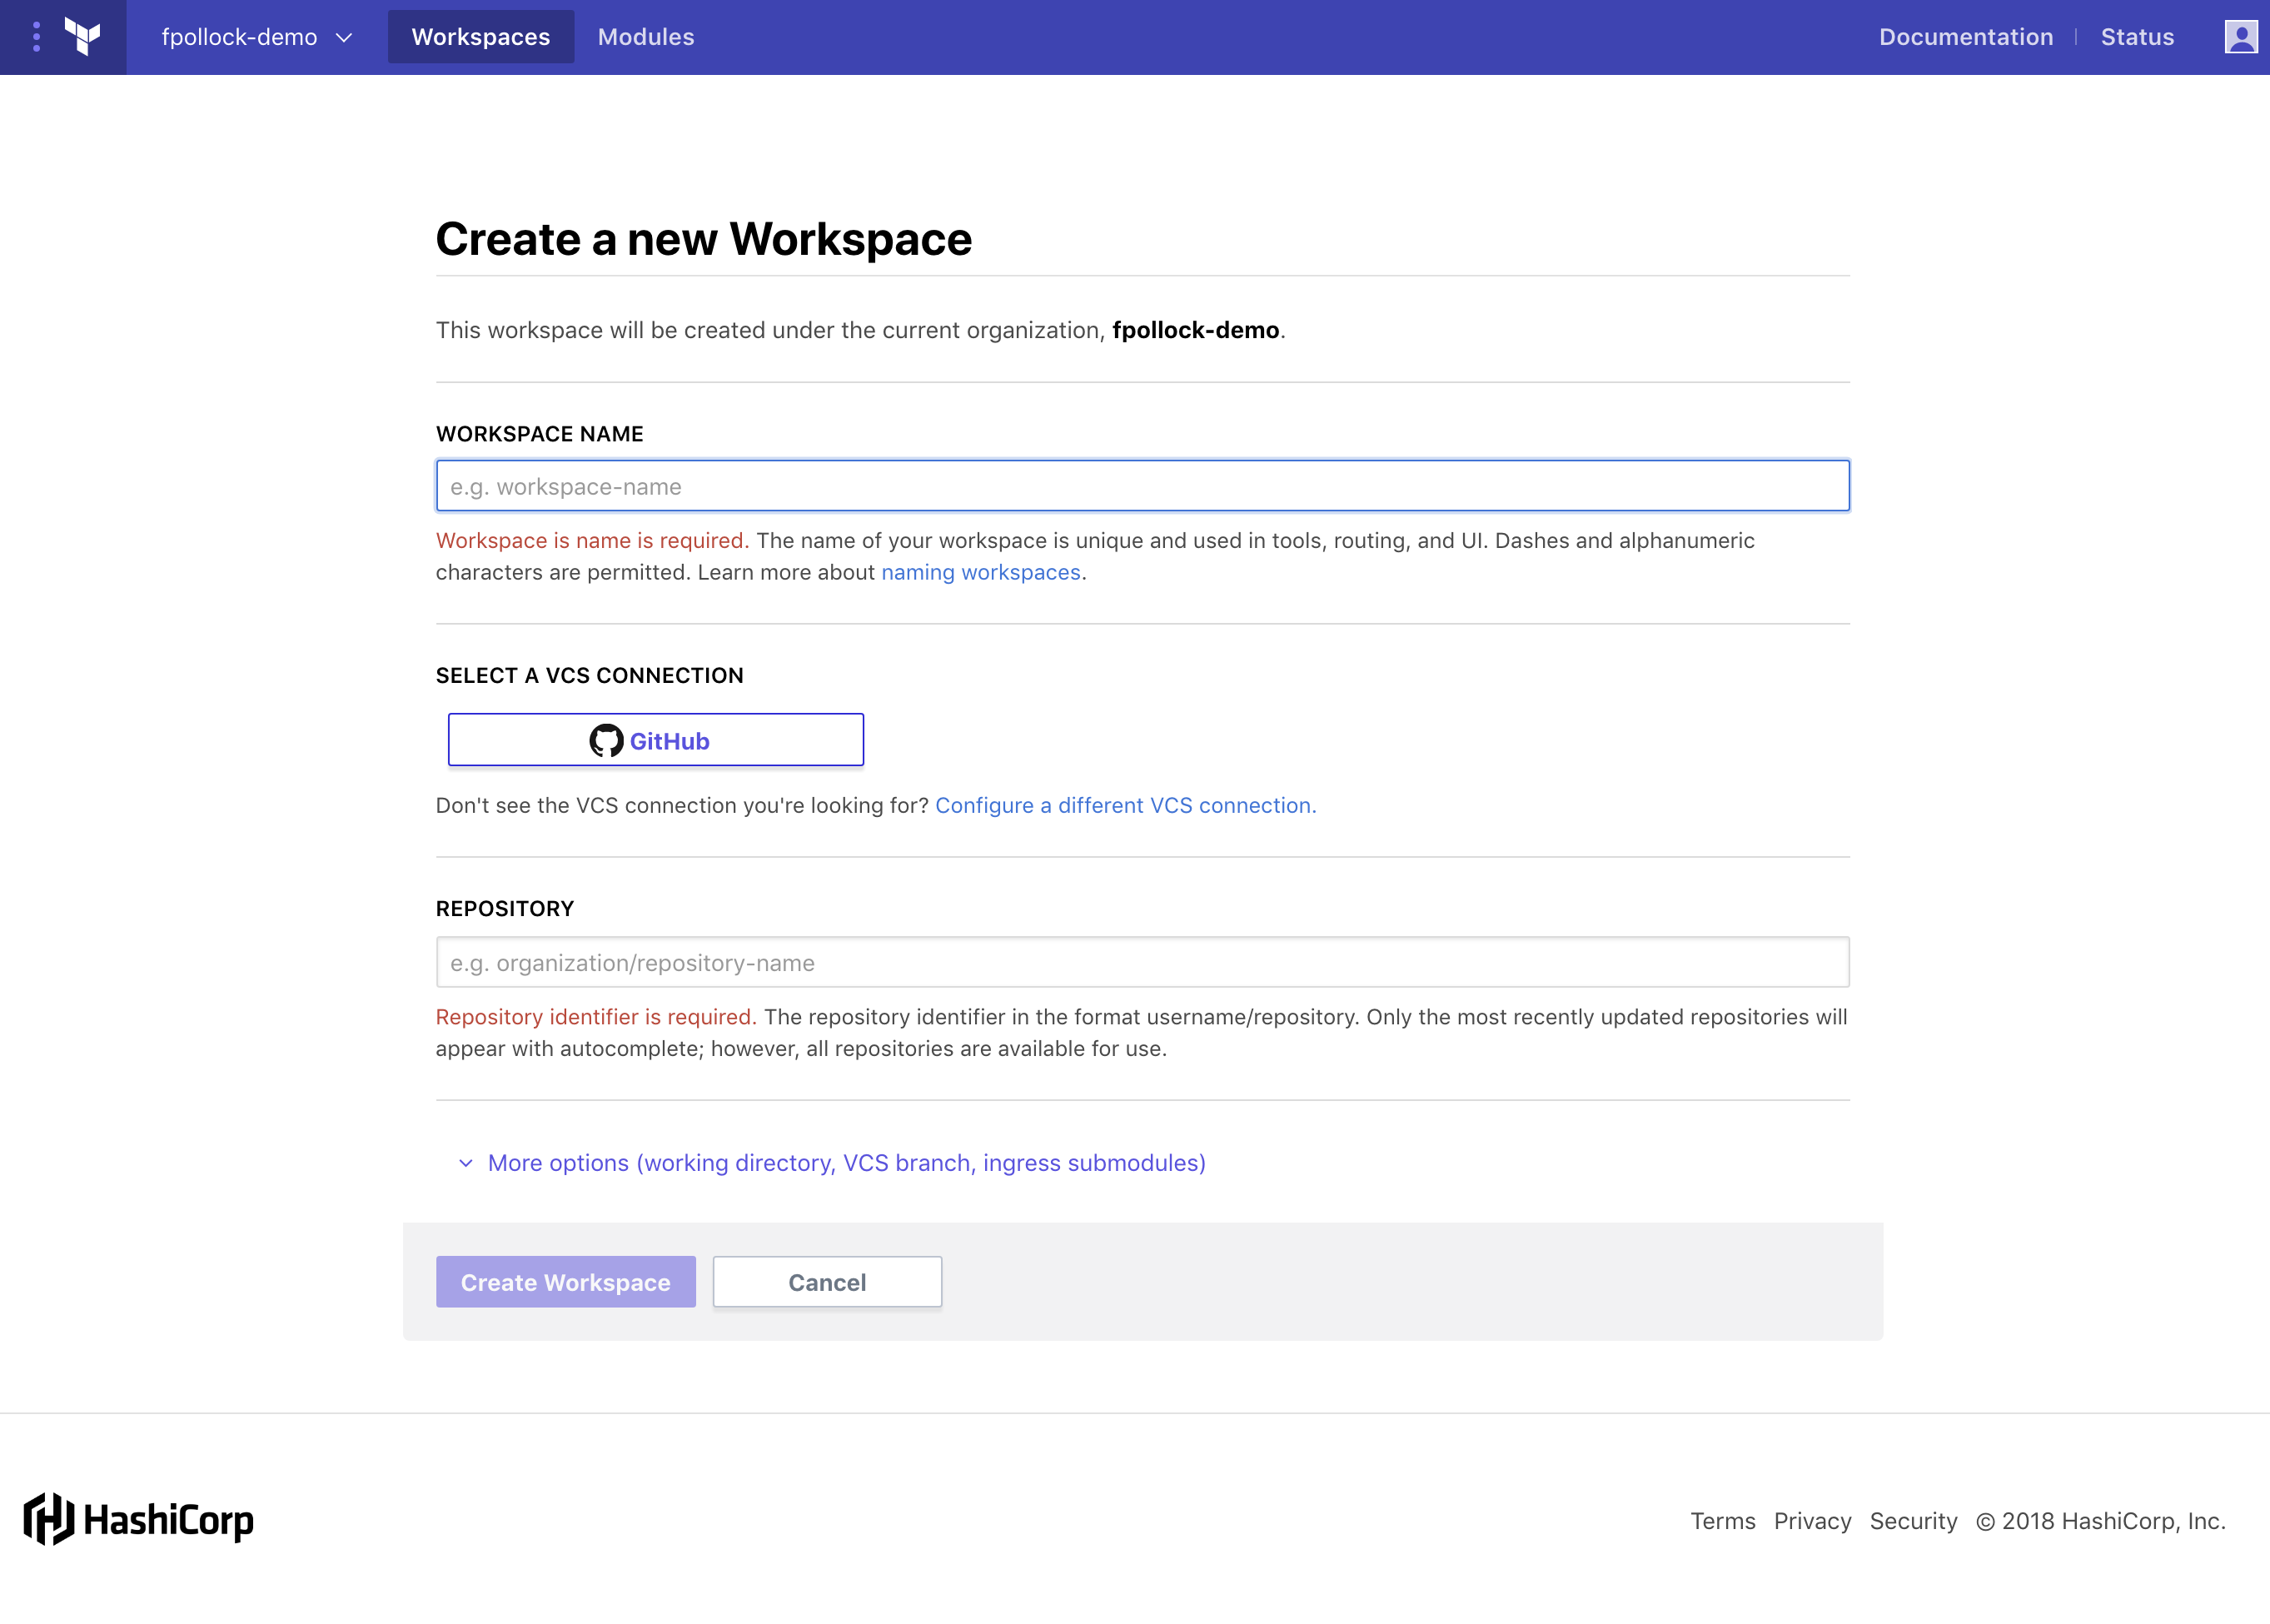
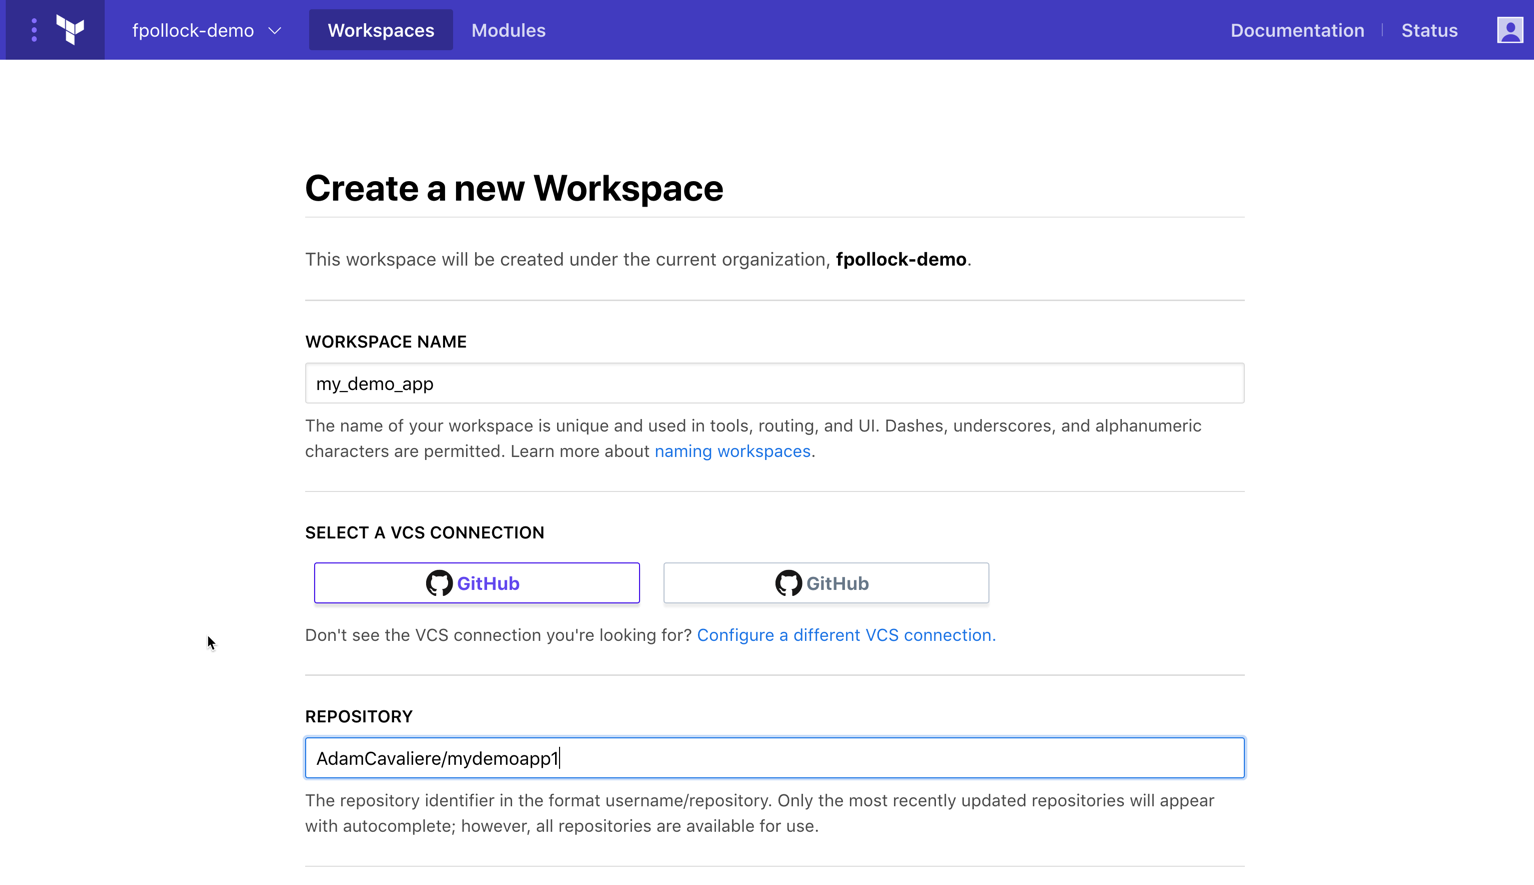
Fill out the “Workspace Name” field with a label that follows the recommended nomenclature for your organization. A good standard to follow is providerfunctionmodule. Ensure that the VCS you configured in the pre-requisites is connected and selected and then fill out the repository with the location of your module or one of the cloned examples for your specific platform:
The format for this field should follow gitorganization/repositoryname. The field should auto-populate some values if your connection is functional.
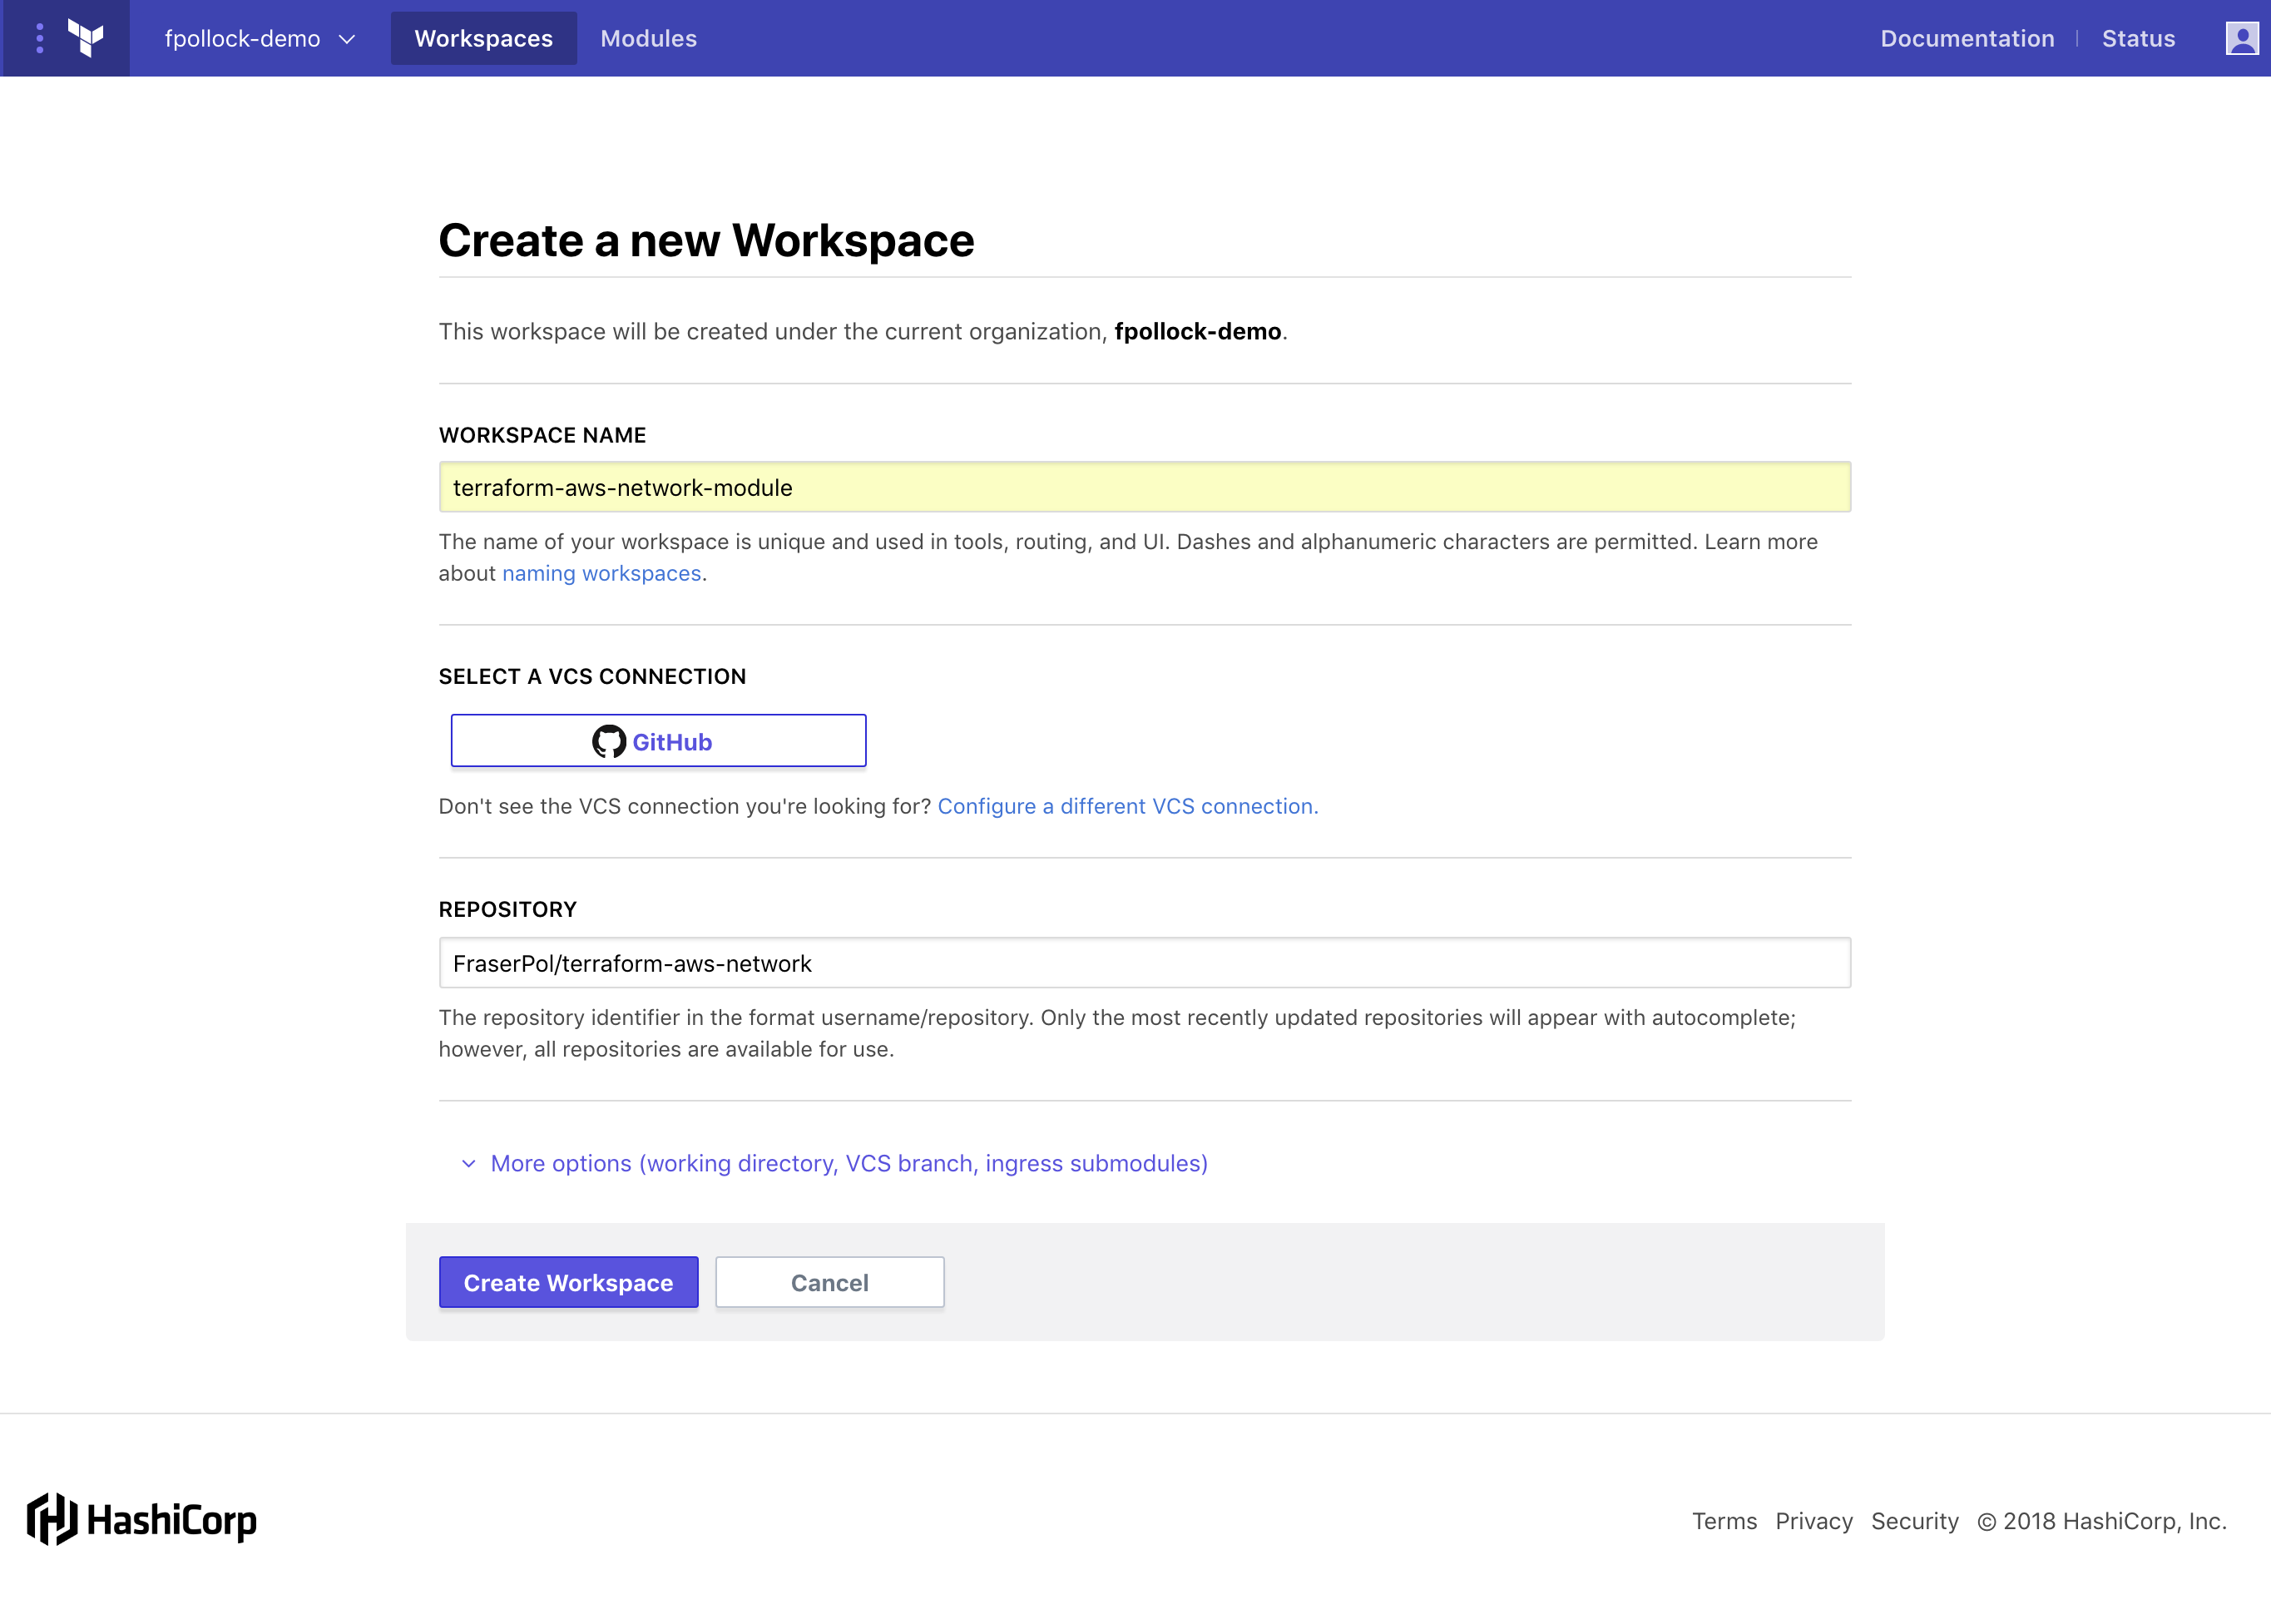
Once all fields are complete select Create Workspace.

Configure Variables
Our next step is to configure some basic variables for our module. For the example below, the recommended default values are displayed. This is also where customized variables can be set.

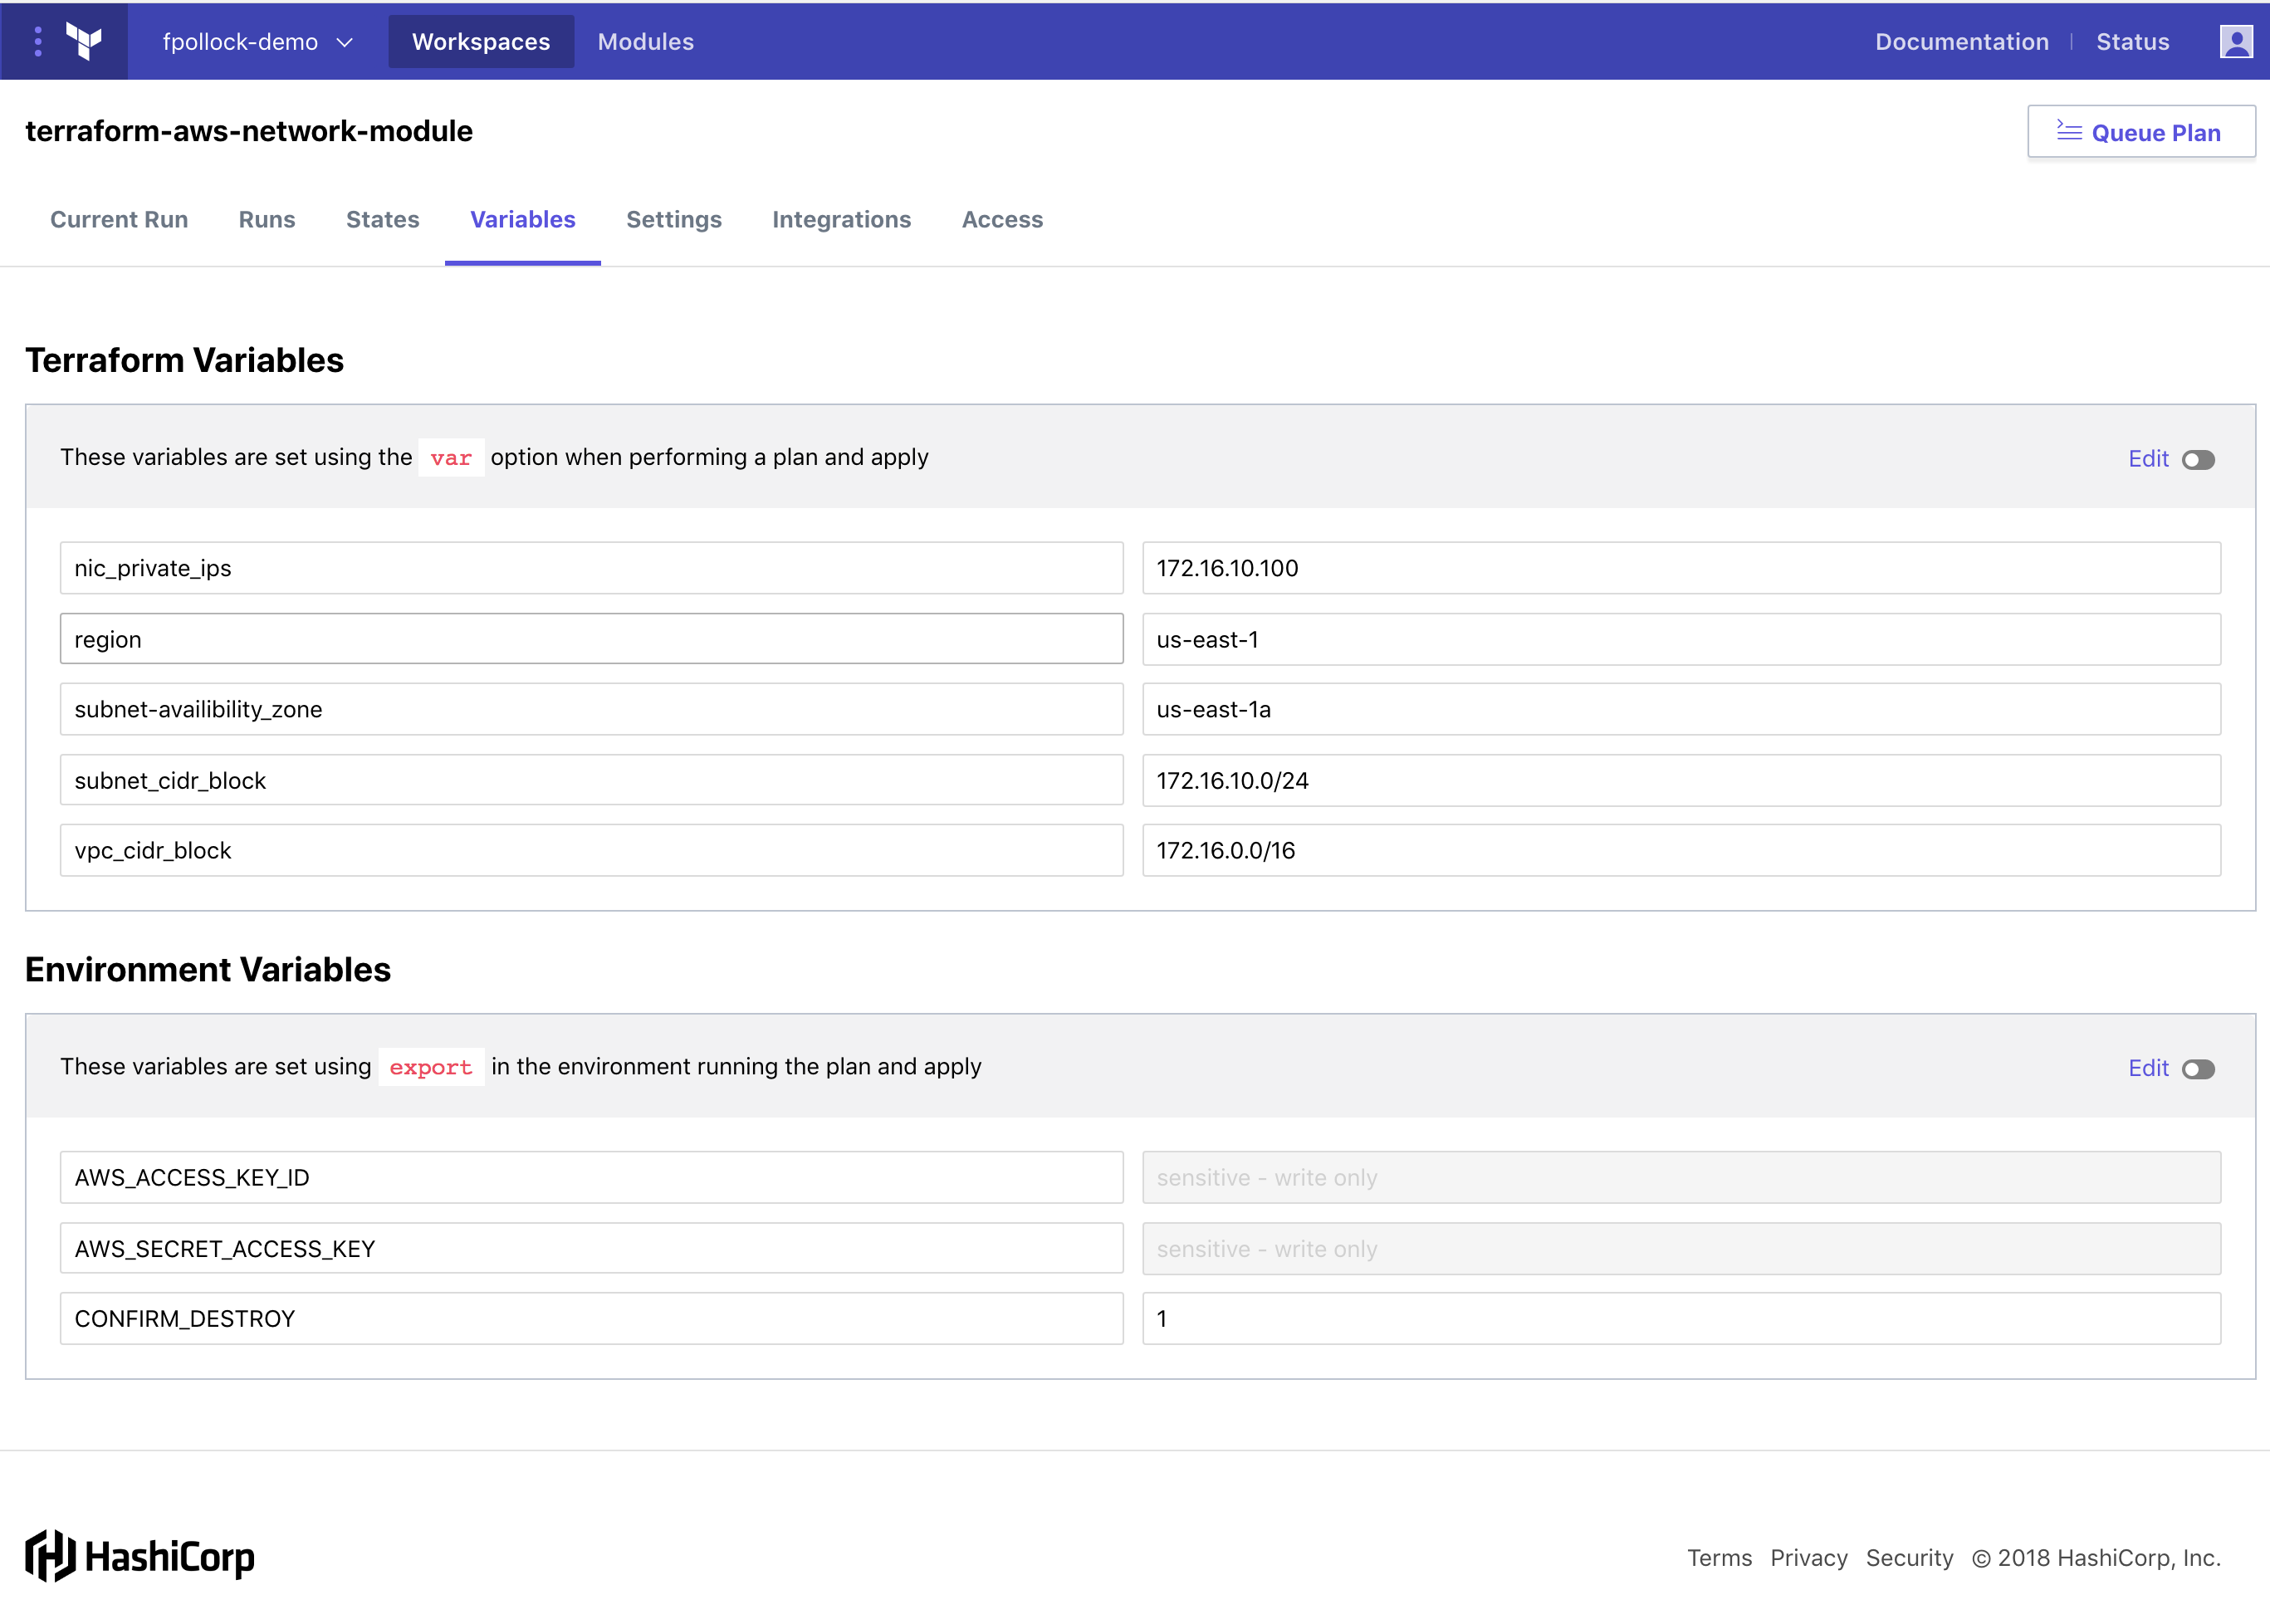
Queue Plan
Once the variables are in place we can select Queue Plan. This is in the top right of the GUI. The plan phase will test our module and the values we provided.
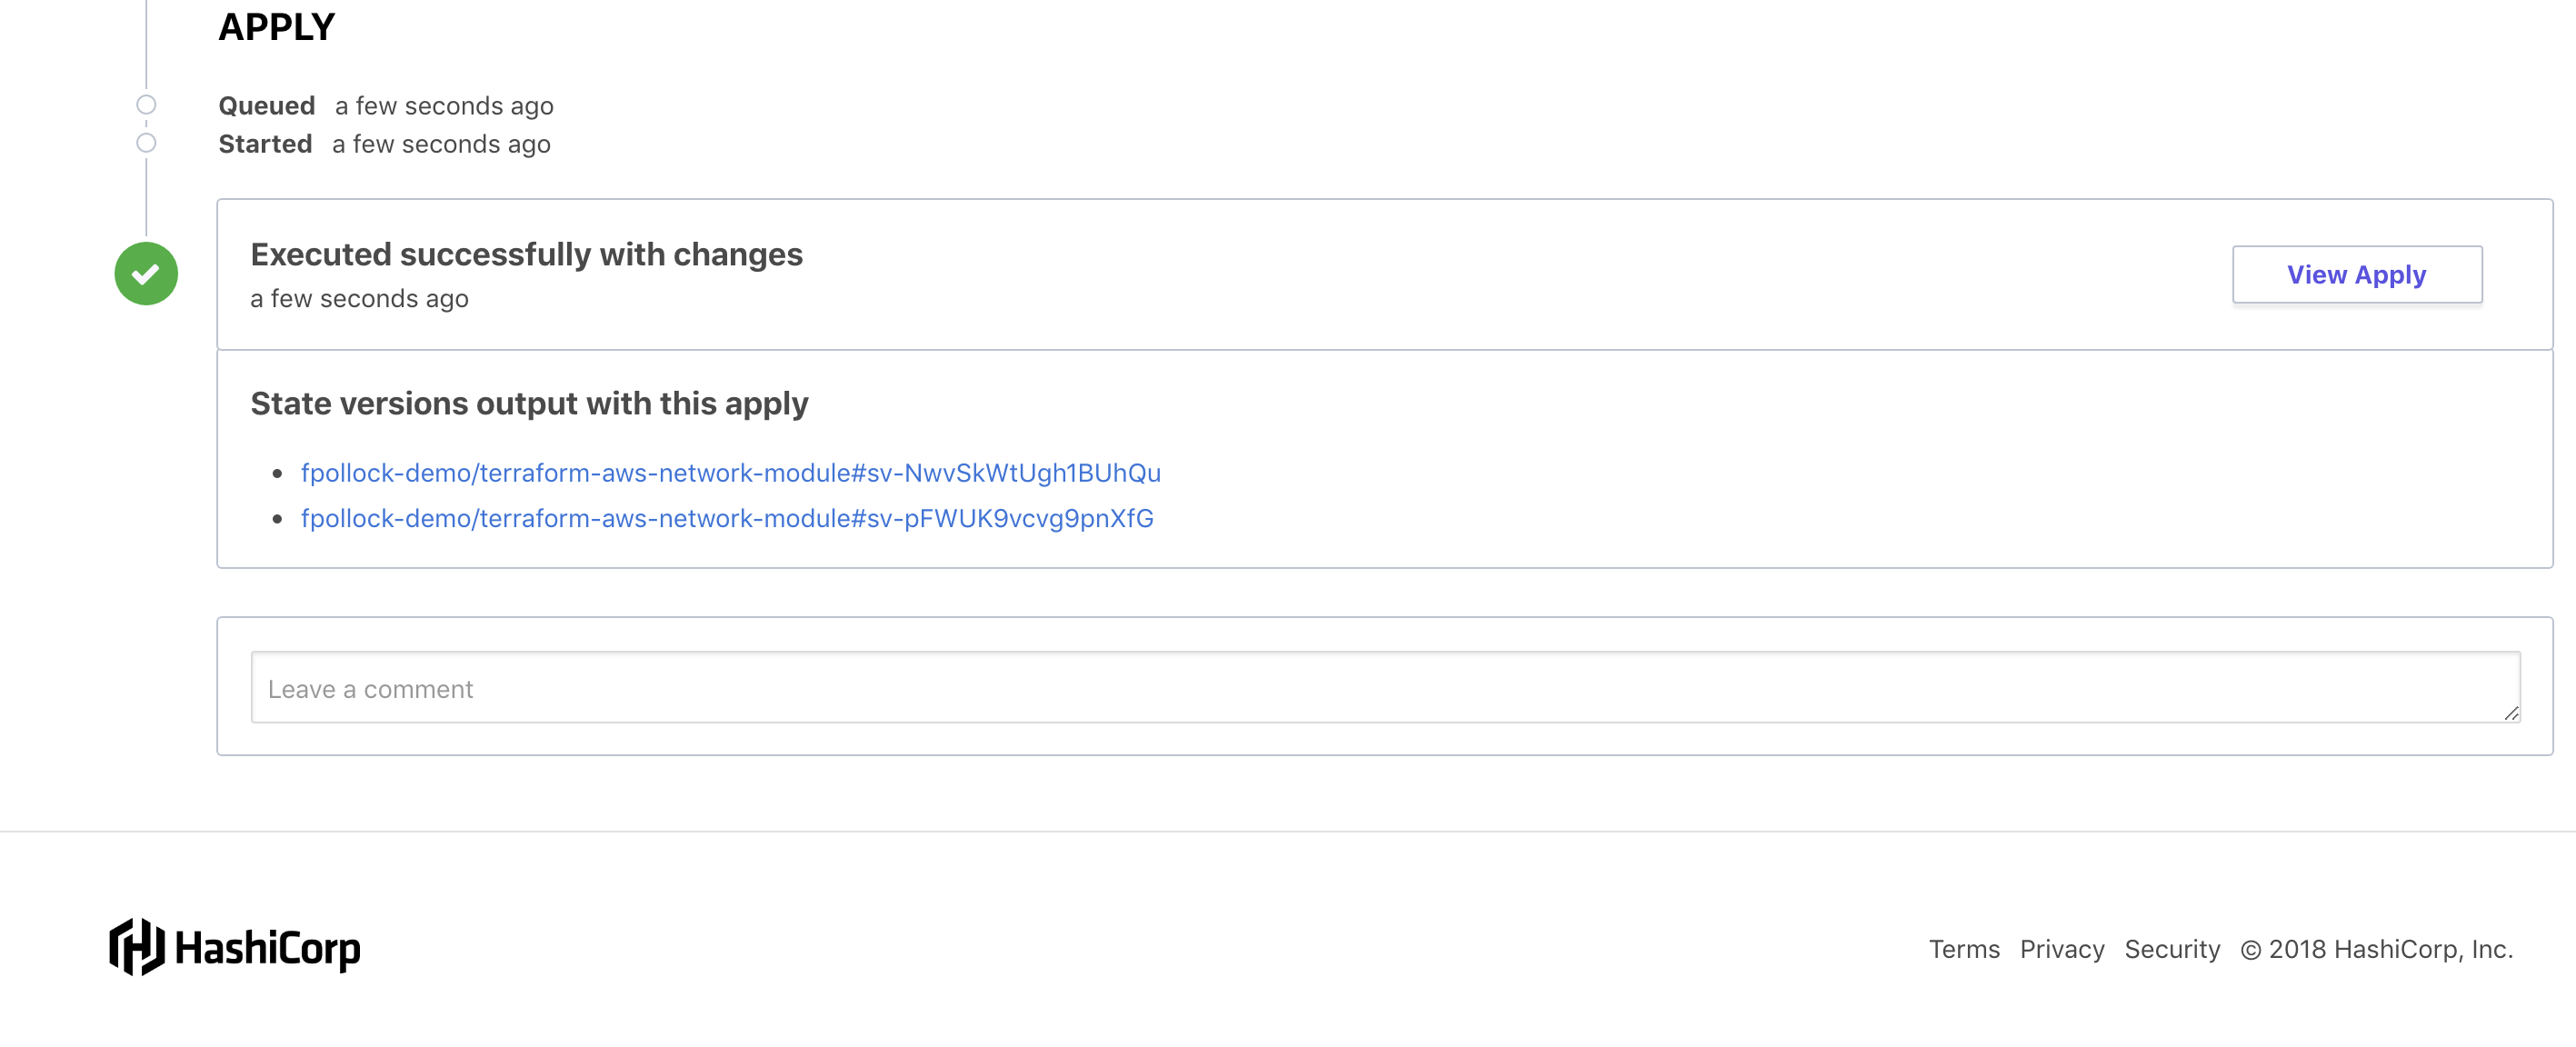
If successful, you will see that your "Apply" is marked with a green check and your assets are created. You can verify this by selecting View Apply and reviewing the output.

Publish Module
Now that the module is built, the next step is to publish the module to the Terraform Enterprise Module Registry. From the Terraform Enterprise GUI, select Modules in the navigation bar.
This will bring you to the "Modules" page. Select Publish a Module in the center of the screen. Once selected, this will bring you to a page to configure and add your module. There are several items to note on this page as well as requirements to publish a module.
Per the prerequisites ensure your VCS connection is already established or you will have to configure it now.
Ensure you’ve reviewed all the requirements outlined for module publication including that you’ve created a release with the symantic versions identified.
The value for the source repository should follow gitorganizationname/terraform-provider-name
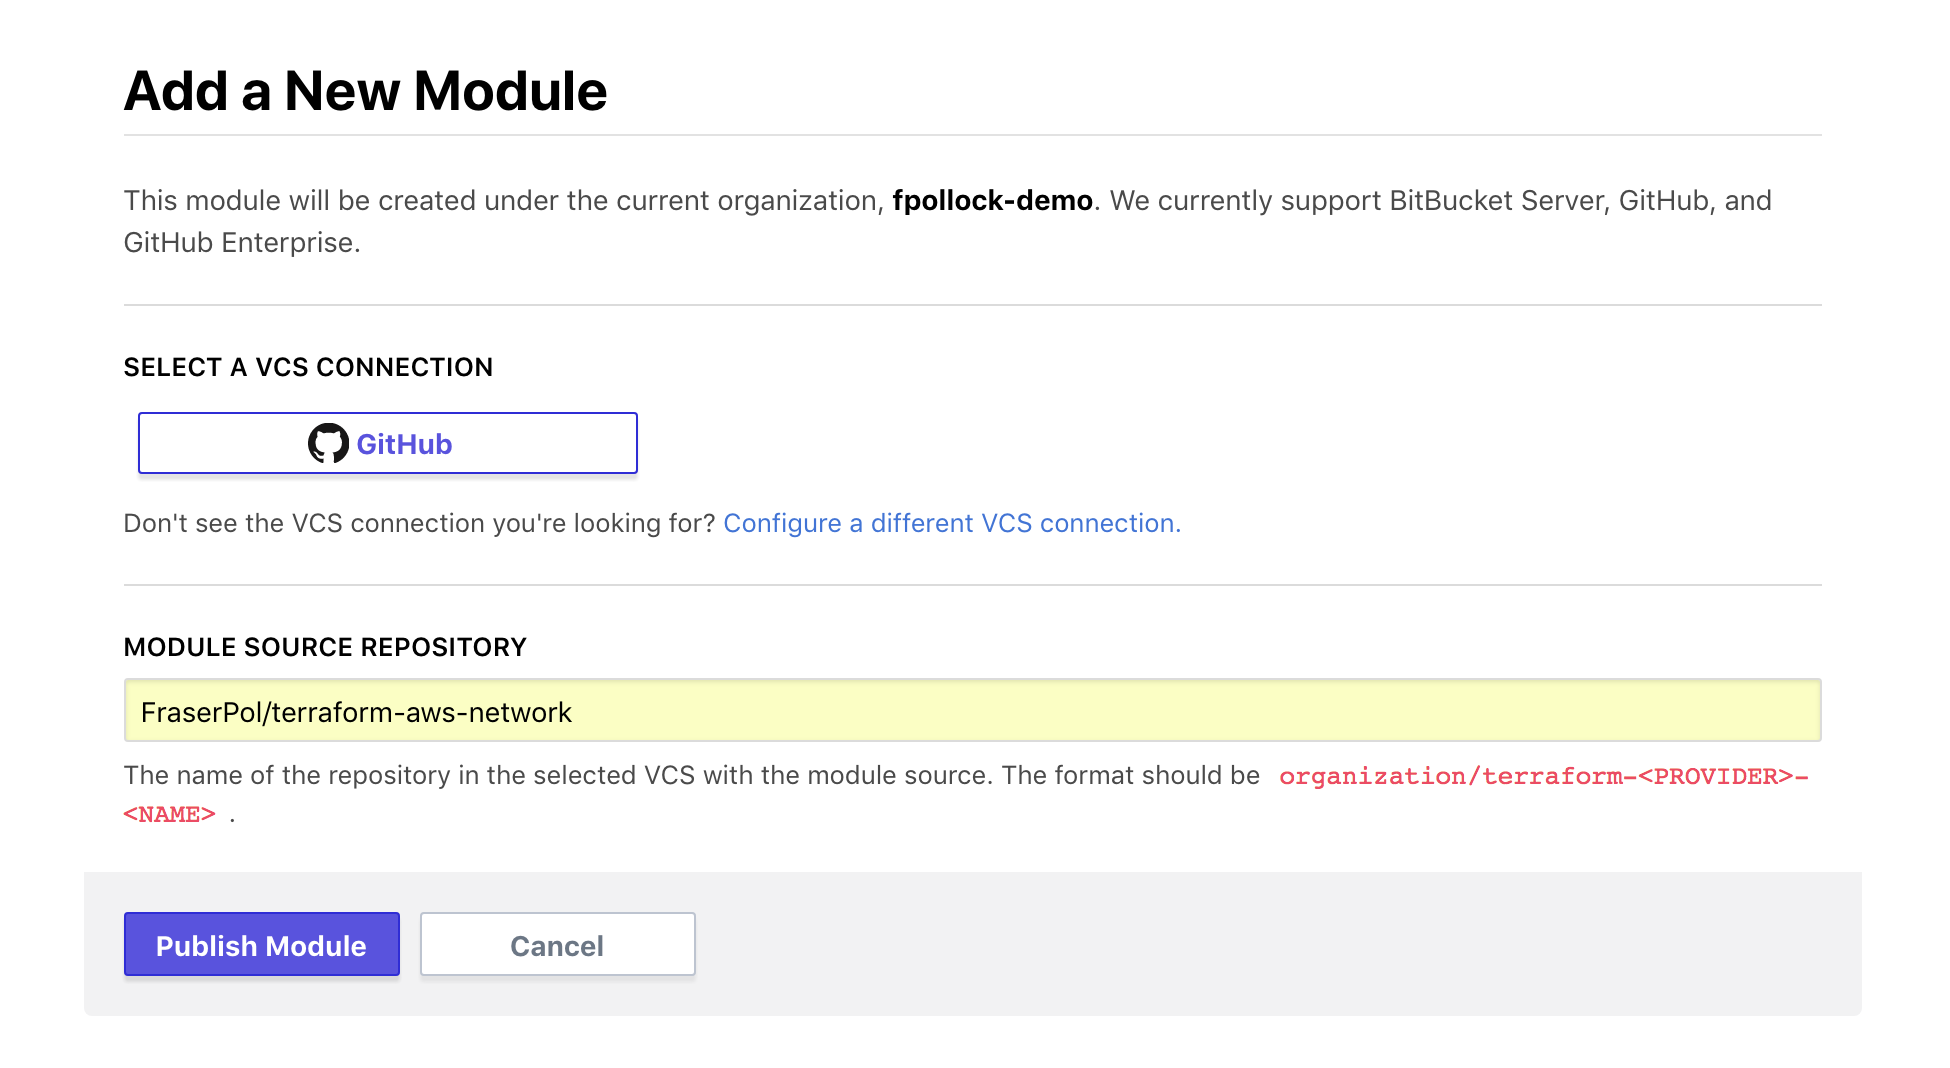
Once you’ve filled in the repository value select Publish Module, if successful this will forward you to a loading screen followed by the module’s summary page.

Congratulations! You’ve just published your first module on the Terraform Enterprise Module Registry! Note there is a lot of information on this page:
- You can see all the inputs, outputs and dependencies for your module. It will also identified all the resources that would be created if this module is used.
- On the right panel you can see how to consume this module and the code required to do so.
- Finally there’s a versions drop down once you start creating multiple releases of your module.
As a last step, lets add another Operator (User 2) to our organization so they can start to work with us in the Organization and use our code. They will be able to use existing modules, publish their own modules, and combine them together.
Create a Team
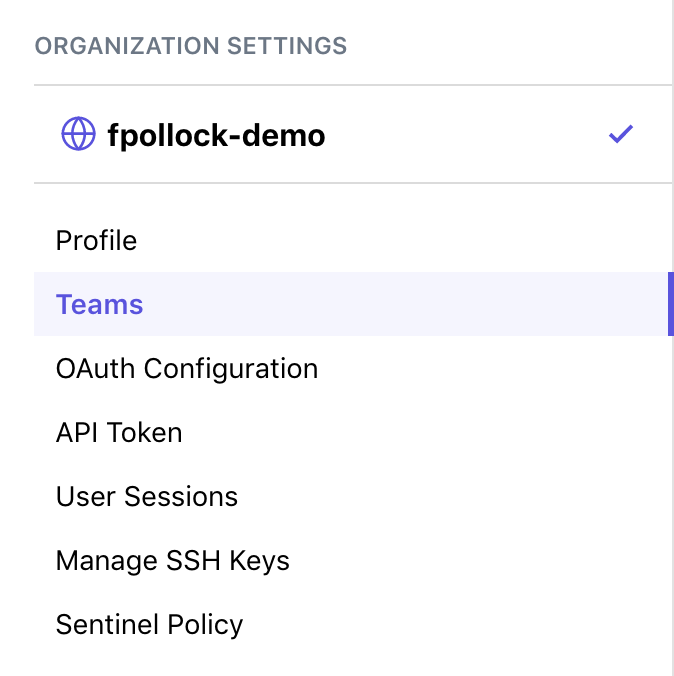
In the navigation bar, on the upper left, your organization drop down contains a link to Organization Settings.
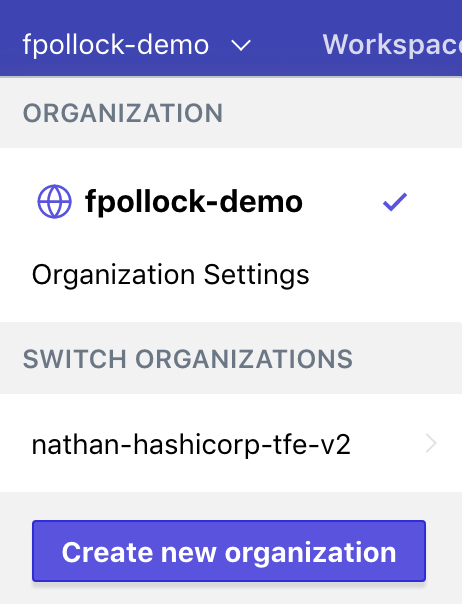
Select this then select “Teams” on the left panel.
To enable collaboration on a workspace, you must add other teams to it.
Read access lets team members view the Workspace's variables and settings, view its run history, and view its StateVersions and Configuration Versions. They can't queue run plans, apply existing run plans, or change any variables or settings.
Write access lets team members create and approve runs, and lock or unlock the workspace. It doesn't let them change variables or settings.
Admin access lets team members change variables and settings, add other teams to the workspace, remove other teams from the workspace, and delete the workspace.
Let’s create an Operators team for our group, you could alternatively add additional users into your existing “Owners” group.
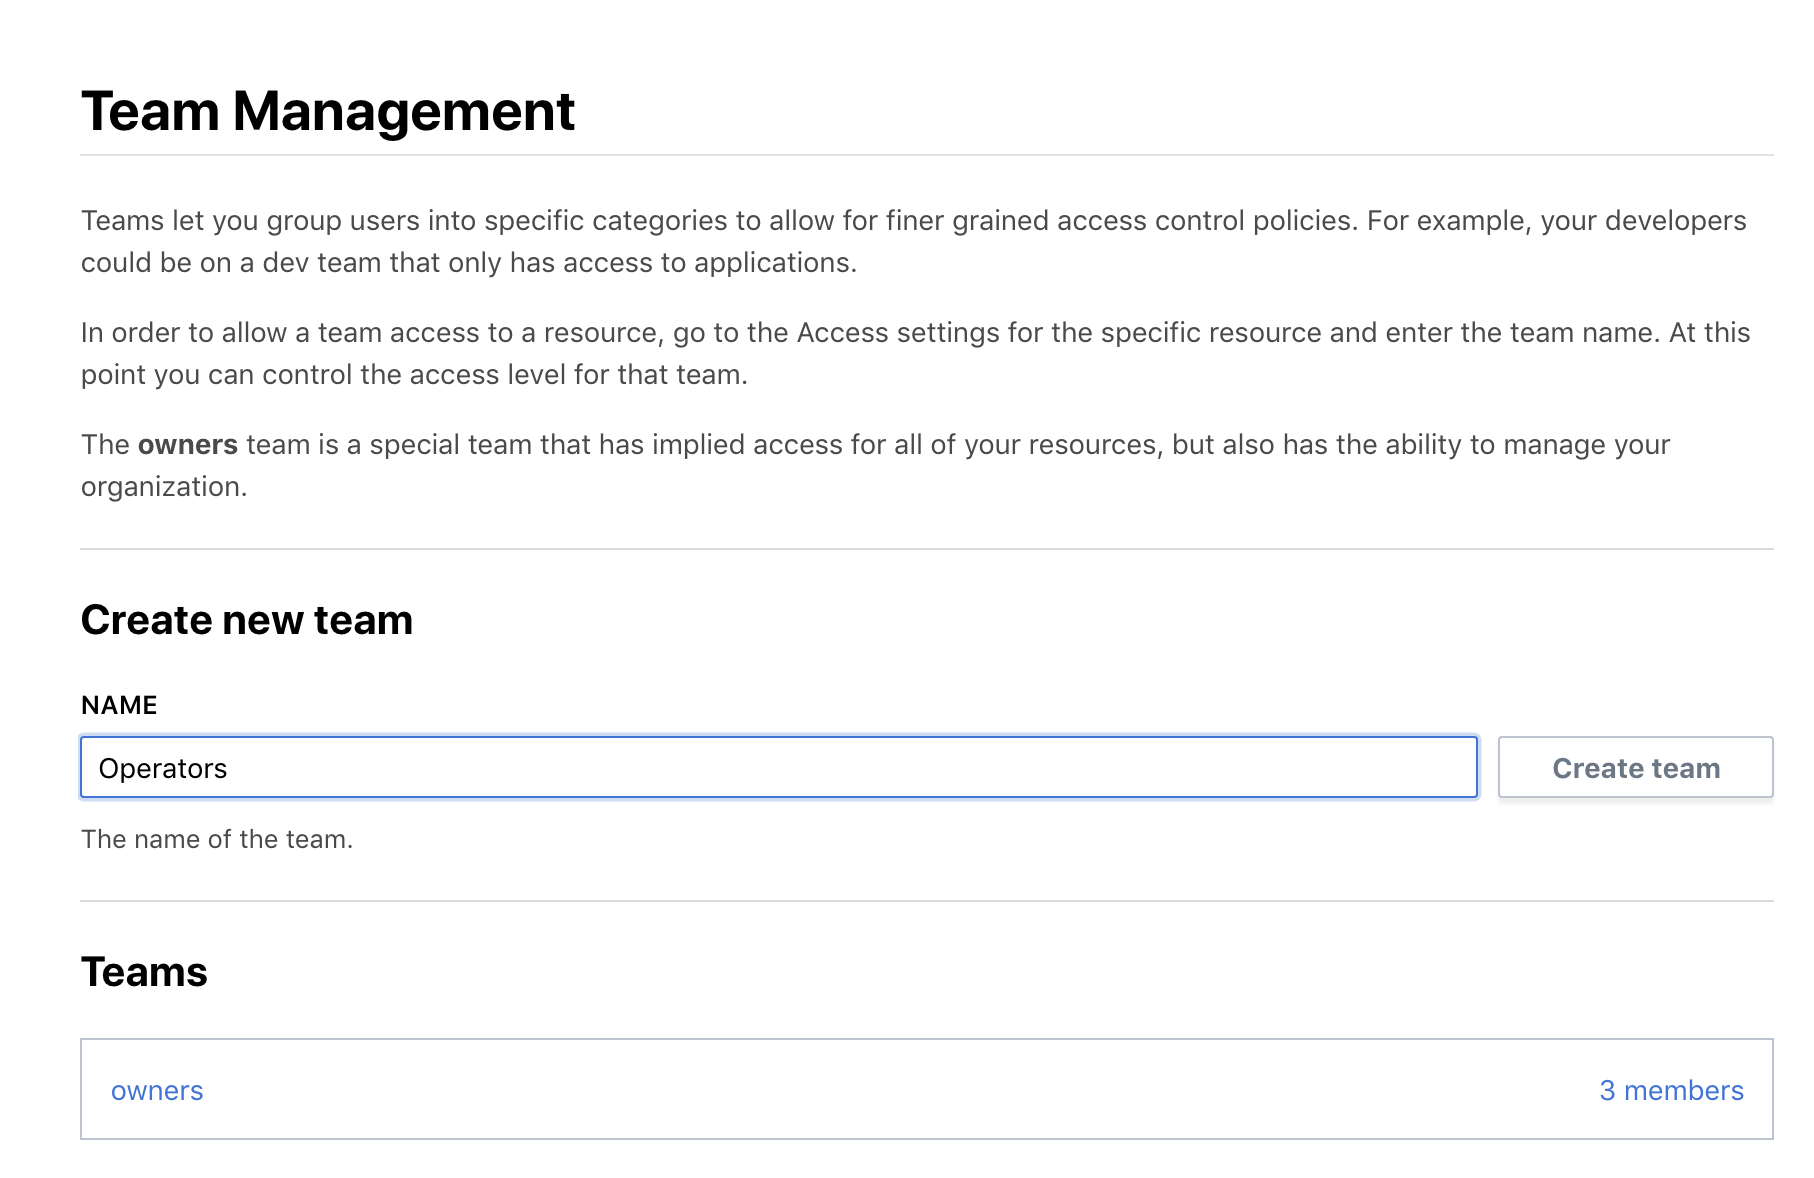
Select Create Team after providing the name. Once on the next page you’ll be able to specify member you want to join your team or a link to provide new users to sign up.
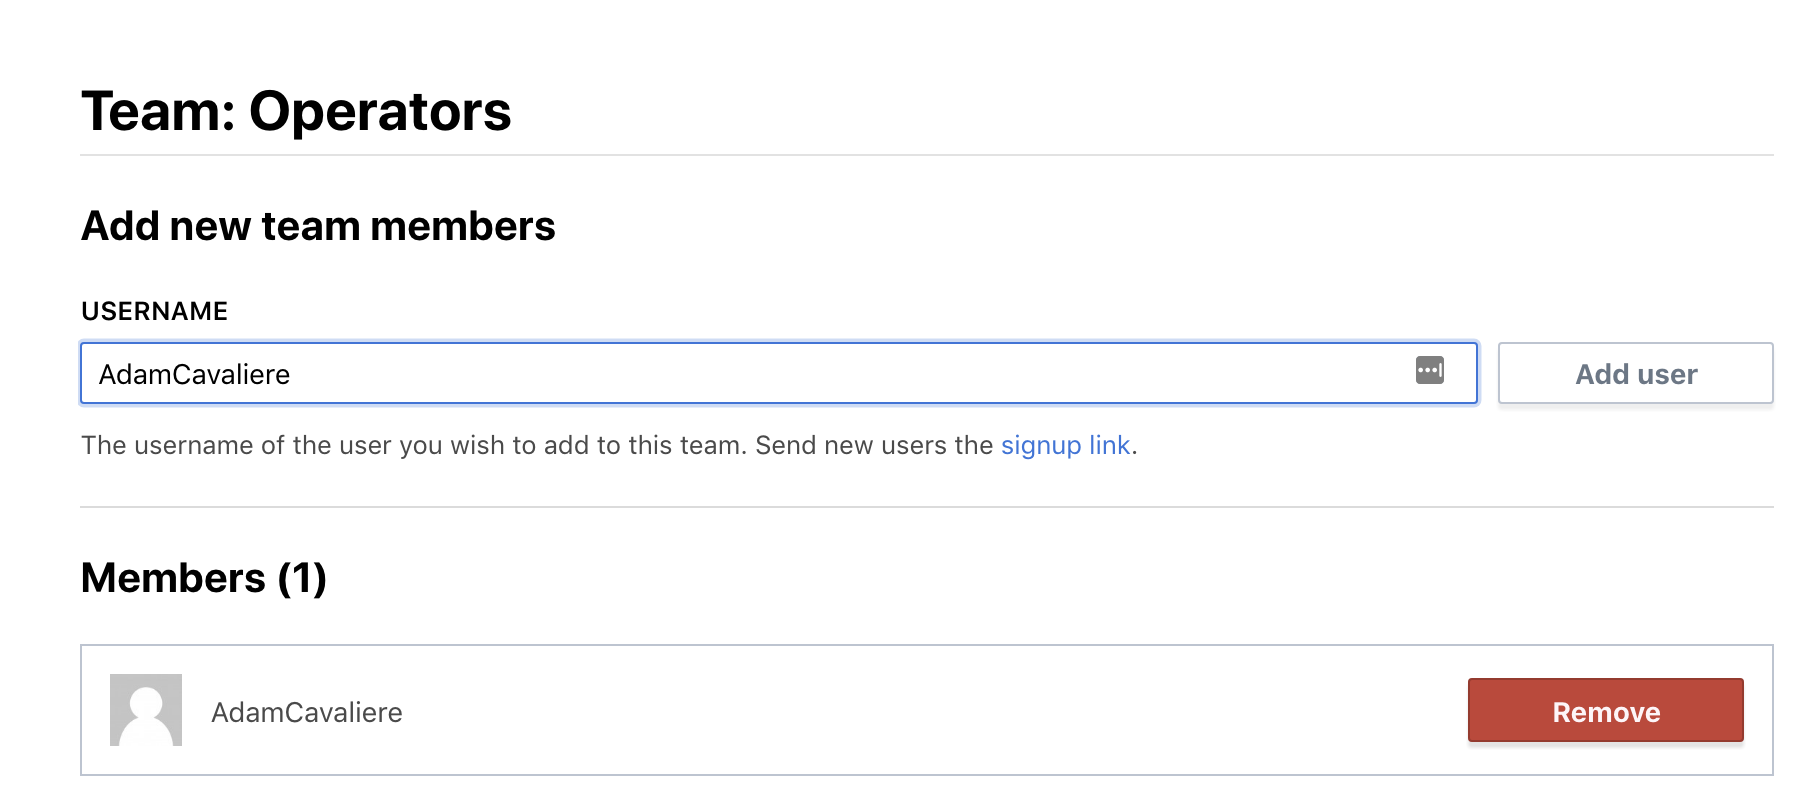
Add as many members for your team as you need. Once done, go back to your “Workspaces” in the navagation bar.

Select your modules.

Click on Access in the middle menu

Finally add in your “Operators” team to “Admin” access for this workspace.
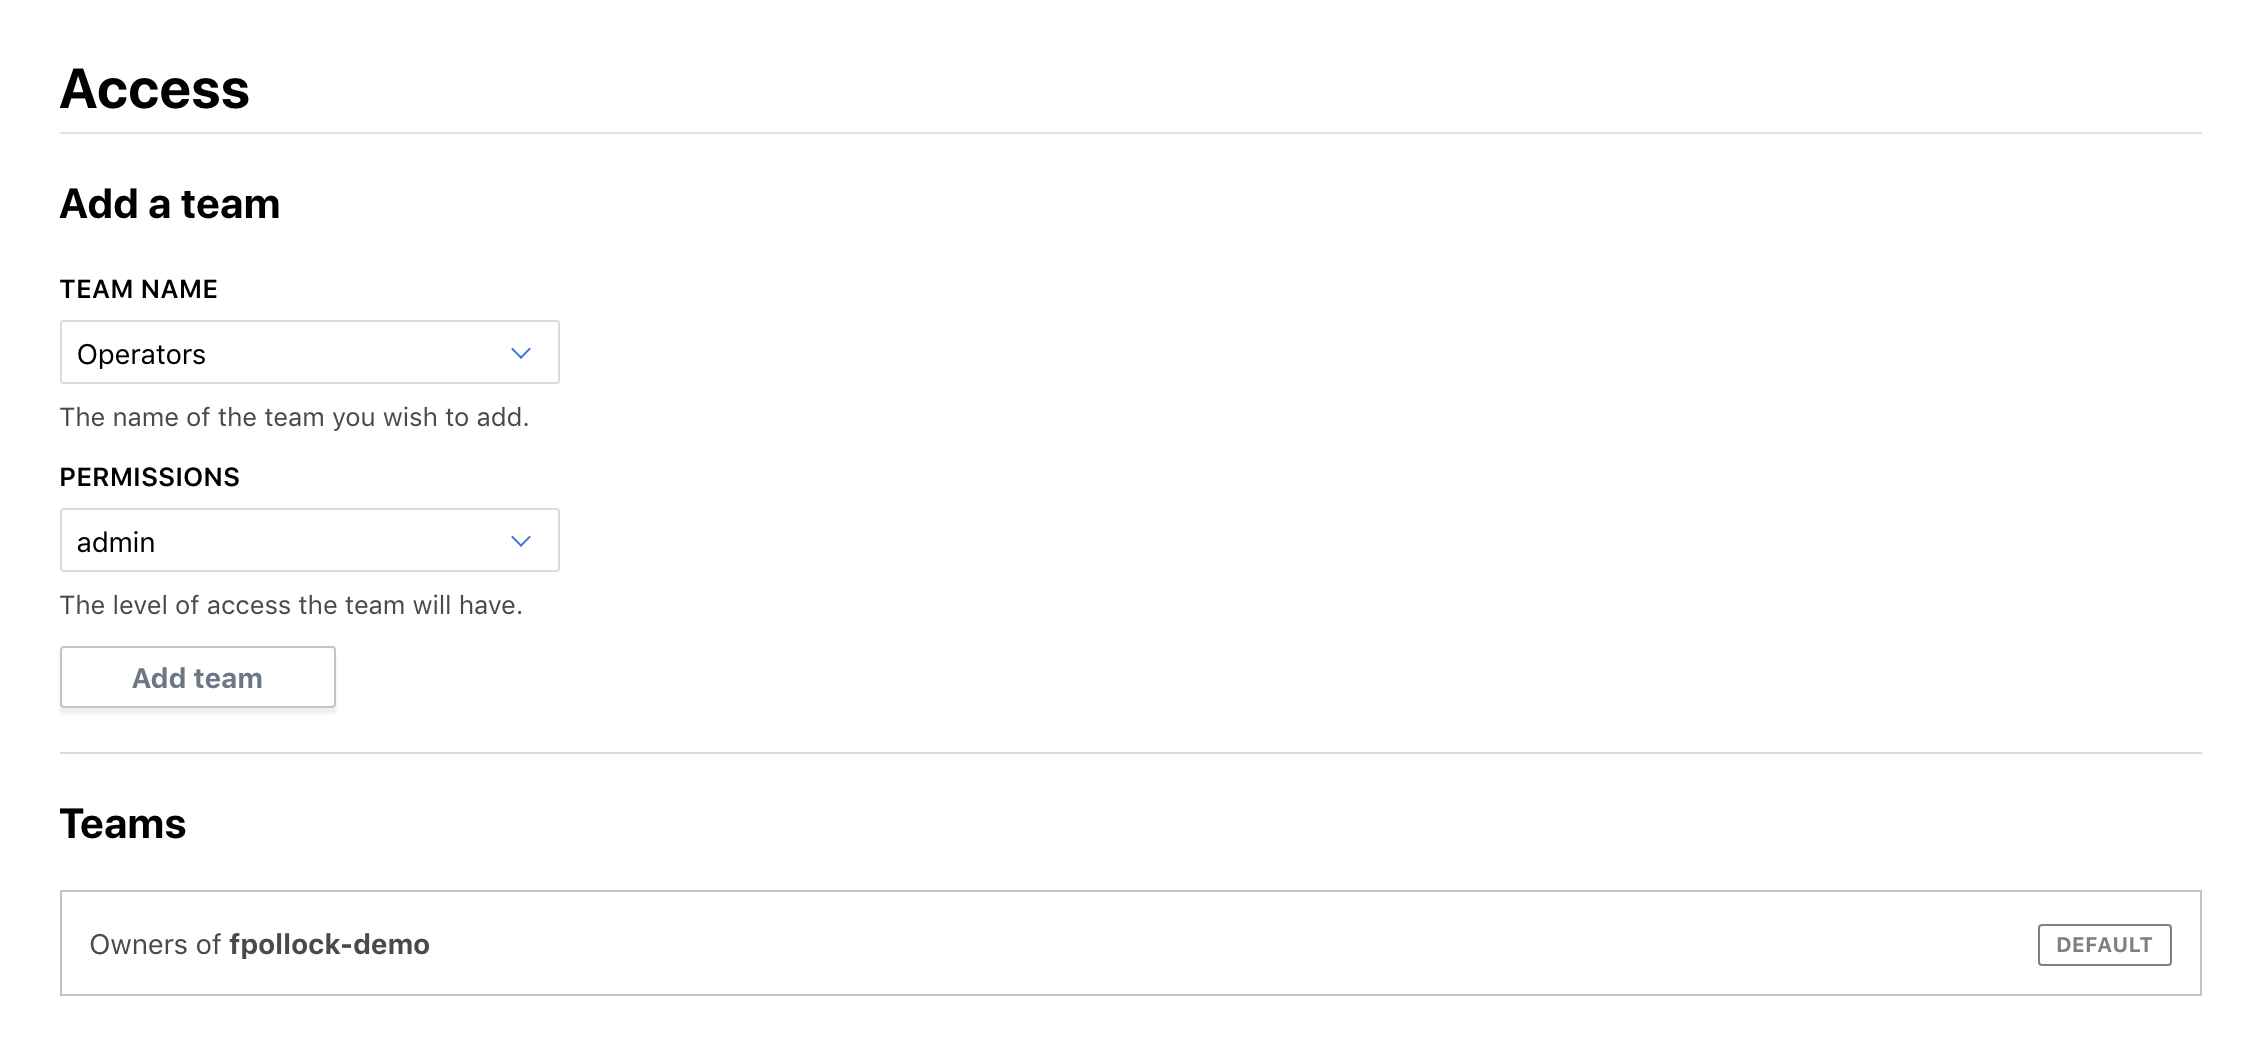
Now you have a way to delegate role based access control as well as manage your team members. You can use this to manage the permissions for each workspace you create as well as your top level organization.
Next we’re going to start using that module and allowing other contributors to add their own modules as well as use the Design Configuration GUI to build our infrastructure.
Part two— User 2
In this part, User 2 will follow the workflow for an infrastructure consumer, an Operator or Developer that uses a pre-defined module from the central service registry (Terraform Enterprise Module Registry).
The below video walks through the steps and can be used to help you complete the guided tutorial.
Create a Workspace
Create a second workspace with newly added user
In this example, the user is looking to deploy a VM, without needing to worry about configuring the networking. The AMI image is in us-west-1a, and therefore some variables will need to be configured, as the network module has a default set for us-east-1.
The new user is added to the team of Operators and can login to the Organization and create a new workspace.
At this point, User two will need to connect to their VCS if they are going to utilize their own code repository. This is not required, but an optional step.
Fill out the “Workspace Name” field with a label that follows the recommended nomenclature for your organization. A good standard to follow is providerfunctionmodule. The format for this field should follow gitorganization/repositoryname. The field should auto-populate some values if your connection is functional.
Use Published Module
View module details
To view modules, click on Modules at the top. A list of modules is shown.

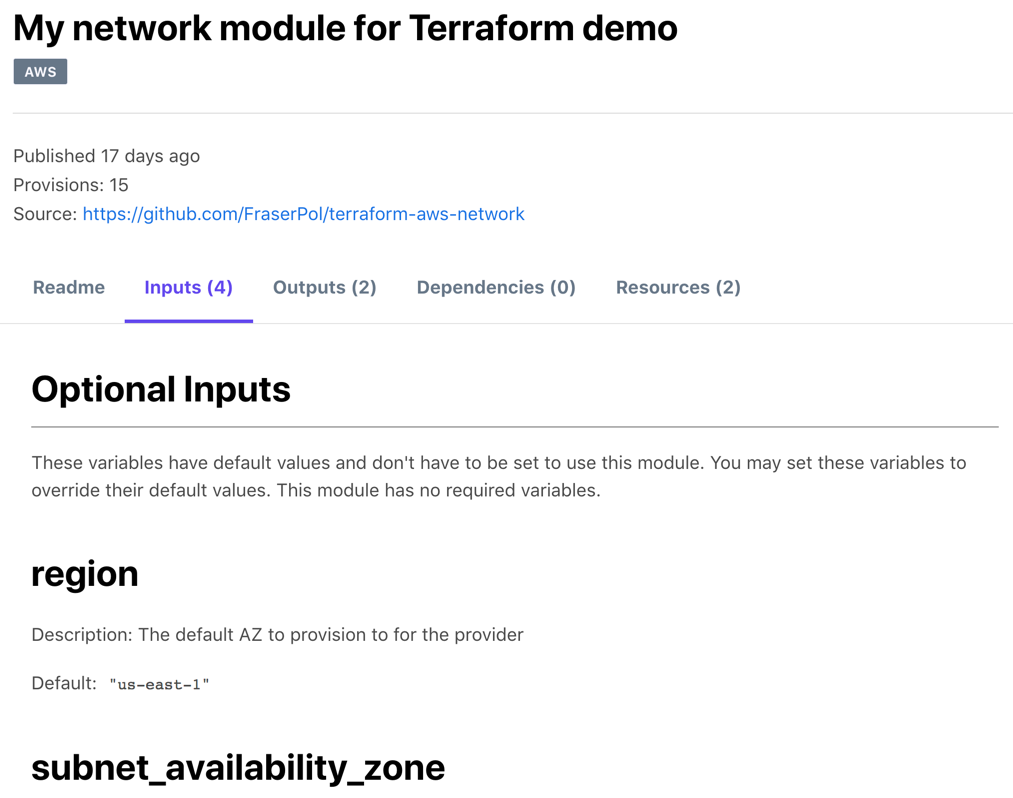
There is a section called "Details". This is where you can see variables & outputs for the module. Under the Inputs tab, all of the variables that are either required or are optional are listed.
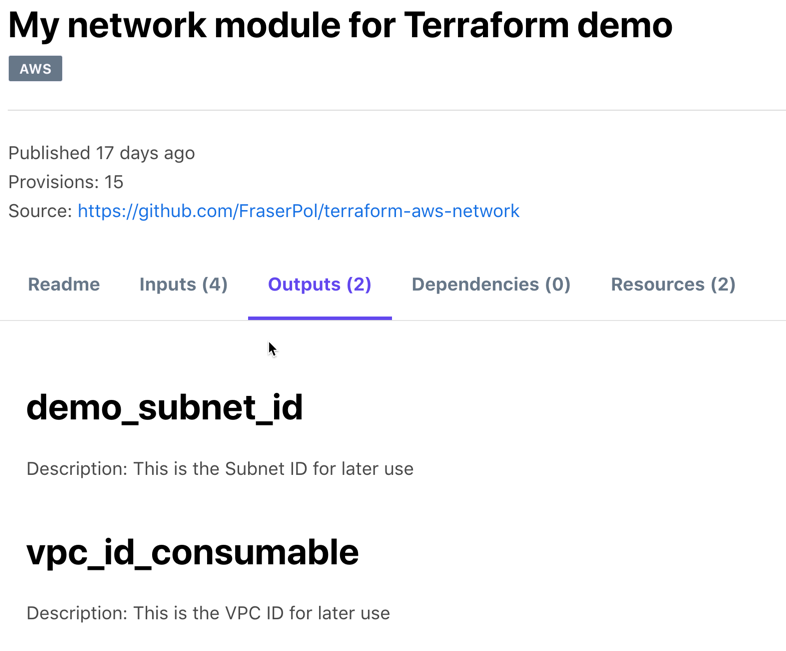
Under the Outputs tab, all of the outputs that can be referenced in the new workspace can be seen. We will utilize the demosubnetid as part of this example.
Click on Modules at the top and then select Design Configuration. From there, you select Add Module for the network module (that was previously published).
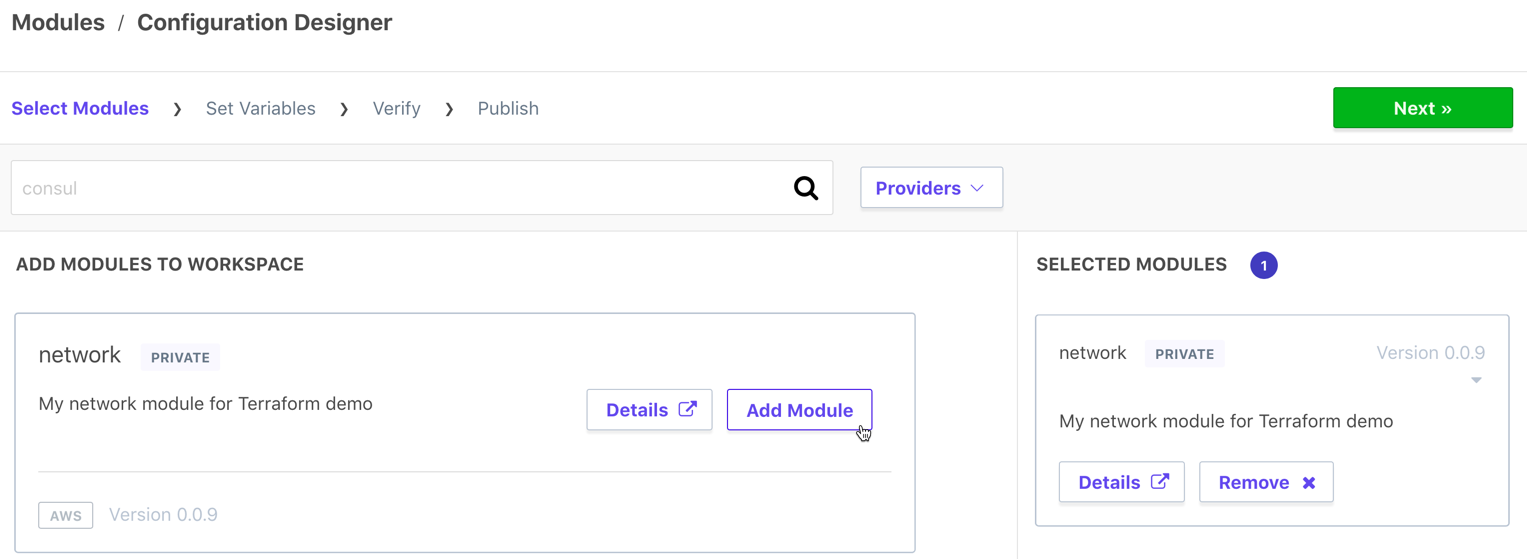
Once modules are added, select Next to configure the variables. At a later point, when more modules are added to the registry, a user can add multiple modules to complete the entire infrastructure stack— from modules.
Configure Variables
In this view, you can see that we are able to supply values for the variables. In this example, we are modifying some of the variables to match the environment where we want the network to be deployed to.
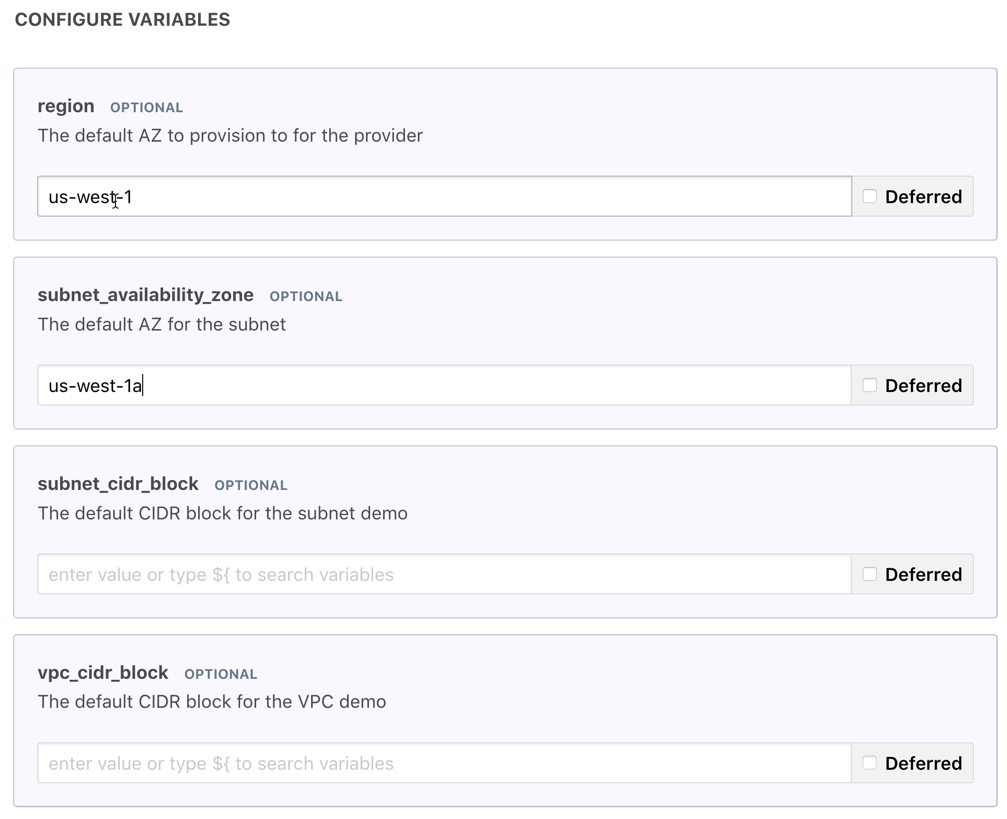
Selecting Deferred will will create a placeholder for the variables to be addressed before running your apply. If the variables are left blank, they will be omitted from the configuration file that is generated. Click Next after the variables are filled in, and the configuration output will be generated for the main.tf file:
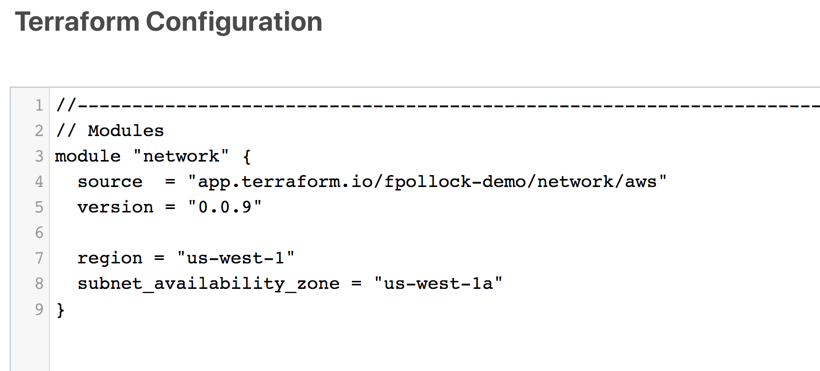
Copy this configuration to utilize in the next step.
Utilize module output
For reference, the example code utilized for this can be found here.
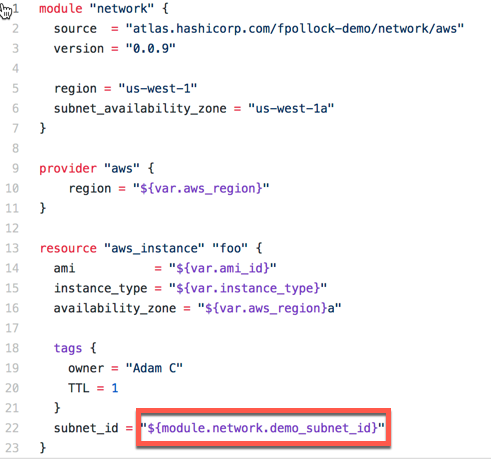
The module output is pasted at the top of the configuration file, and the output variable for the subnet is referenced in the configuration for the VM.
Queue Plan
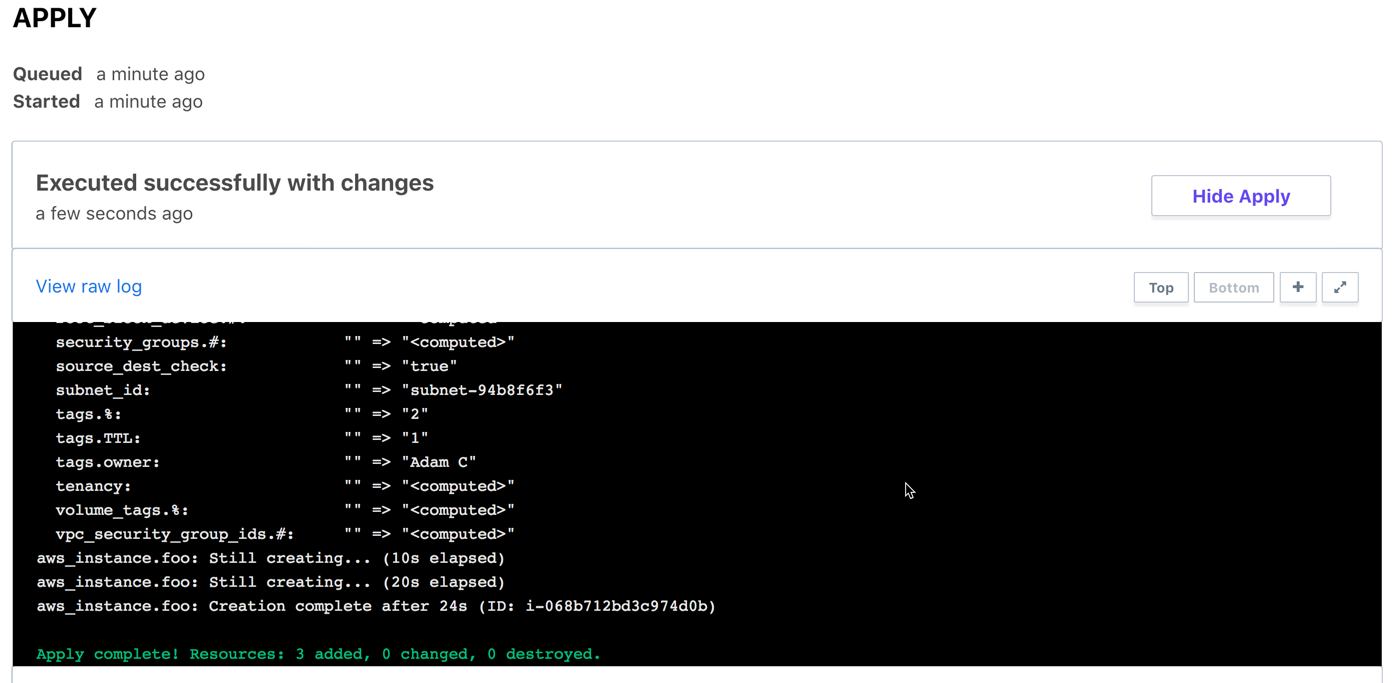
After saving the configuration and variable files to your VCS, queue the plan. After the plan has been run and passes, confirm and apply. The plan was successfully applied, with three resources provisioned. Two were created from the module, and the third is the VM itself.
Reference Content
Next Steps
You have now setup your Terraform Enterprise organization, added team members to the organizations, and enable two Operators to create and use modules to provision infrastructure. Now use these same steps to add more Operators and Developers to the organization and start using modules.


