
The Microsoft Cloud Adoption Framework (CAF) for Azure provides guidance and best practices to adopt Microsoft Azure, and it gives users two paths to adopt by using either enterprise scale or CAF Terraform modules. Both approaches use an opinionated set of code to deliver their defined outcome for example setting up user accounts.
In this article, we explore the two approaches and give some guidance on choosing the best approach for you to take, whether that is going big and building all the necessary components within one pattern or taking a smaller approach and establishing smaller pre-defined outcomes to build from. Then we’ll demo the “going small” approach using the CAF modules from the Terraform registry along with the CAF pattern to set up the elements for a networking foundation.
»Enterprise Scale and CAF
View the full-size diagram here.
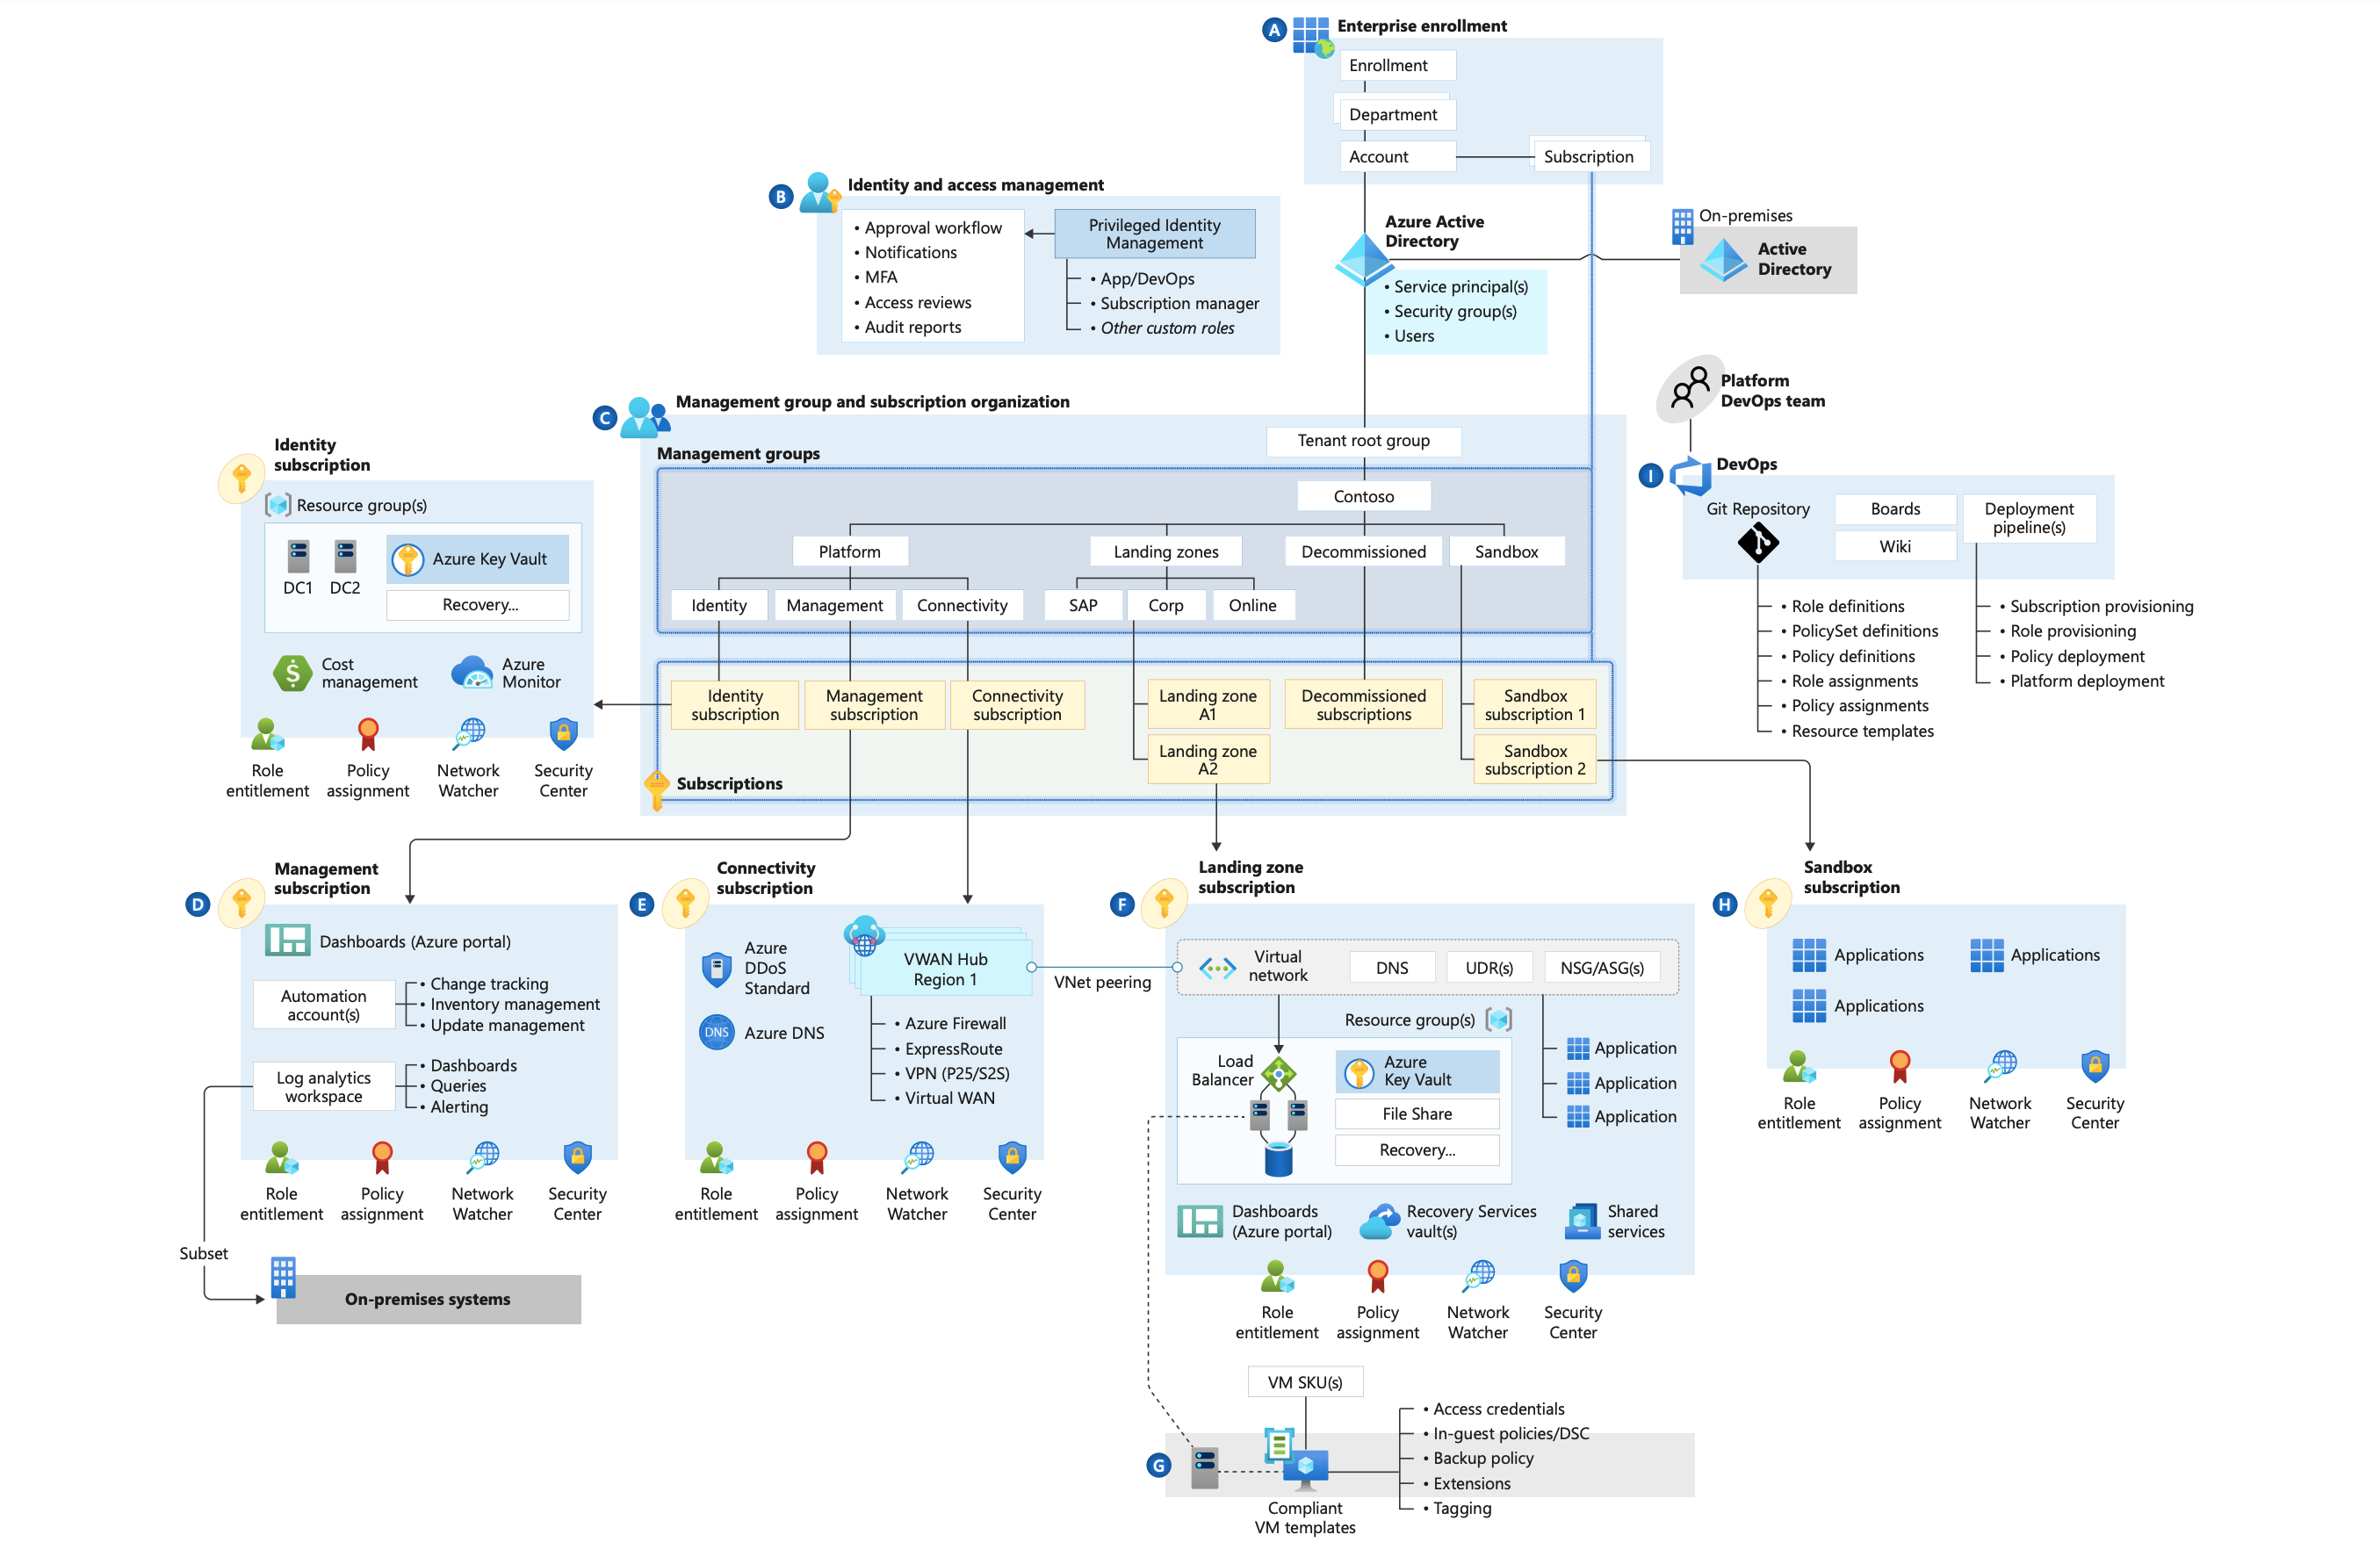
Figure 1: Microsoft's Cloud Adoption Framework enterprise-scale landing zone architecture based on an Azure Virtual WAN network topology. The connectivity subscription uses a Virtual WAN hub.
Enterprise scale tackles the big picture, whereas CAF modules take a smaller approach to build out the elements that you want to start with — both are valid approaches and both are customizable, enabling you to deliver your outcome while approaching the problem from different paths.
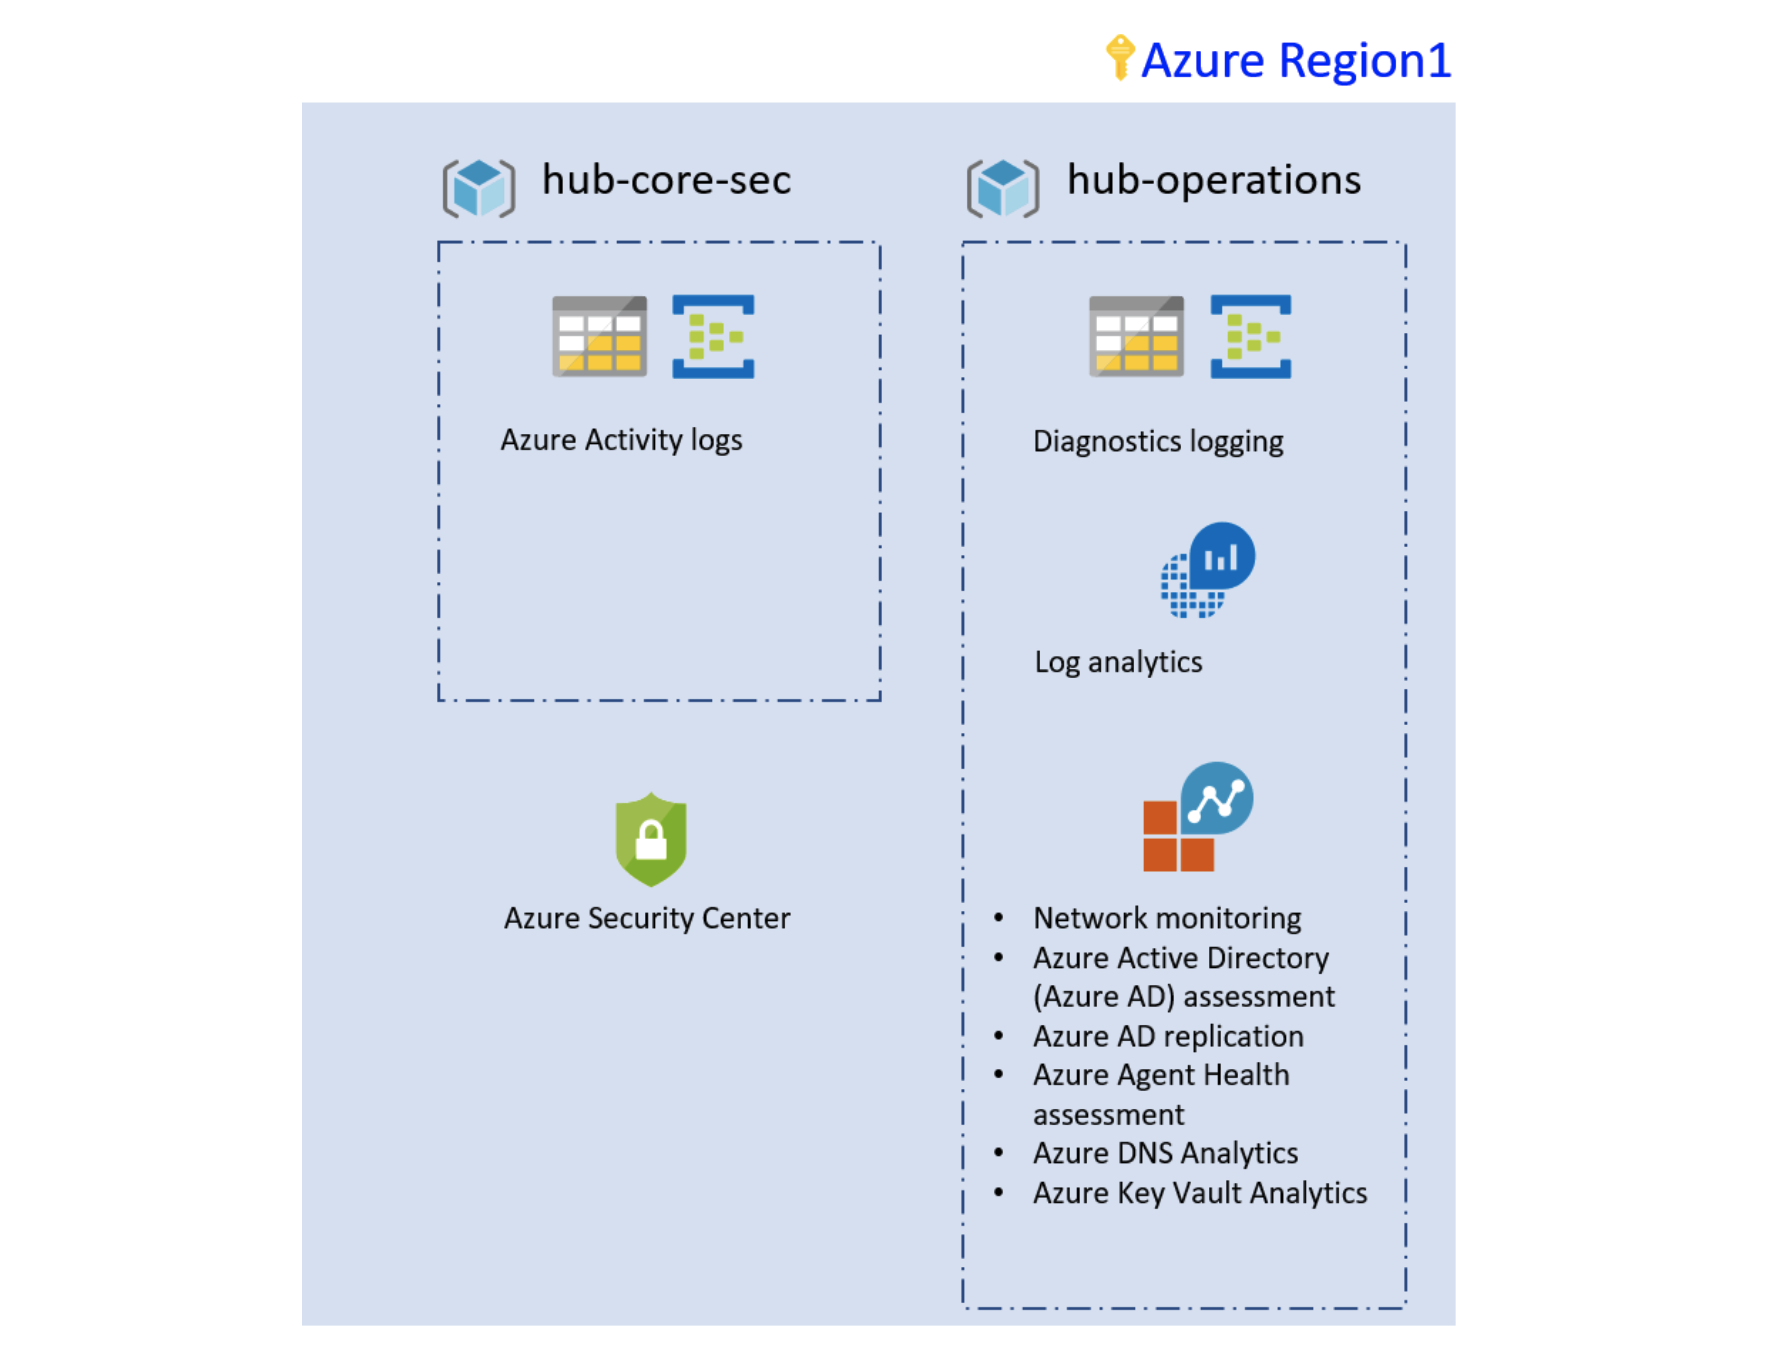
Figure 2: Foundation landing zone using Terraform
»Go Big
The enterprise-scale architecture approach represents the strategic design path and target technical state for your Azure environment. The technical considerations and design recommendations of the enterprise-scale architecture might lead to different trade-offs based on your organization's scenario. Some variation is expected, but if you follow the core recommendations, the resulting target architecture will set your organization on a path to sustainable scale.
»Go Small
The CAF module allows you to create resources on Azure and is used to provision defined resources in an Azure subscription. It can deploy resources being directly invoked from the Terraform registry.
The module was created so that users can leverage reusable code to pre-provision workloads through code, and the module is dedicated to the support of one or more workloads integrating components together, which is often an arduous task when done from scratch. Using the CAF module users can create their own configuration files to build complex workloads in the cloud, or migrate to Azure’s existing ones.
»Or Don't Choose
The good news is that you don't have to choose between the two because you can use enterprise-scale to deploy your controls, guardrails (via Azure policies), and management groups and use the CAF module to deploy the workloads at high speed.
»Deploying Your First CAF Module
As mentioned in the introduction, we’ll be going small and using the CAF modules. We will walk through setting up and using the CAF modules from the Terraform registry and, as an example, use the CAF pattern that allows you to set up the necessary elements for a networking foundation. The environment has both public and private subnets where you can launch services and other resources based on this guide.
»Sign Up for Terraform Cloud
This pattern uses Terraform Cloud. Sign up and log into Terraform Cloud here. (There is a free tier available)
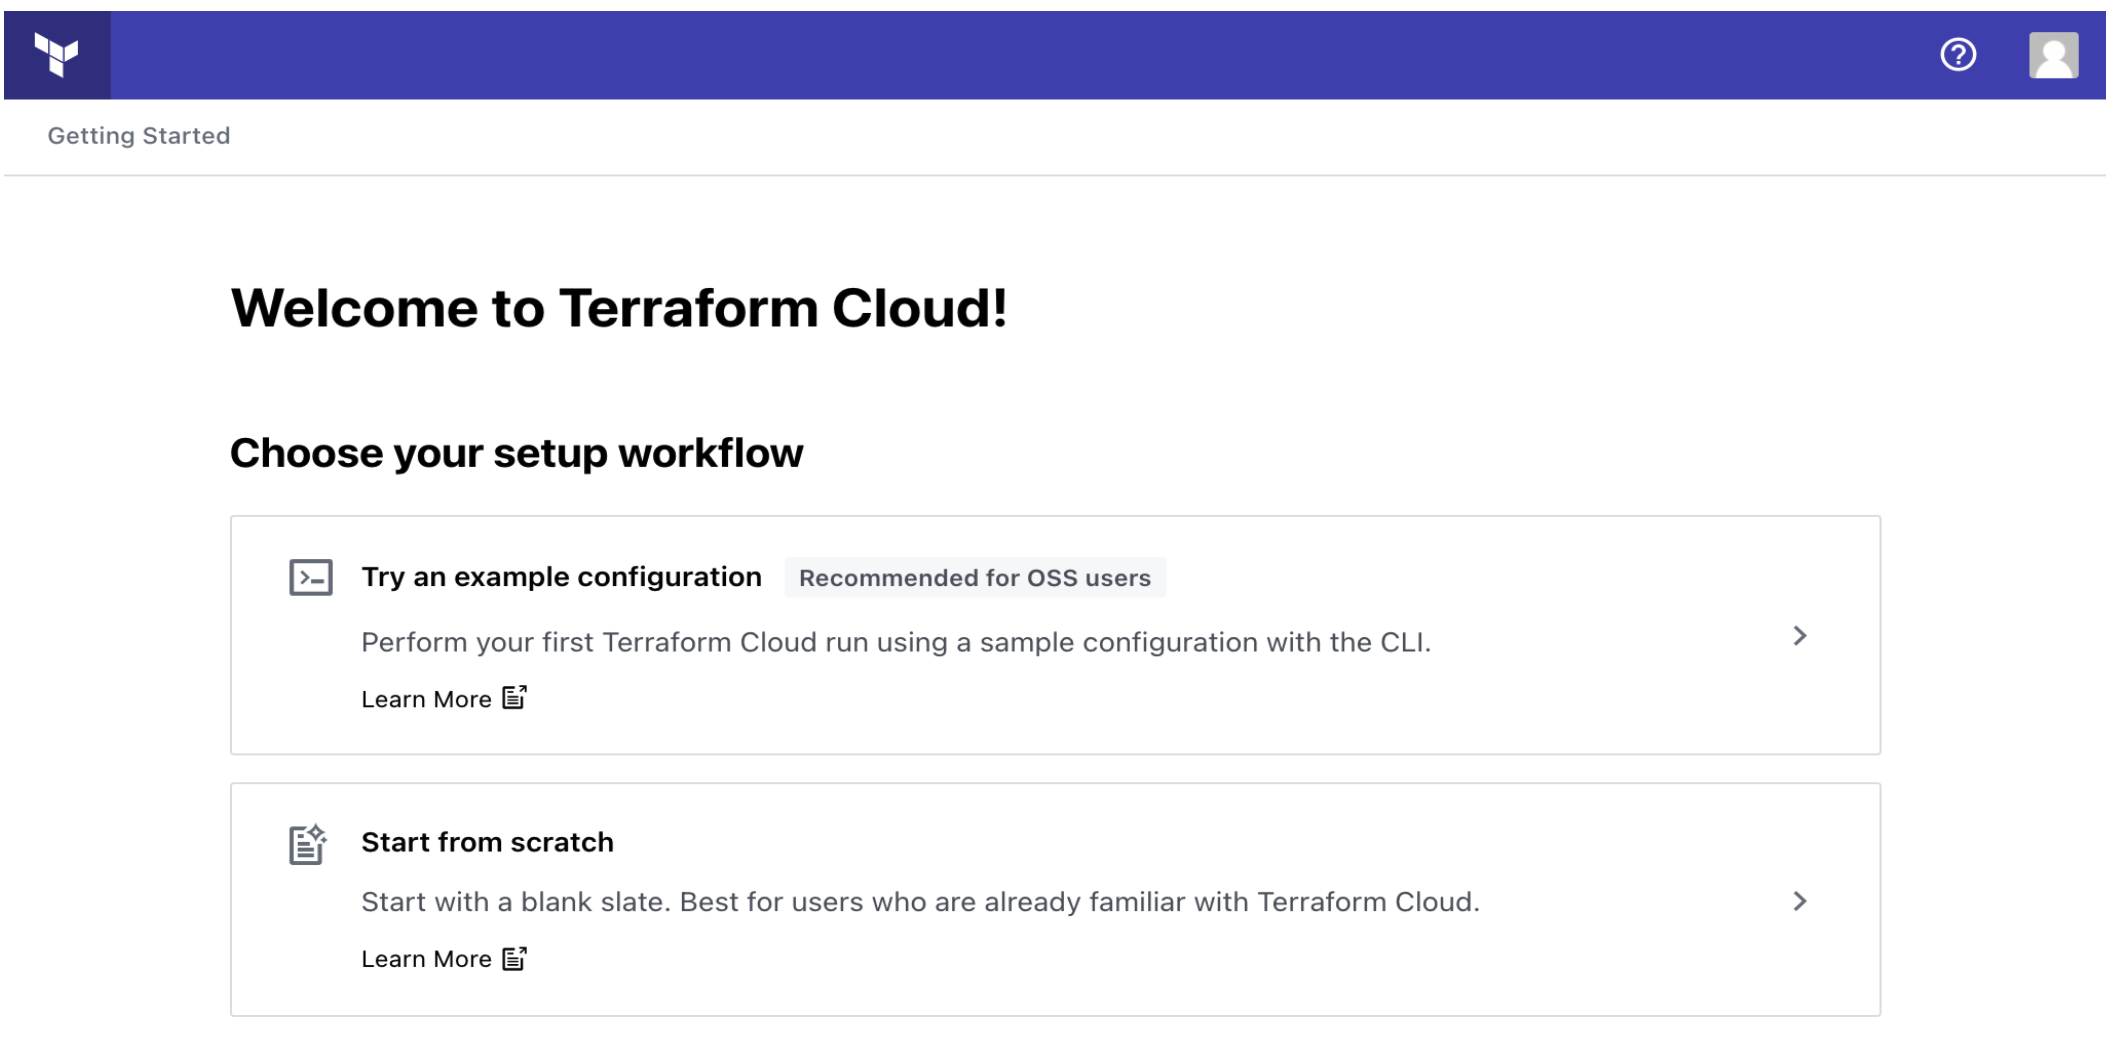
When you sign up, you will receive an email asking you to confirm your email address. Confirm your email address before moving on. When you click the link to confirm your email address, the Terraform Cloud UI will ask which setup workflow you would like to use. Select "Start from scratch".
»Create an Organization
The next screen will prompt you to create a new organization. Your organization is free, and the members you add will be able to collaborate on your workspaces and share private modules.
Enter an organization name and email address. You can use the same email address that you used for your account.
Note: If you want to join an existing organization, give the organization's administrator the email address you used to create an account. They will be able to send you an invite.
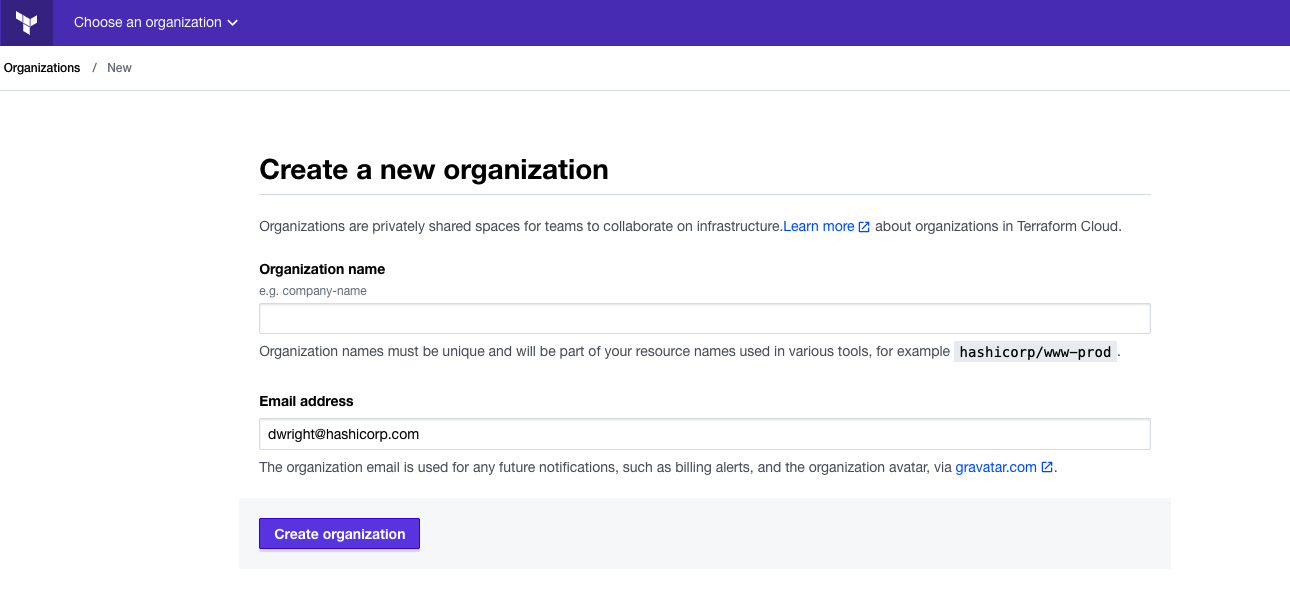
Then click "Create organization". Terraform Cloud will prompt you to create a new workspace. The Create a Workspace tutorial will guide you through to creating a new workspace and connecting it to a version control repository.
»Create a Workspace
Once you have created a Terraform Cloud account and created or joined an organization, you can start managing version-controlled infrastructure with Terraform Cloud. You will need to create a version control system (VCS)-driven Terraform Cloud workspace by connecting the CAF repository to Terraform Cloud.
»Fork the CAF GitHub Repository
Visit aztfmod/terraform-azurerm-caf, which contains the Terraform configuration for the CAF modules. Click the "Fork" button at the top right of the page to copy the repository to your GitHub account.
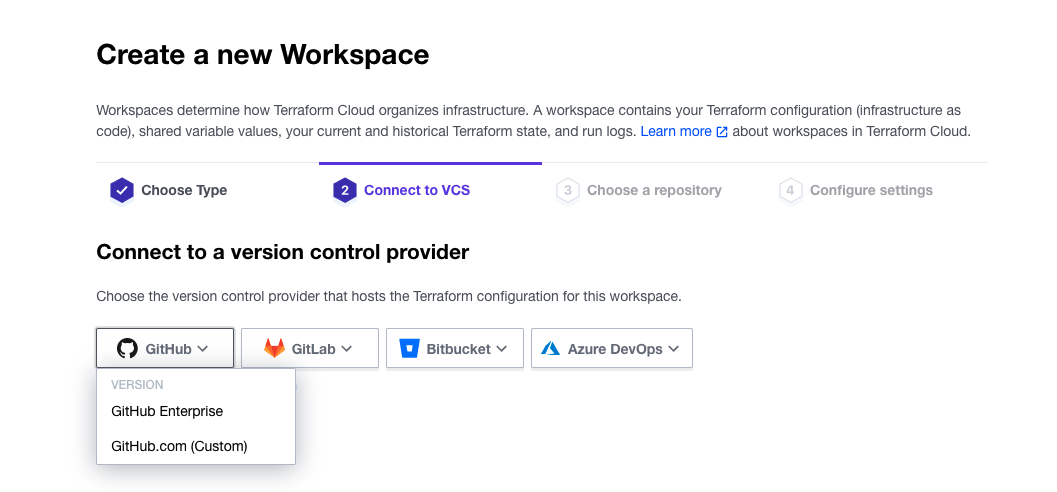
»Connect Terraform Cloud to GitHub
Navigate to the "Workspaces" page from the main menu and click "+ New workspace."

On the "New Workspace" page, select "Version control workflow" from the workflow options screen. On the "Connect to VCS" screen, press the "GitHub" button and then choose "GitHub.com" from the drop-down to continue.
A new window will open asking you to authorize Terraform Cloud to use your GitHub account. Click the green "Authorize" button to connect Terraform Cloud to your GitHub account.
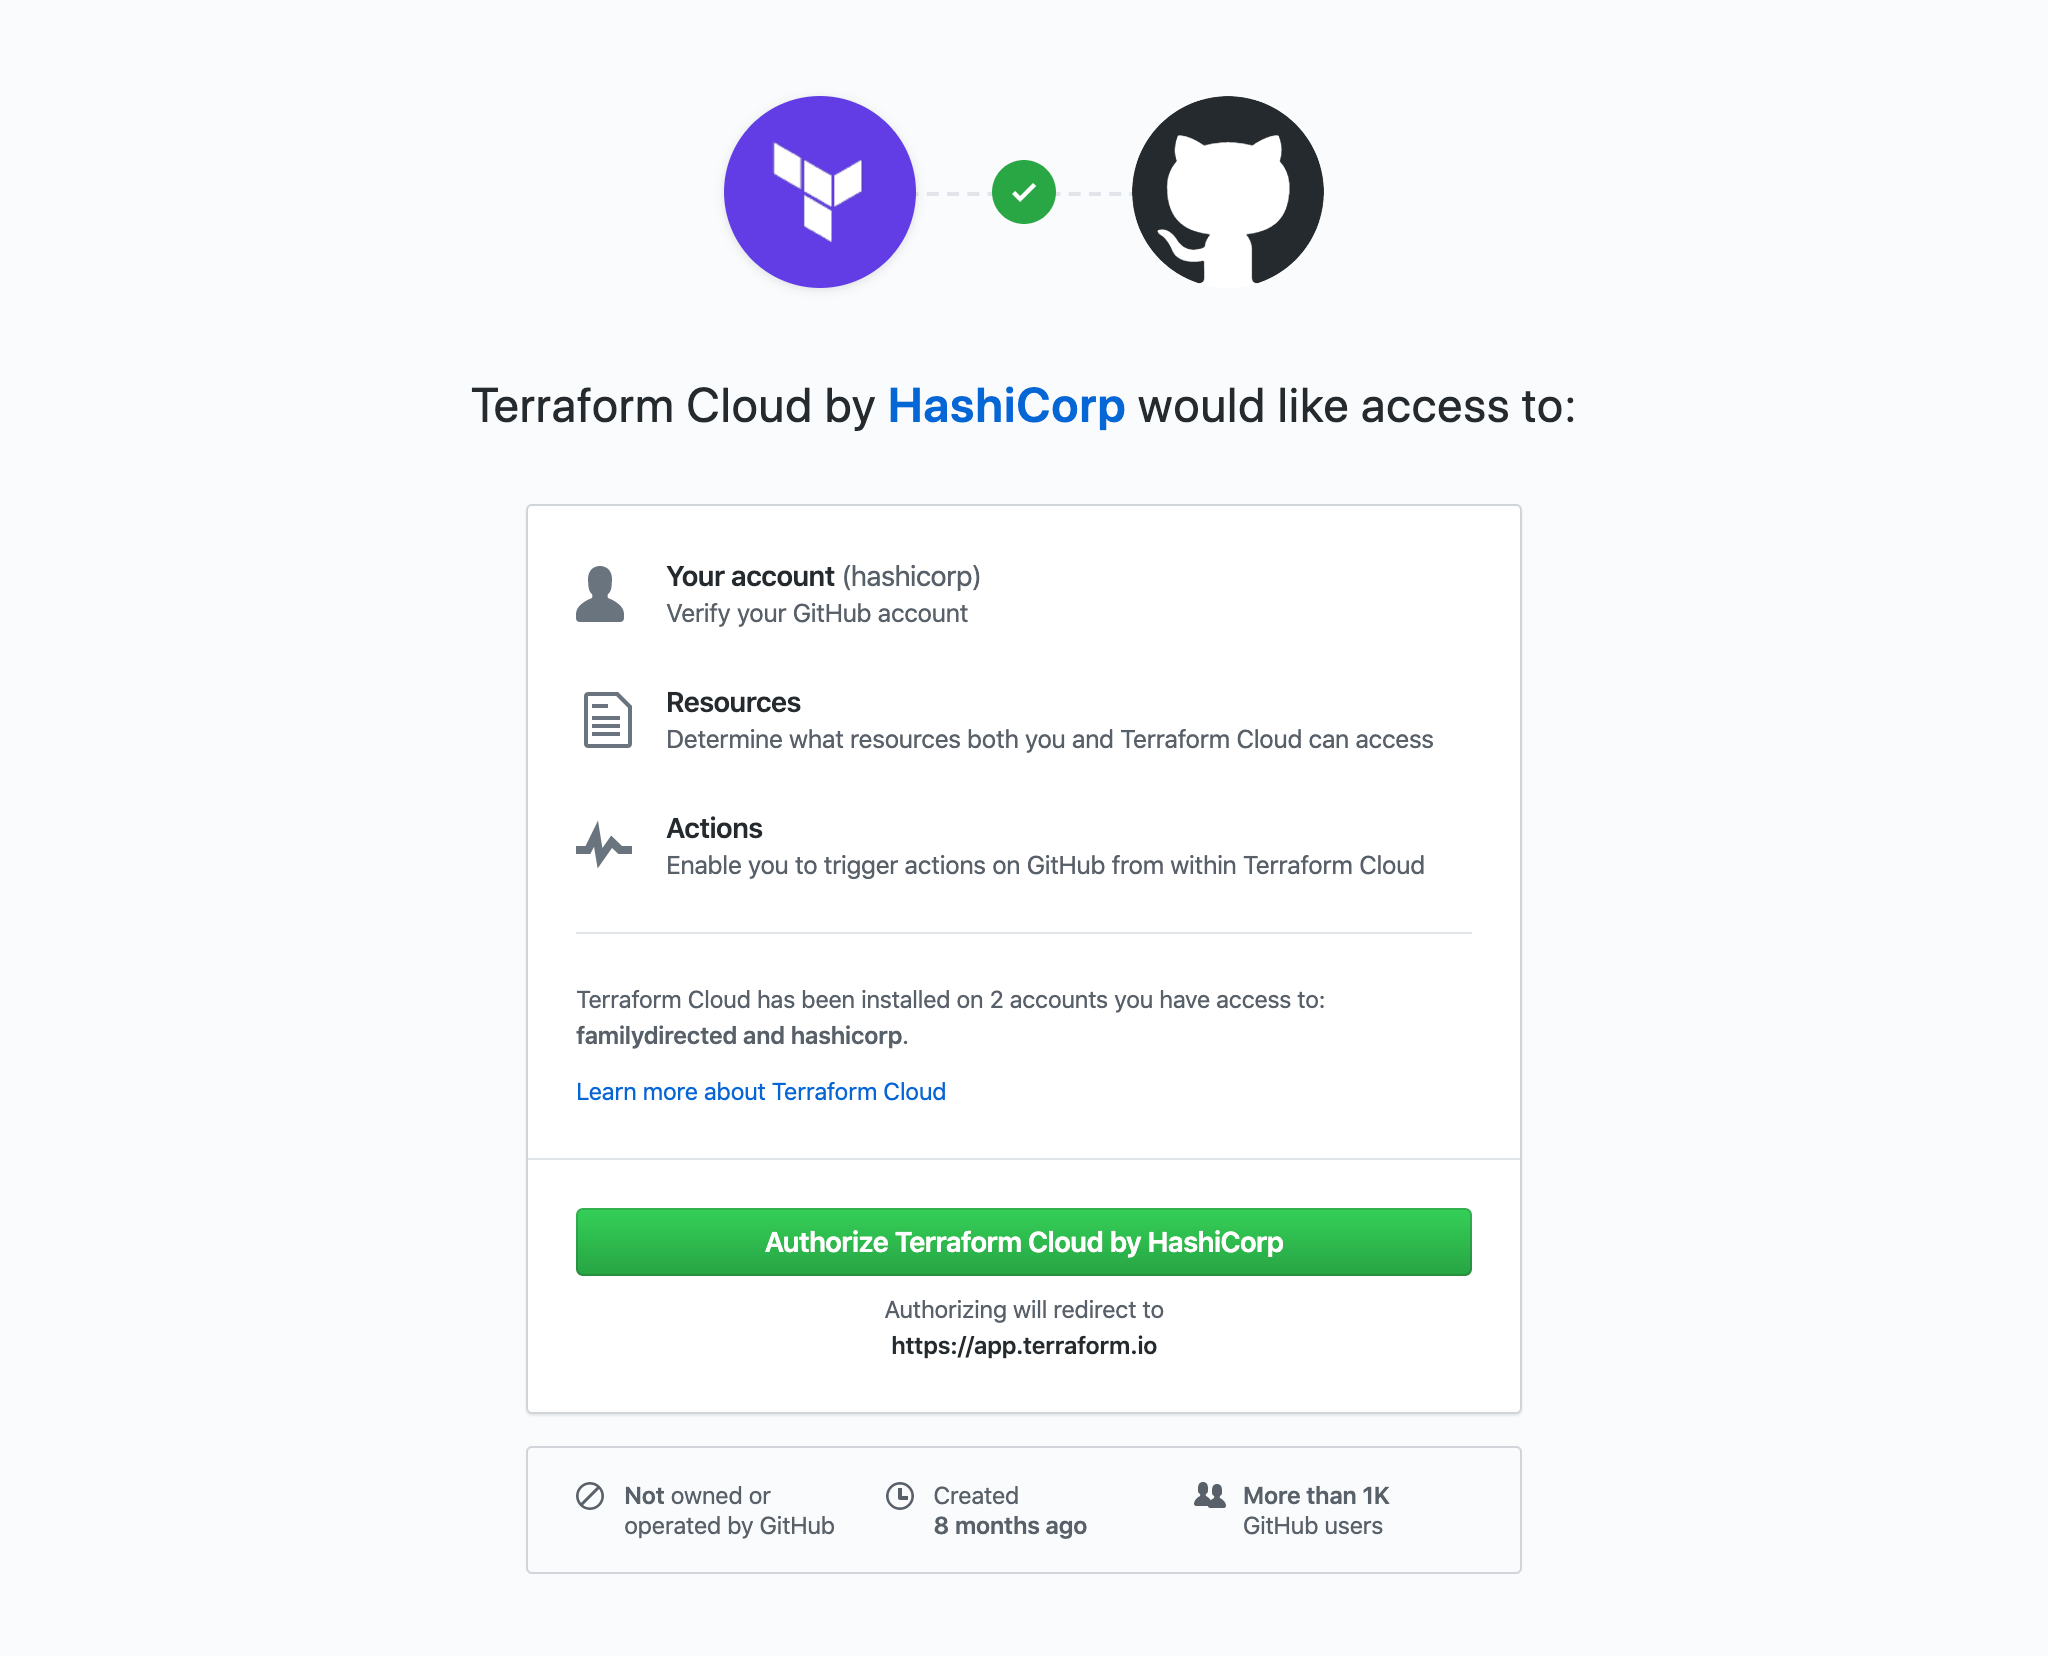
You may be asked to install Terraform Cloud for your GitHub account or organization. If prompted, select your account or organization to install Terraform Cloud.
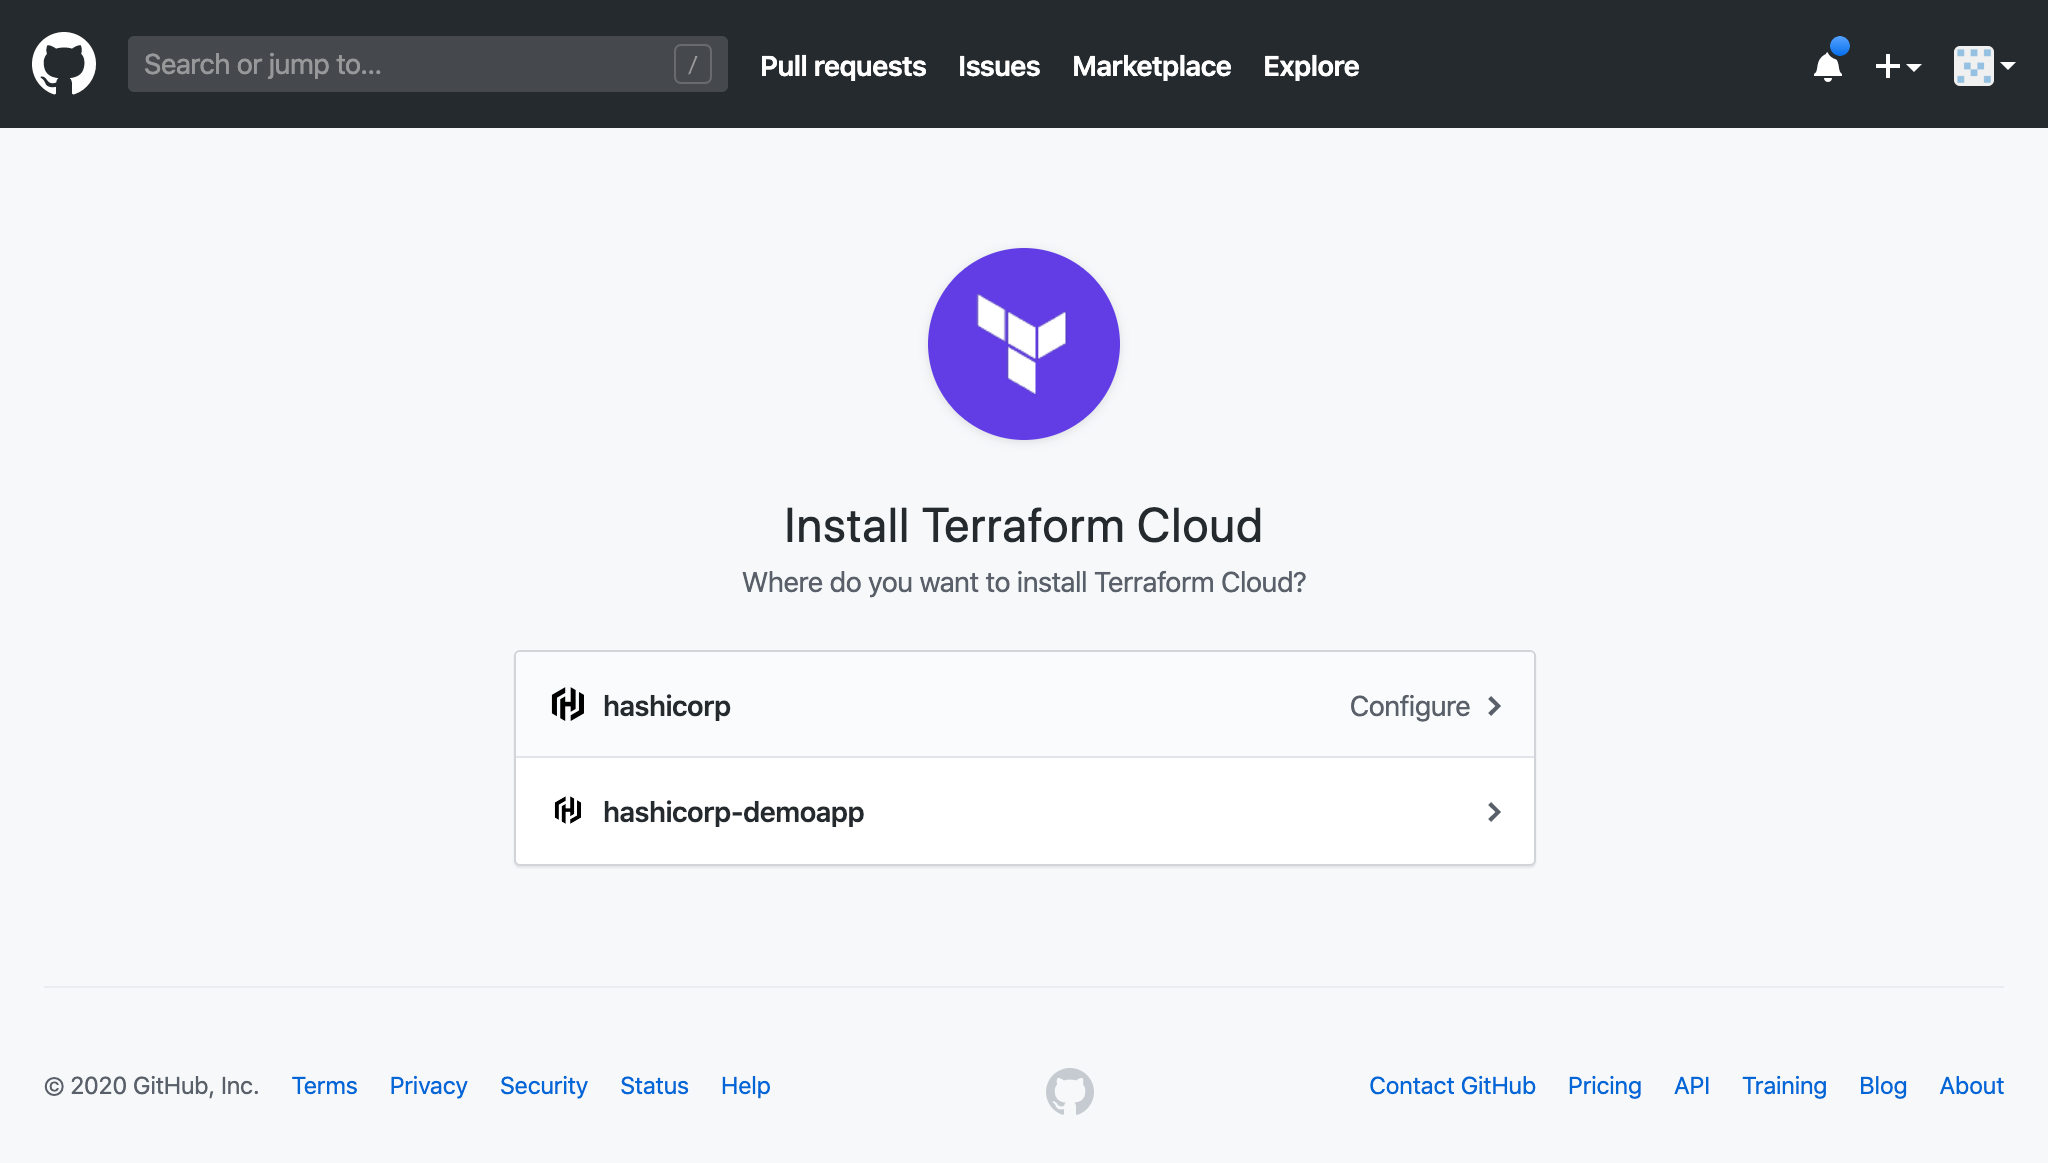
For information about installing Terraform Cloud on GitHub, refer to the Terraform Documentation: Configuration-Free GitHub Usage.
»Choose a Repository
Next, Terraform will display a list of your GitHub repositories. Choose the repository aztfmod/terraform-azurerm-caf. If you have many GitHub repositories, you may need to filter the list to find the correct one. You are going to deploy the standalone module from the example directory.
»Create the Workspace
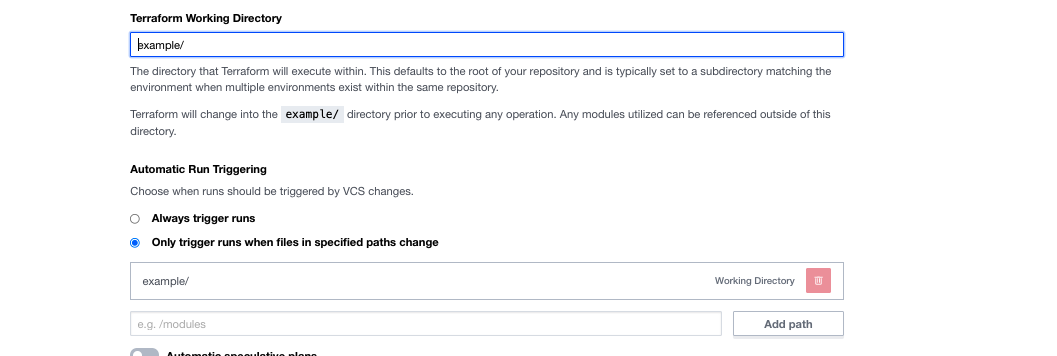
On the next screen, click on "Advanced options" and add “example”, and click the purple "Create workspace" button to create the workspace.
It will take a few minutes for Terraform Cloud to connect to your GitHub repository. Once connected, Terraform Cloud will display a notification that your configuration was uploaded successfully.

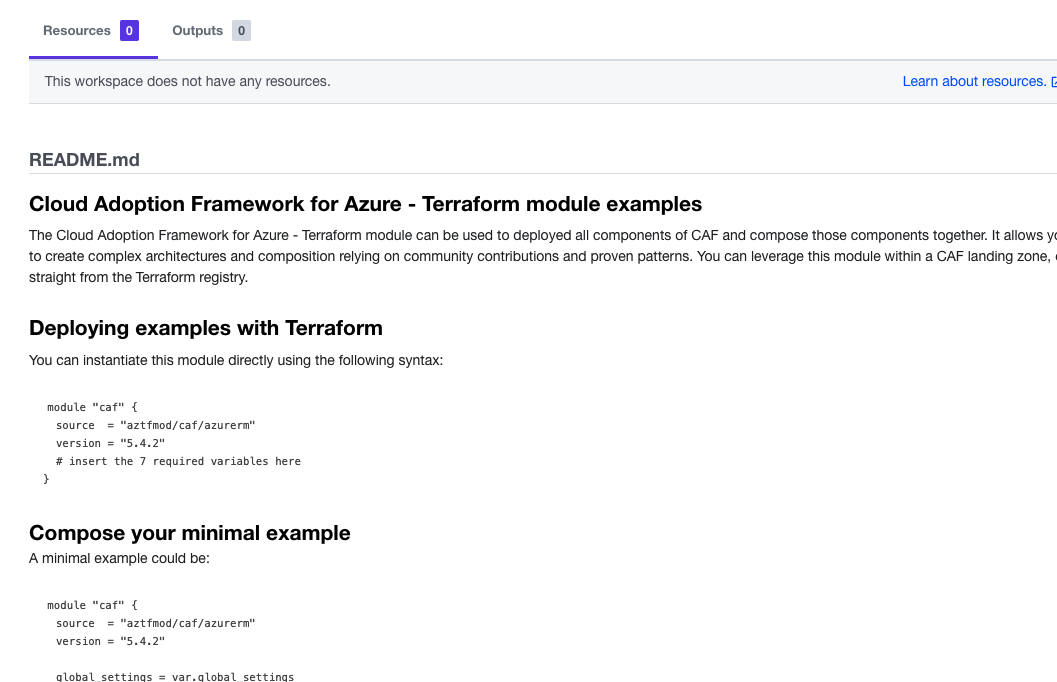
»Workspace Complete
Once the workspace is completed you should see something similar to the screenshot below.
»Configure Terraform Variables
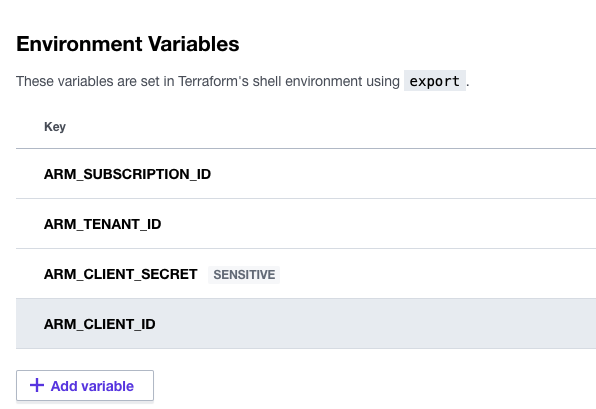
Return to the Terraform Cloud UI and visit the "Variables" page for your workspace, where you will set your credentials. Terraform Cloud supports two types of variables: environment variables and Terraform variables.
Either type can be marked as sensitive, which prevents them from being displayed in the Terraform Cloud web UI and makes them write-only. You will need to set up both to get this example working. First, you’ll set up the input variables.
Examine the terraform-azurerm-caf/examples/standalone.md in that directory. It defines the input variables you need to set up and some defaults to use.
variable "virtual_machines" {
  default     = {}
  description = "Create a virtual machine from CAF module"
}
variable "resource_groups" {
  default = {}
}
variable "vnets" {
  default = {}
}
variable "public_ip_addresses" {
  default = {}
}
variable "keyvaults" {
  default = {}
}
variable "global_settings" {
  default = {}
}
There's a way to do this easily if you are happy with the example.auto.tfvars. In the working directory you can directly copy from them.
global_settings = {
  default_region = "region1"
  regions = {
    region1 = "southeastasia"
  }
  resource_defaults = {
    virtual_machines = {
      # set the below to enable az managed boot diagostics for vms
      # this will be override if a user managed storage account is defined for the vm
      # use_azmanaged_storage_for_boot_diagnostics = true
    }
  }
}

resource_groups = {
  vm_region1 = {
    name = "example-virtual-machine-rg1"
  }
}
After defining the global name, you can copy between the first curly brace { to the trailing one } and using the HCL checkbox you can paste these into the value section per the example below.

Then you need to set up the environment variables to allow Terraform Cloud to build into the Azure environment. The setup should resemble the screenshot below.
»Plan Infrastructure Changes
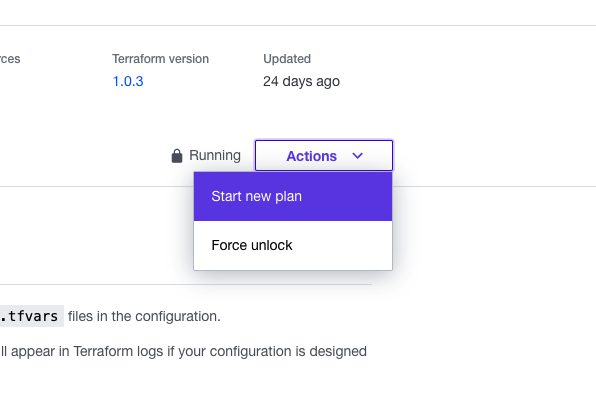
Now that you have set your variables, select "Start new plan" from the "Actions" drop down menu, choose the "Plan (most common)" option, and provide an optional explanation. Then select the purple "Start plan" button to start a plan. This may take a few minutes.
When the plan completes you should see something similar to the screenshot below.
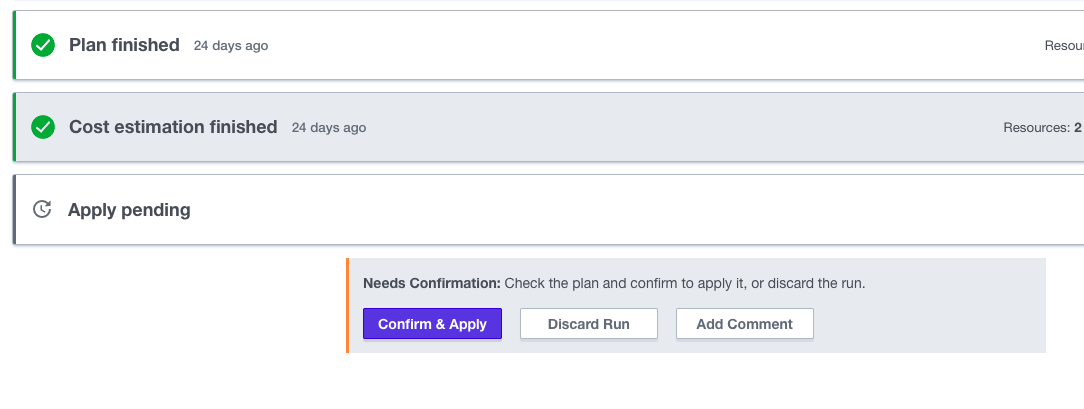
»Apply Planned Changes
Once the plan is complete, click the "Confirm & Apply" button, followed by the "Confirm Plan" button to apply the change. After a few minutes, your “apply” should complete. Terraform Cloud will display a confirmation.
»Wrapping Up
You have now deployed a standalone environment drive out of Terraform Cloud. Remember that if you want to avoid unnecessary costs that you will need to delete the run too. To destroy the infrastructure you provisioned in these tutorials, go to your workspace in the Terraform Cloud UI. Next, from the top menu, select "Settings -> Destruction and Deletion".
Hopefully you can see how easy it is to use Terraform Cloud to deploy an outcome on Azure. If you would like to know more about either CAF or Terraform, I’ve listed some useful resources:
Terraform
CAF
Understand cloud platform functions - Cloud Adoption Framework: Understand cloud platform functions, including the source, the scope, and the deliverable.
Understand cloud adoption functions - Cloud Adoption Framework: Understand how cloud adoption functions enable technical solutions so that you can staff your teams appropriately.
Get started: Align your organization - Cloud Adoption Framework: Recommended steps for aligning your organization so that you're ready for successful cloud adoption.
Get started: Build a cloud operations team - Cloud Adoption Framework: This guide helps a cloud operations team understand scope, deliverables, and the functionality that the team is responsible for.