Announcing HashiCorp Terraform Cloud and Enterprise Support for Azure DevOps
Today we're pleased to announce HashiCorp Terraform Cloud and HashiCorp Terraform Enterprise support for Azure DevOps Services. This support includes the ability to link your Terraform Cloud and Enterprise workspaces to Azure DevOps-backed VCS repositories, and an upcoming open-source Azure Marketplace task for invoking Terraform operations. Included in this release is VCS-backed integration with workspaces and modules.
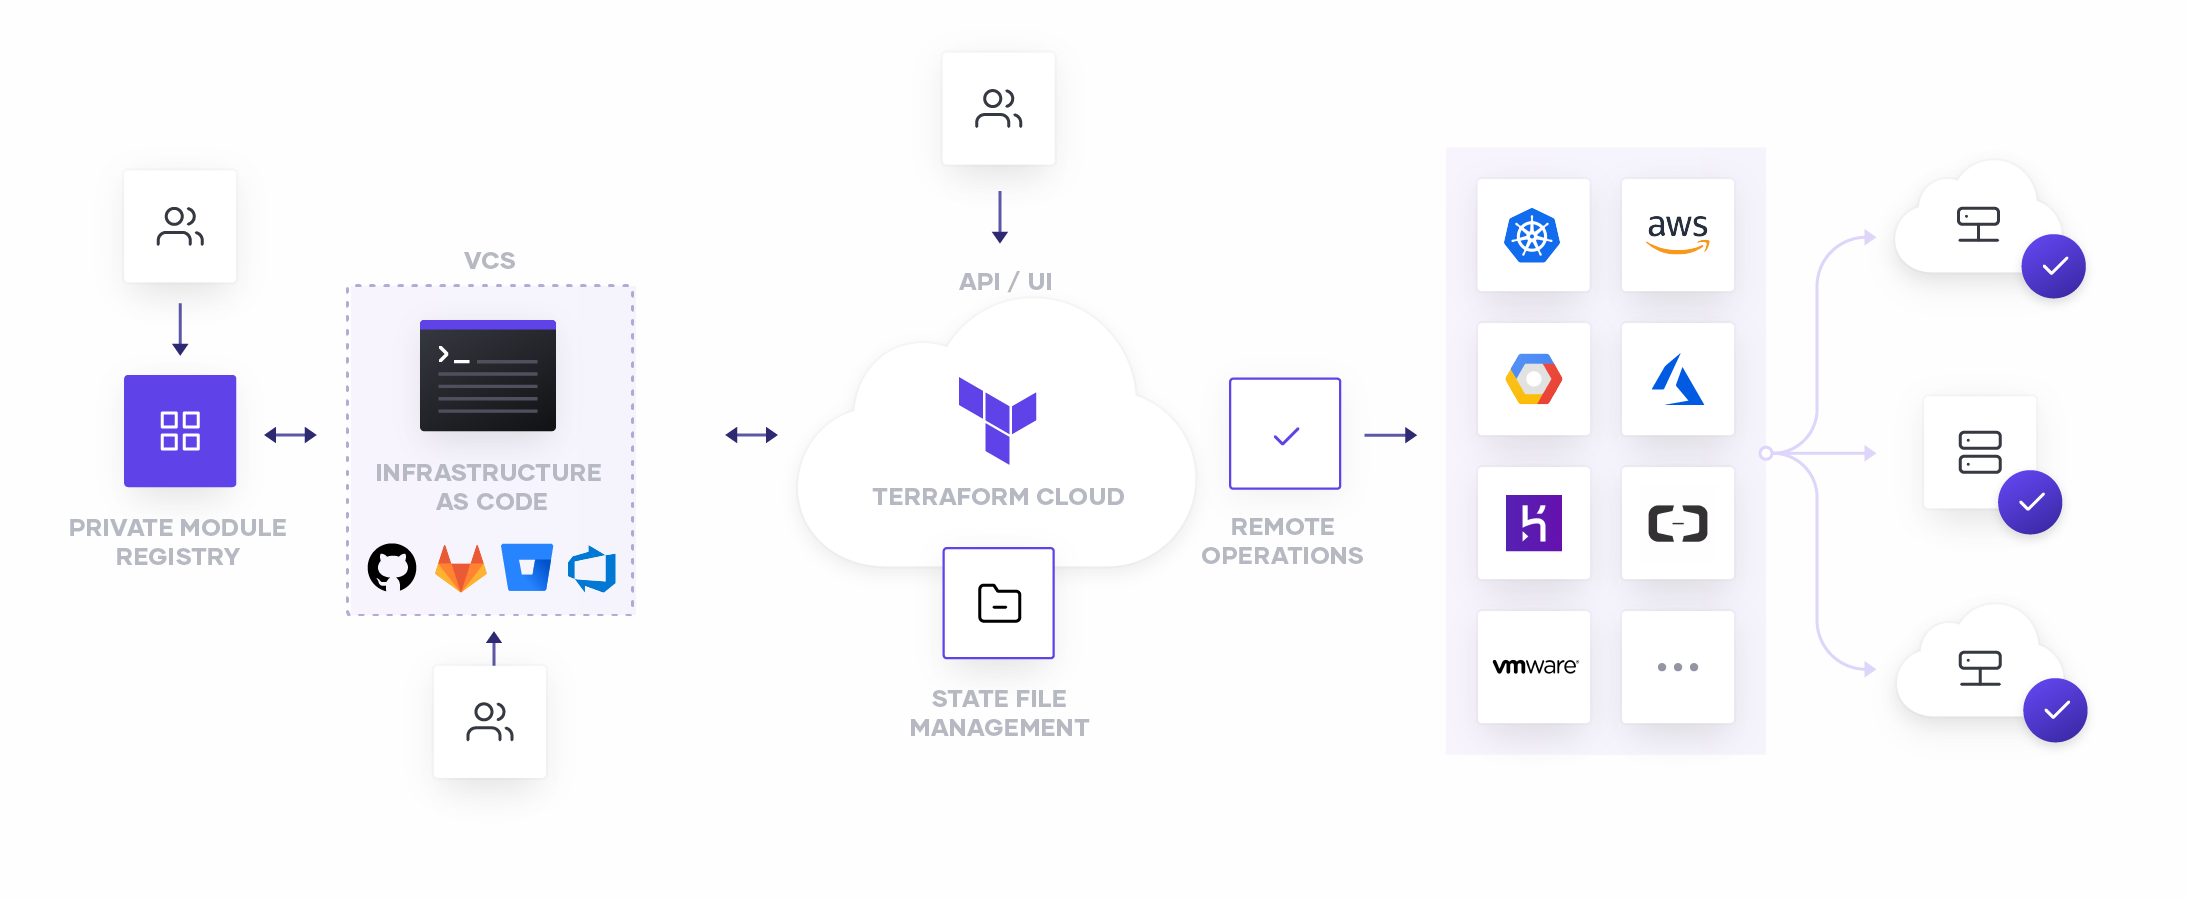
It’s always been our position that the best way to provision infrastructure is to store your infrastructure as code (IaC) configuration files in a VCS repository and use Terraform to create resources based on them. This process typically has three steps:
-
Write infrastructure as code
-
Manage configuration files in VCS
-
Automate infrastructure provisioning

Assuming you’re already familiar with creating Terraform configurations, we’ll focus on step 2. In this blog, we’ll discuss the following topics:
-
How to set up your Azure DevOps Repos
-
Where you can find the Terraform task on the Azure Marketplace
-
How to learn more at Microsoft Ignite
»Setting up Azure DevOps Repositories
Setting up your Azure DevOps Repos is as simple as configuring any other VCS repository type in Terraform Cloud. This newly supported repository type is available from within the Settings > VCS Providers view, simply by clicking Add VCS Provider and following a few simple instructions.
For complete details on how to add your repositories, you can reference our documentation -- but for a simple overview, the steps are below.
- Make sure you already have a Terraform Enterprise or Cloud organization, and the rights to configure VCS providers.
- Make sure you also have both an Azure DevOps organization and an authentication application configured -- complete instructions for this are in the Terraform documentation linked above.
- Click on Settings > VCS Providers, then Add VCS Provider.
- Select Azure DevOps Services from the dropdown list
- Fill in a few vital pieces of information, including your App ID and Client Secret, then click Create VCS Provider.
- Once the provider is created, copy your Callback URL and add it to your Azure DevOps authentication application
- Return to Terraform Cloud and click Connect Organization...
- Accept the following prompt, authorizing Terraform and Azure to communicate with each other, and that’s it!
You’re now ready to configure your Terraform Workspaces and Private Module Registry to take advantage of your new Azure DevOps connection. This will allow you to store your Terraform configurations and modules in your repositories -- and get you one step closer to automated infrastructure provisioning.
»Video walkthrough
In this video, you’ll walk through the process of configuring Azure DevOps Repos from end to end and do some example provisioning actions
»Learn more at Microsoft Ignite
HashiCorp is a sponsor at Microsoft Ignite, happening Nov. 4-8, 2019 at the Orange County Convention Center in Orlando, FL. We will be located at booth #2013 on the expo floor. Experts will be available to answer questions about the Azure DevOps and Terraform integrations listed above, as well as any other product questions that you may have. For those attending the conference, there are a number of sessions happening throughout the week that explore using HashiCorp tools on Azure. Select the following links to learn more information about each session:
- THR3120 Building a golden image pipeline
- THR2168 Lifecycle of a Java app from initial deployment to running in production using Terraform and Ansible
- THR2056 On your mark, get set, go: Get up to speed with Terraform for Azure
- BRK3161 Hybrid multi-cloud Infrastructure as Code using Terraform
- BRK2166 How to choose the right infrastructure management tool for the job
- BRK3118 How to use automation for Linux workloads deployment on Azure
- THR2316 Best practice for cloud architects to work with app developers in the enterprise
- BRK2377 – A Quickstart for Terraform in Azure
- BRK2375 – Continuous Infrastructure – Leveraging Terraform with Azure Pipelines
- BRK2376 – A Vault for your CI/CD Pipeline
»Getting started
Hopefully by now you’ve got a better understanding of how Azure DevOps and HashiCorp Terraform can combine to support your DevOps workflow. For more information on Terraform Cloud and Terraform Enterprise visit the Terraform product page or get started for free here. To learn more about Terraform visit the HashiCorp Learn platform and see it in action.
Sign up for the latest HashiCorp news
More blog posts like this one

A blueprint for cloud success with HashiCorp at Google Cloud Next
A recap of HashiCorp infrastructure and security news and developments from Google Cloud Next, from scaling infrastructure as code to fighting secrets sprawl and more.

Terraform 1.8 improves extensibility with provider-defined functions
New in Terraform 1.8: Provider-defined functions let users extend Terraform with custom capabilities. Plus, refactoring can now be done across resource types.

Terraform 1.8 provider functions for AWS, Google Cloud, and Kubernetes
See usage examples of Terraform 1.8's new launch-day provider-defined functions for AWS, Google Cloud, and Kubernetes.