

HashiCorp and Microsoft have partnered to create a number of Terraform modules that build an N-tier architecture following Microsoft's Azure Well-Architected Framework and security best practices. In the first part of this series, we walked through how to use HashiCorp Terraform to deploy Azure resources using security best practices and policy as code. In this part, we will set up more security utilities to provide a defense-in-depth approach to cloud vulnerabilities. These utilities include:
»Reference architecture
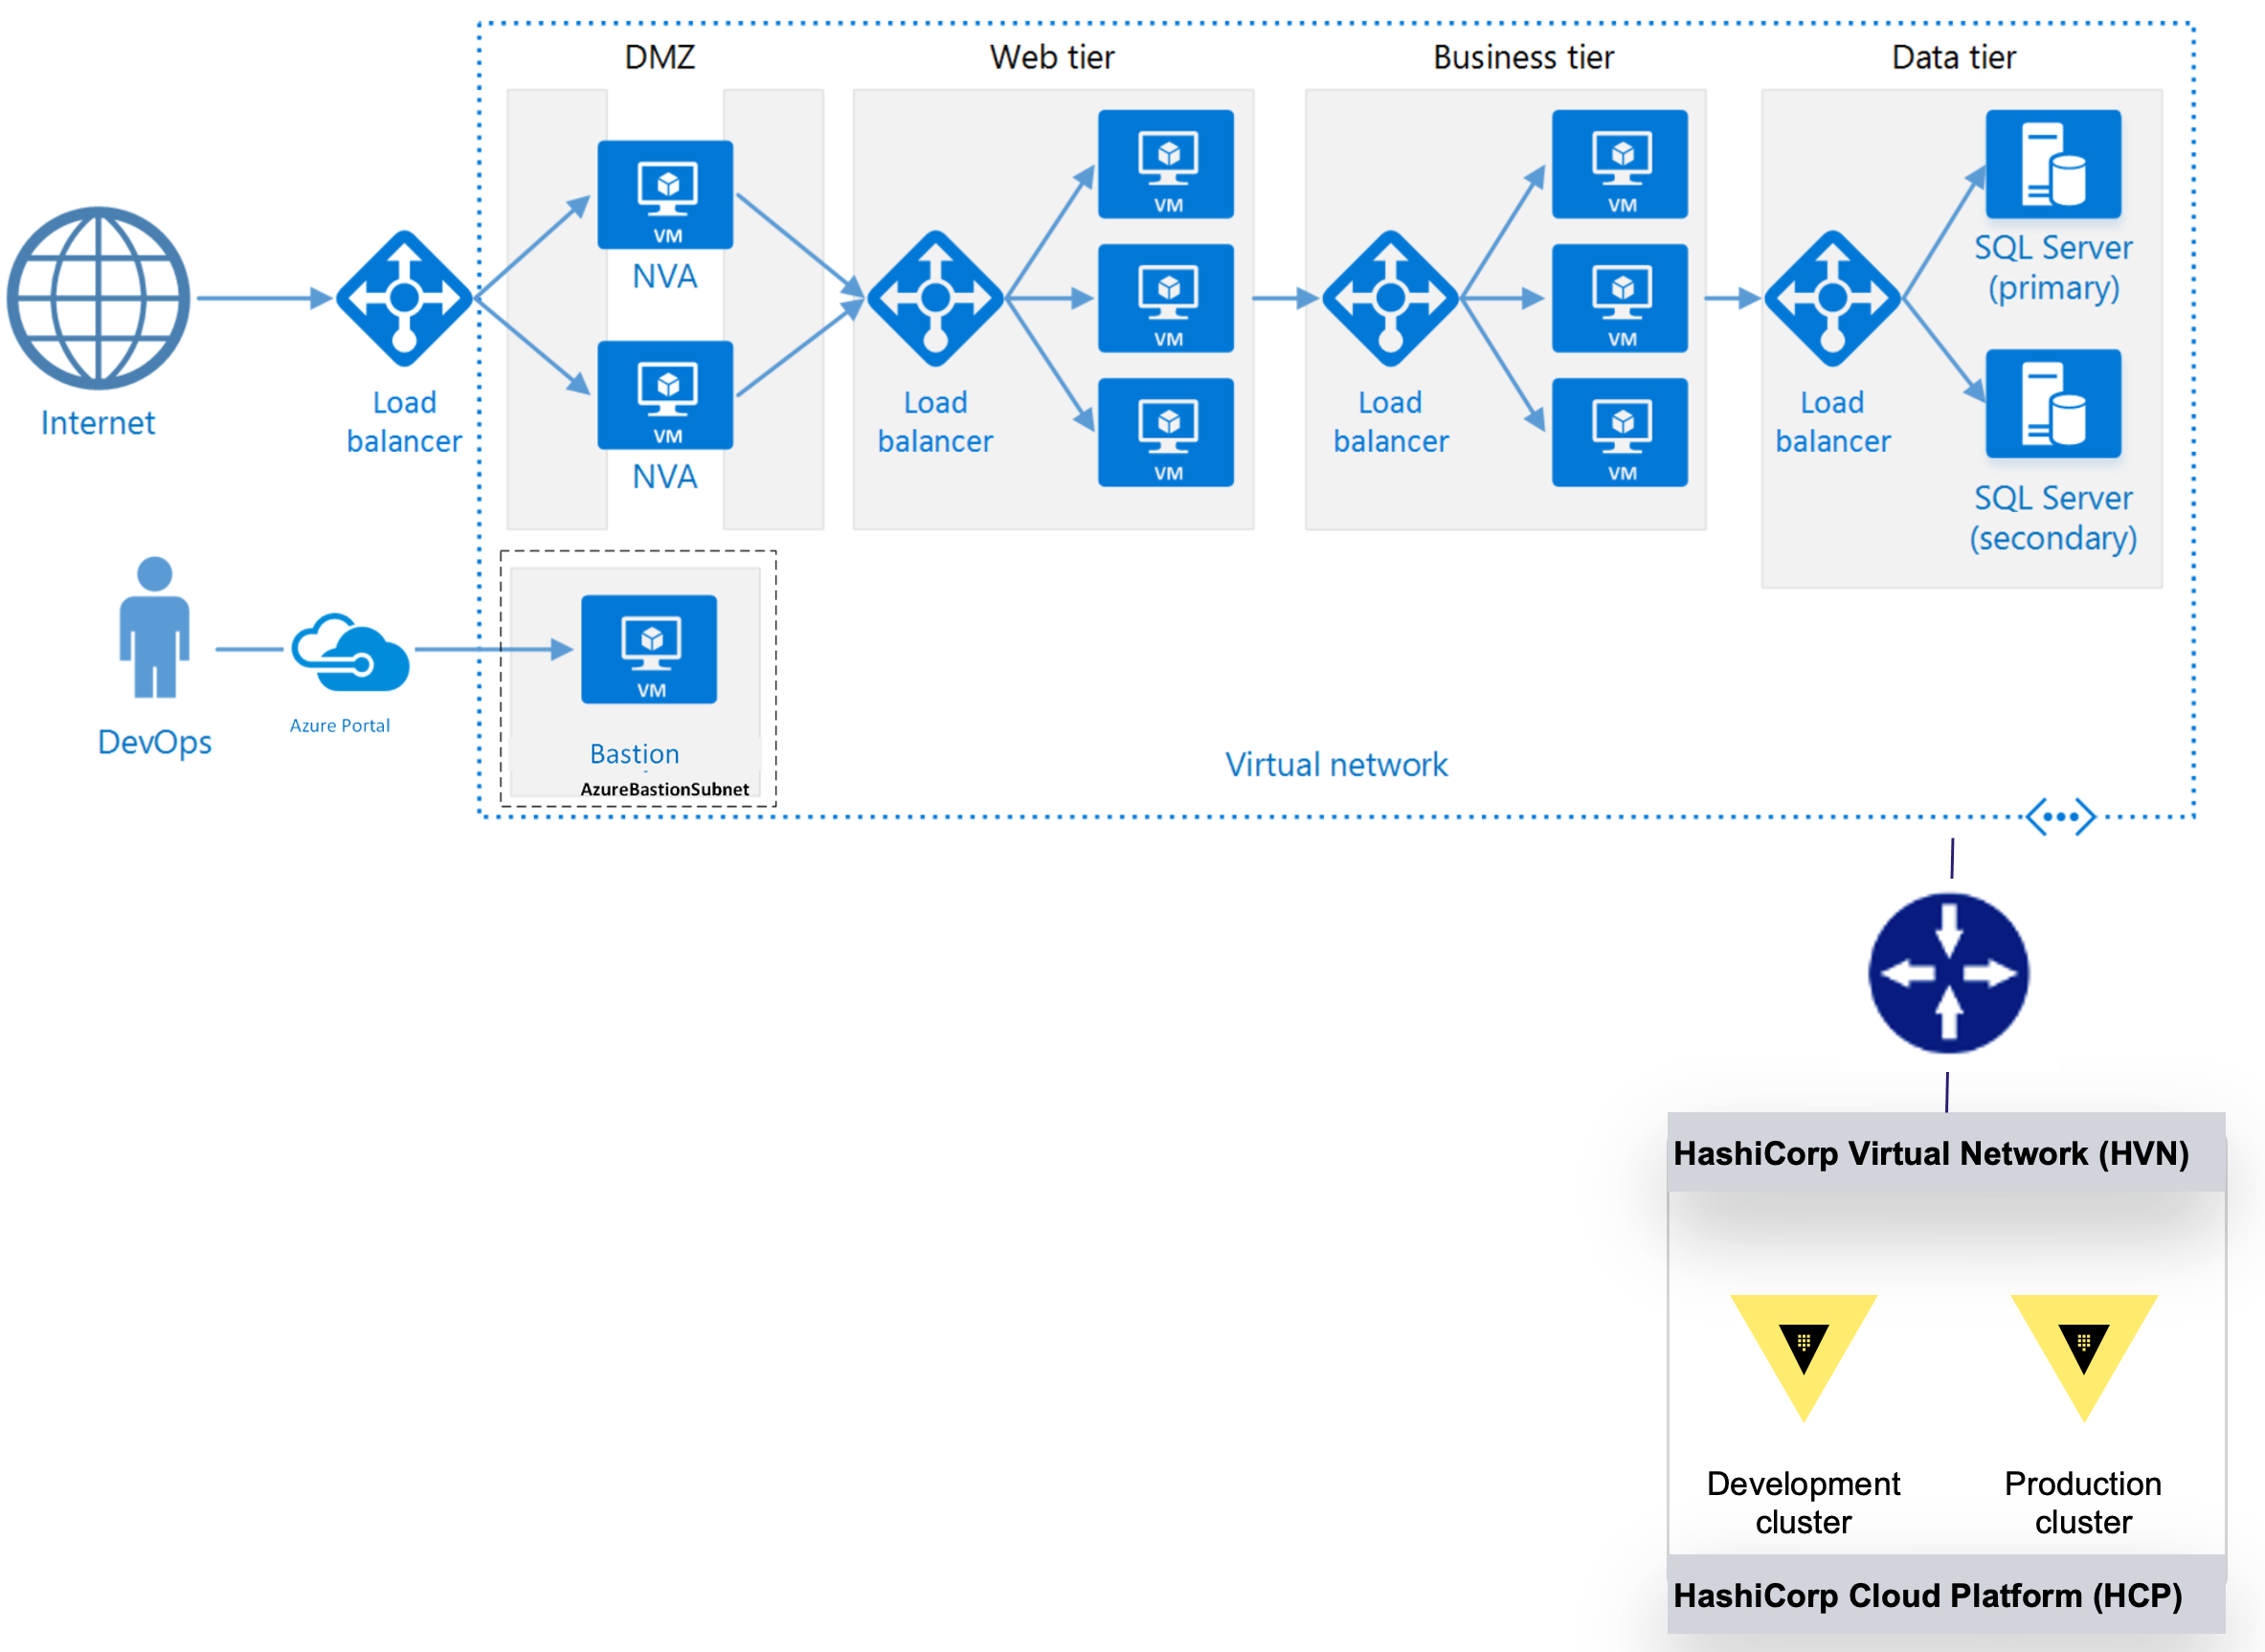
Similar to the previous post, we will use an N-tier architecture, since it is a common starting point for traditional on-premises applications migrating to Azure infrastructure. The code for this architecture can be found in this GitHub repository.
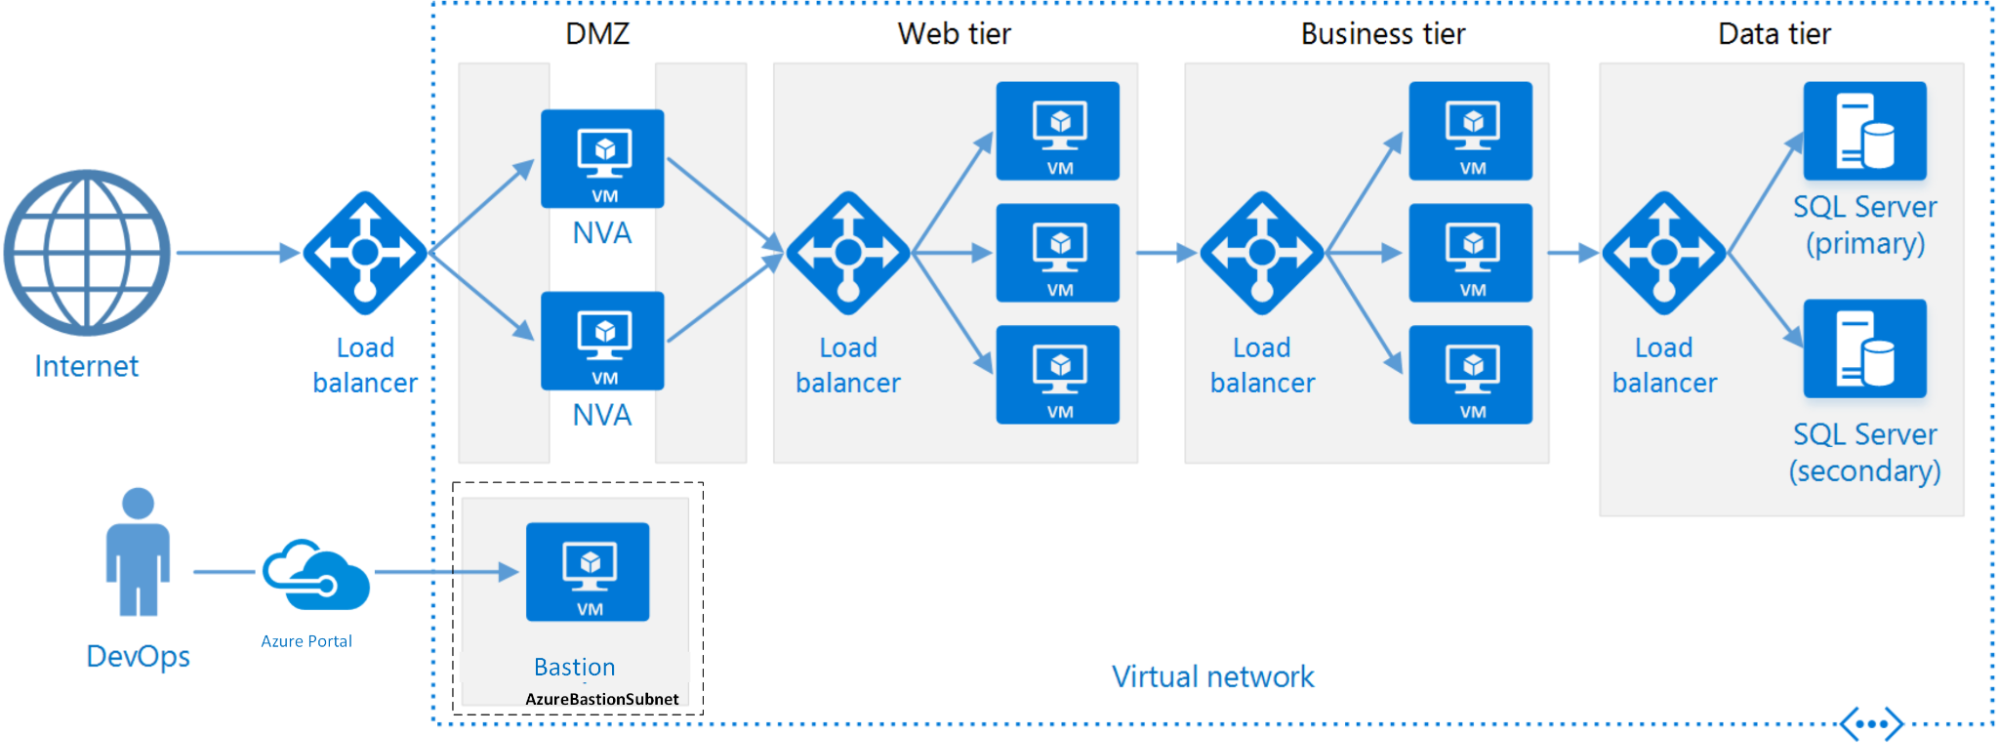
A standard N-tier architecture on Azure.
»Microsoft Defender for Cloud
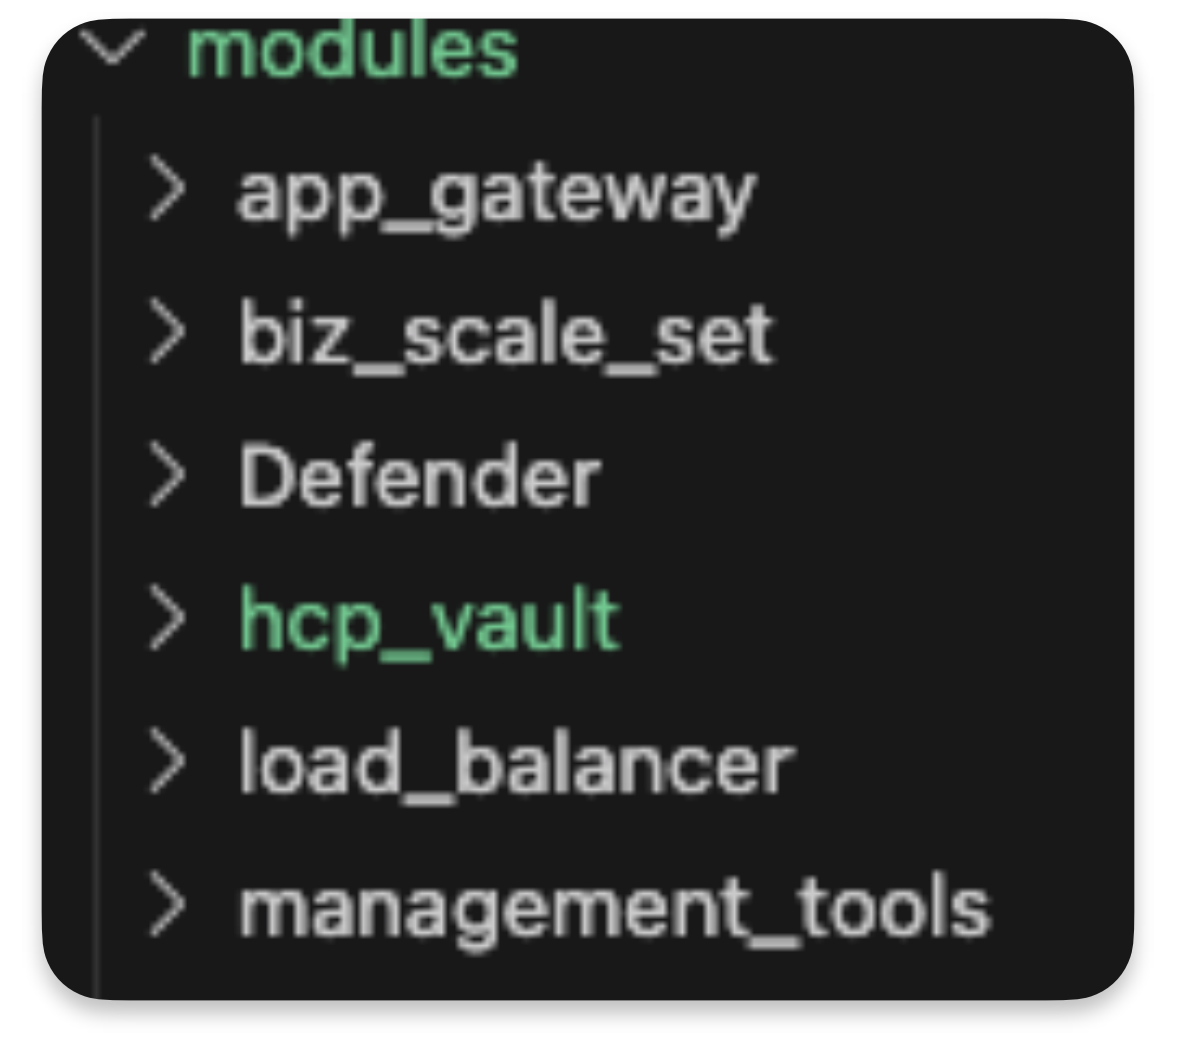
After forking the repository, you’ll see the module from part one in the series, with some additions. The first addition is the Defender module, which is used to deploy Microsoft Defender for Cloud. Defender is a cloud-native application protection platform (CNAPP) with a set of security measures and practices designed to protect cloud-based applications from various cyber threats and vulnerabilities.
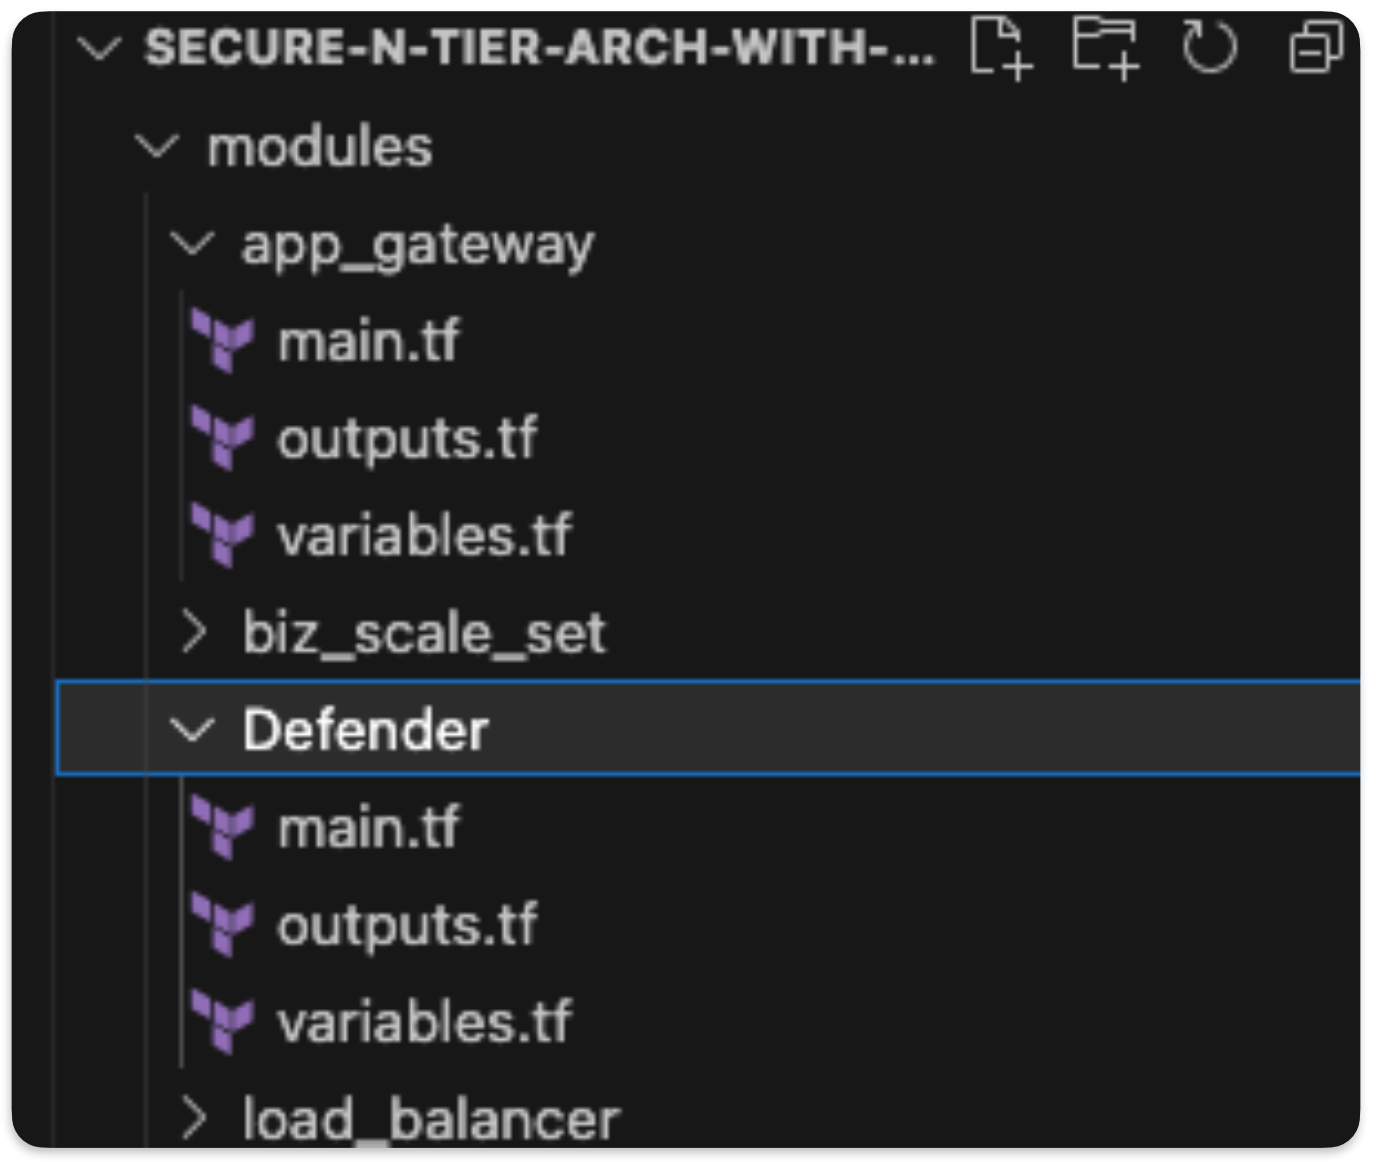
The main.tf file in this folder has the elements needed to deploy Defender. To add them to the overall environment deployment, add the code below to main.tf. This injects the name, resource group, and location of the overall deployment.
# Adding in Security Features

######################################
# Deploy Defender.
######################################

module "defender" {
 source                  = "./modules/Defender"
 name                    = random_pet.name.id
 resource_group_location = var.resource_group_location
 resource_group_name     = azurerm_resource_group.rg.name
 email                   = var.email
 phone                   = var.phone
}
»Dynamic provider credentials with Terraform Cloud and HCP Vault
The next step helps you follow security best practices for data/storage security for the Azure platform. It involves a new feature in Terraform Cloud: dynamic provider credentials.
Terraform Cloud will use native support for OpenID Connect (OIDC) to integrate with Azure to generate dynamic credentials for the AzureRM or AzureAD providers in your Terraform Cloud runs. The process of generating short-lived, just-in-time (JIT) credentials for your cloud deployment limits the amount of time an attacker would have to do damage even if they did obtain the credentials.
The tutorial Dynamic Credentials with the Azure Provider covers the required configuration steps. In the GitHub repository for this tutorial, we leveraged the Terraform Cloud provider for a fast setup. This is a simple process of cloning the repo, changing into the azure directory, and running the commands shown below:
azure git:(main) ✗ Git clone https://github.com/hashicorp/terraform-dynamic-credentials-setup-examples.git

azure git:(main) ✗ az login

azure git:(main) ✗ terraform login
Terraform will request an API token for app.terraform.io using your browser.

If login is successful, Terraform will store the token in plain text in
the following file for use by subsequent commands:
    /Users/dwright/.terraform.d/credentials.tfrc.json

Do you want to proceed?
  Only 'yes' will be accepted to confirm.

  Enter a value: yes


---------------------------------------------------------------------------------

Terraform must now open a web browser to the tokens page for app.terraform.io.

If a browser does not open this automatically, open the following URL to proceed:
    https://app.terraform.io/app/settings/tokens?source=terraform-login


---------------------------------------------------------------------------------

Generate a token using your browser, and copy-paste it into this prompt.

Terraform will store the token in plain text in the following file
for use by subsequent commands:
    /Users/dwright/.terraform.d/credentials.tfrc.json

Token for app.terraform.io:
  Enter a value: xxxxxxxx-xxxxxx-xxxxx-xxxxxxx-xx


azure git:(main) ✗ Terraform apply
The next step is to associate your Azure subscription and tenant ID to the workspace. This example takes advantage of Terraform variable sets to have this ready to associate with the new workspace. The variable page should have the following:
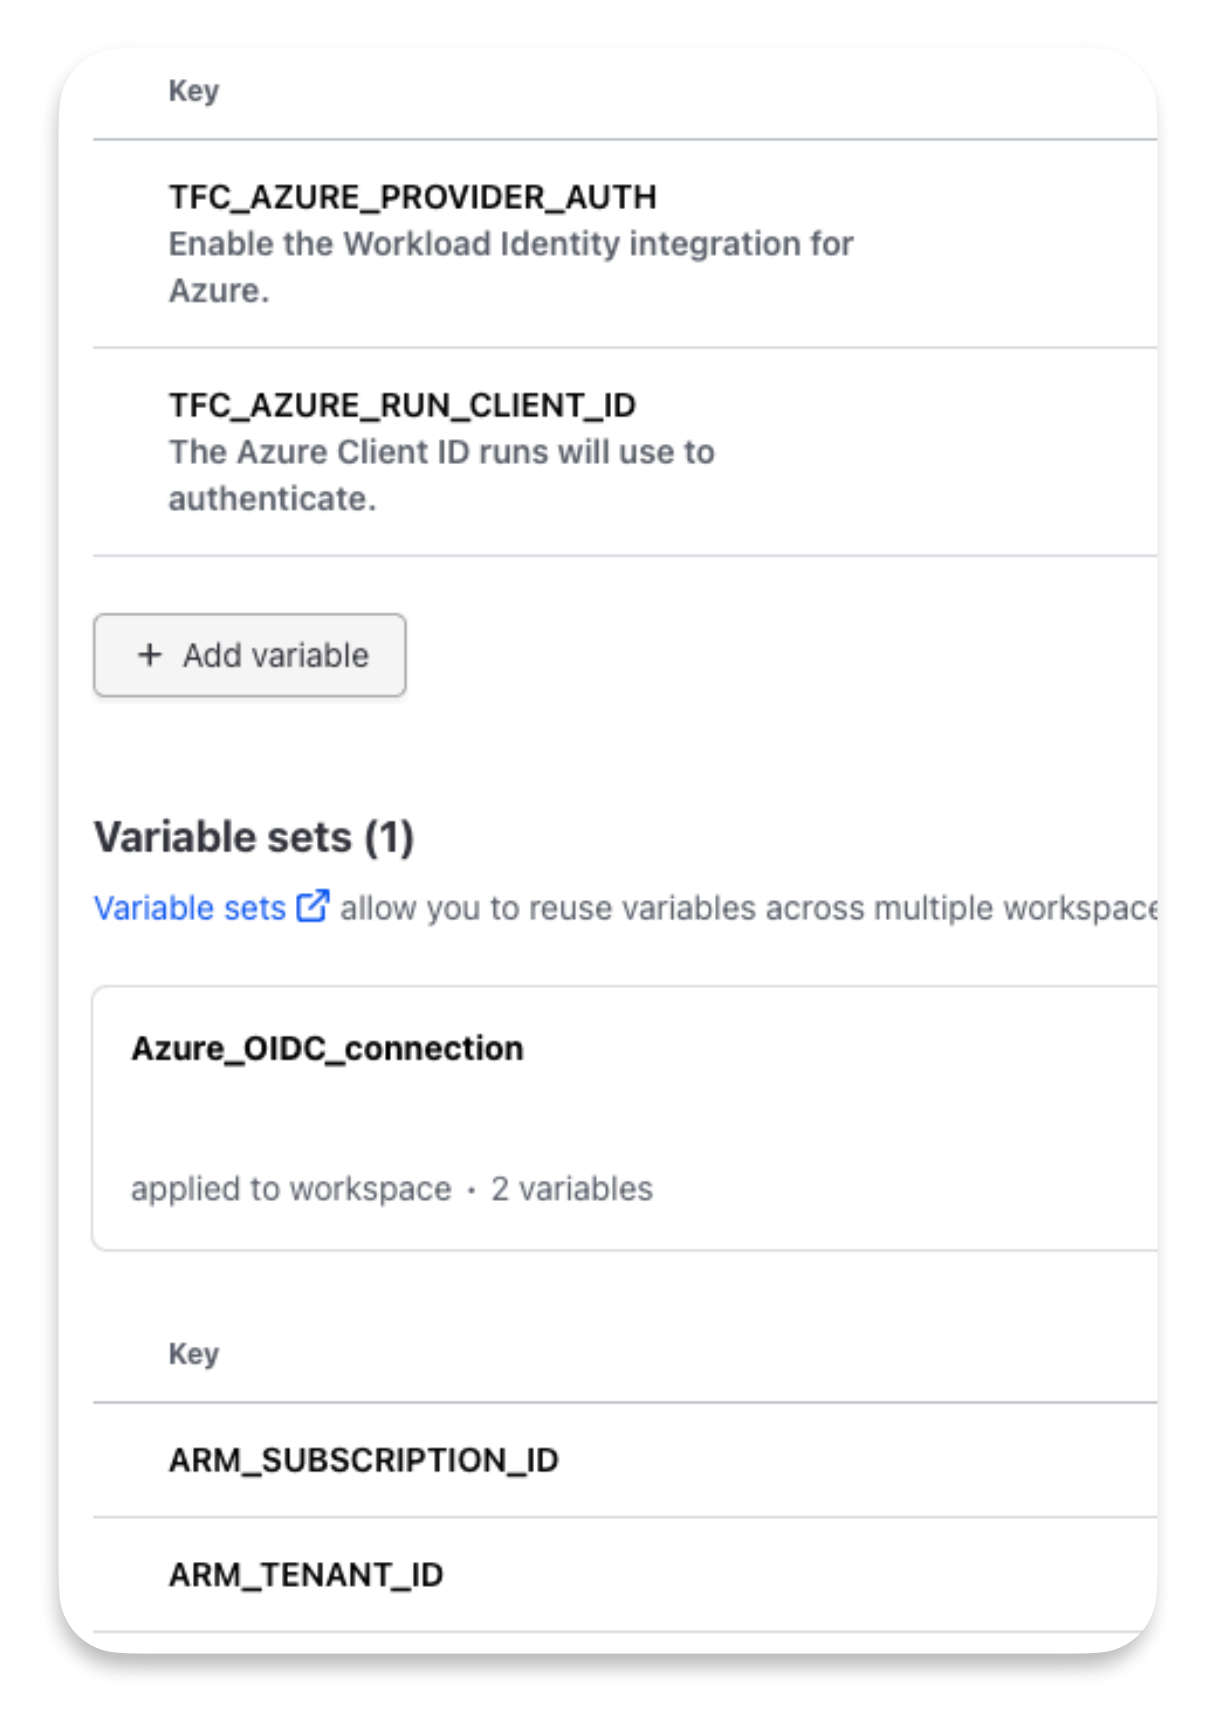
With these variables set, you can then go into Terraform Cloud and associate a code repository to deploy at:
organization/workspaces/dr-azure-workspace/settings/version-control
Once complete, you should see something similar to the image below:
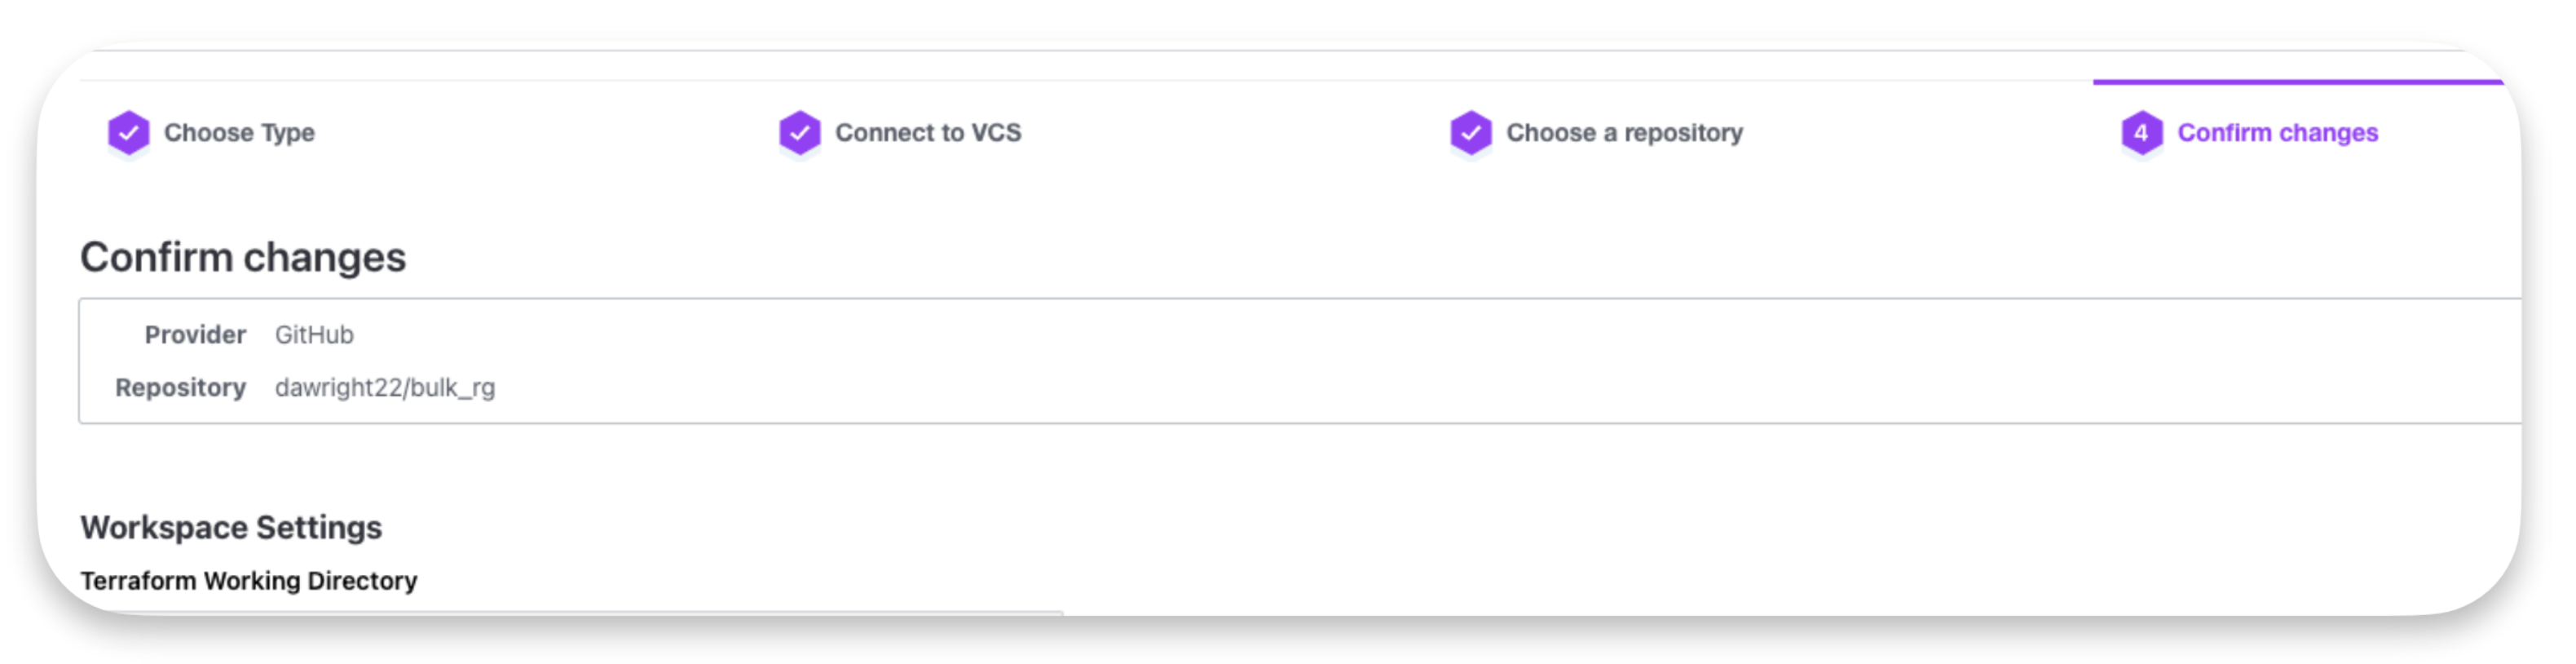
When your version control system (VCS) is associated with the workspace it will automatically start a run to deploy the code within the VCS.
»Adding HCP Vault on Azure
HCP allows users to deploy a fully managed version of Vault on Azure, connecting workloads that are running on Azure virtual machines (VMs) or Azure Kubernetes Service (AKS) and, in this case, allowing dynamic secrets to be used in the environment.
HCP is a fully managed cloud platform and HCP Vault is the easiest way to secure, store, and tightly control access to tokens, passwords, certificates, encryption keys, and other sensitive data in a hybrid or multi-cloud environment. HCP Vault is designed to minimize the steps necessary to use Vault within your Azure environments. At a high level, operators need to take three steps to start using HCP Vault:
Create a HashiCorp Cloud Platform account.
Deploy a cluster: Select HCP Vault from the HCP dashboard and follow the quickstart deployment guide that will walk you through the process of creating your HashiCorp Virtual Network (HVN) and a Vault cluster.
Peer with Azure: Once you have deployed the HVN and cluster, peer that network with your existing Azure environments.
In this example, we use the HCP provider to build a cluster and connect it to your Azure environment. To do this we have added the hcp_vault module:
The HCP provider also requires authentication — this can be client credentials, obtained on the creation of a service principal key or a user session, obtained via browser login (as of version 0.45). Client credentials are recommended for CI and local development and they require the addition of values for client_id and client_secret in your variable file.
To add HCP to the overall environment, use the code below within the main.tf. This injects the name, resource group, and location of the overall deployment plus the peer information.
######################################
# Deploy HCP Vault.
######################################
module "hcp_vault_cluster" {
 source                  = "./modules/hcp_vault"
 name                    = random_pet.name.id
 resource_group_location = var.resource_group_location
 resource_group_name     = azurerm_resource_group.rg.name
 VNet                    = module.networks.Net-vm-ref-arch
 hcp_region              = var.hcp_region
}
Let's walk through what this code does. First, it references the location of the hcp_vault module. Then it injects the resource group, its location, and its name. It also brings the pet name into the module to keep all naming references synchronized. The two unique elements are the VNet that we want to attach the HVN to, and the region it's in.
An HVN is used to establish a peering connection between Vault and the cloud provider. This ensures that only trusted clients (users, applications, containers, etc.) running in the peered public cloud provider can connect to Vault.
Here's a diagram of how HVN connects to the environment:
The hcp_region is the location of the primary cluster, which acts as the system of record for Vault data. If you require more redundancy and scale, then you can use replication.
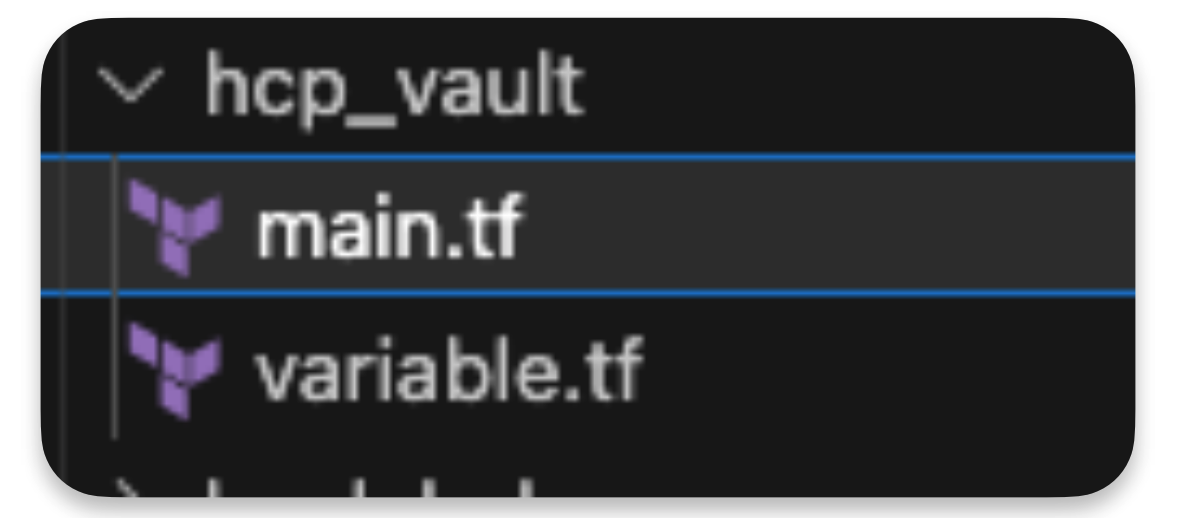
The hcp_vault module is divided into two major elements: the role assignments and permissions to establish a peer, and the creation of the peer and the HCP cluster.
Permissions are important to allow the establishment of the peer network with the HCP cluster. In this code snippet, you can see a permissions list giving the cluster only the privileges needed to complete the deployment.
permissions {
   actions = [
         "Microsoft.Network/virtualNetworks/read",
         "Microsoft.Network/virtualNetworks/virtualNetworkPeerings/read",
         "Microsoft.Network/virtualNetworks/virtualNetworkPeerings/write",
         "Microsoft.Network/virtualNetworks/peer/action"
   ]
 }
}
The comments below highlight the individual resource functions:
// This is the the resource used to create the HVN for the HCP cluster network.
resource "hcp_hvn" "hvn" {
#redacted
}


// This resource creates the HCP vault cluster.
resource "hcp_vault_cluster" "azure_hcp_vault" {
#redacted
}

// This resource initially returns in a Pending state, because its application_id
// is required to complete acceptance of the connection.
resource "hcp_azure_peering_connection" "peer" {
#redacted
}


// This is a data source that reads the peering information but waits for the connection
// to be Active before returning any information thus making sure the correct order is maintained.

data "hcp_azure_peering_connection" "peer" {
#redacted
}
// This route depends on the completion of the above data source to ensure the
//connection has peered and is Active before creating the routes.
resource "hcp_hvn_route" "route" {
#redacted
}
»Next steps
Incorporating security tools along with best practices into your infrastructure as code is essential for maintaining secure and reliable infrastructure. By doing so, organizations help ensure that their cloud deployments are secure, compliant, and easily maintainable.
To learn more, watch the HCP on Azure launch video.
Be sure to also check out our video on Securing Your Cloud with Terraform Foundational Policy Library and join Microsoft and HashiCorp for our ongoing webinar series: Enforce Compliance with Azure Identity and HashiCorp Vault.


