

This post will discuss industrialized workflows and why they are important to the cloud adoption journey. Using these concepts, the post shows you how to take advantage of Microsoft's Frameworks examples to produce repeatable and compliant infrastructure that follows best practices.
»From Tactical to Industrialized Cloud Adoption
So what is an “industrialized workflow”? To understand this we need to take a hard look at the first version of the cloud adoption model and where most organizations are in the journey. Many organizations wanted to move to the cloud when it was new. They experimented and “failed fast” along the way but were not familiar with the end state they would need.
»Tactical Cloud Adoption
Being a pioneer means that you can choose your own route and equipment needed to arrive at your destination. In this case, people charged with cloud adoption often used open source tools because they often had no budget for tooling. And so after several years of this phase of tactical adoption, there are many challenges that present themselves around the infrastructure layer.
One challenge is siloed teams using different tools and disparate workflows based on general tooling, or cloud platform-specific tools to deliver infrastructure. This meant that there were skill gaps across the business. This approach also created infrastructure sprawl with unknown provisioned elements managed outside of IT-sanctioned teams. As a result, teams had hard-to-manage infrastructure with expanded costs and risk from compliance issues or vulnerabilities that unmanaged infrastructure may introduce. As the following quote from McKinsey’s report on the 10 commandments for faster cloud outlines:
“For many companies moving to the cloud, a focus on short-term gain leads to long-term pain and prevents them from capturing a much bigger portion of cloud’s estimated $1 trillion of value potential. It happens when IT departments, usually with the assistance of systems integrators, migrate a set of applications to the cloud as quickly as possible to capture initial gains. That short-term focus frequently has significant consequences.”
So how can organizations move forward? This is where industrialized workflows come into play.
»Industrialized Workflows
Industrialized workflows leverage a standard workflow or pattern to deliver a business-focused outcome. This workflow or pattern is common across the organization, which allows for centralized visibility, control, and management using a shared approach that everyone within the organization understands.
Industrialized cloud adoption allows you to focus on growing your business and getting ahead of the competition instead of the underlying systems your organization needs. This approach also allows organizations to develop deployment outcomes that capture best practices and incorporate them into every deployment, regardless of who does it.
Now you know why you should take a workflow approach. The next questions are, how do you set up your industrialized workflow and how does it help you build faster?
»Microsoft Cloud Adoption Framework (CAF)
The Microsoft Cloud Adoption Framework (CAF) for Azure provides guidance and best practices to adopt Microsoft Azure. It creates a best practice set of examples that define and deliver outcome-based workloads. Using this framework, you can take the defined patterns approach and build them into your desired state for a workload. Even better, by combining this framework with HashiCorp Terraform Cloud, you can create a workflow-based approach that can be adopted across the entire organization.
In our blog post on Go Big or Go Small? Building in Azure CAF with Terraform Cloud, we discussed getting started with Terraform Cloud and CAF. Within the CAF framework, there’s a resource that allows users to build even faster.
»Best Practices Examples in GitHub
In the GitHub repository for the CAF module, you will find a directory called “examples”.

Inside this directory there is a wealth of predefined, best-practices workload definitions that can be integrated into your Terraform Cloud workflow.
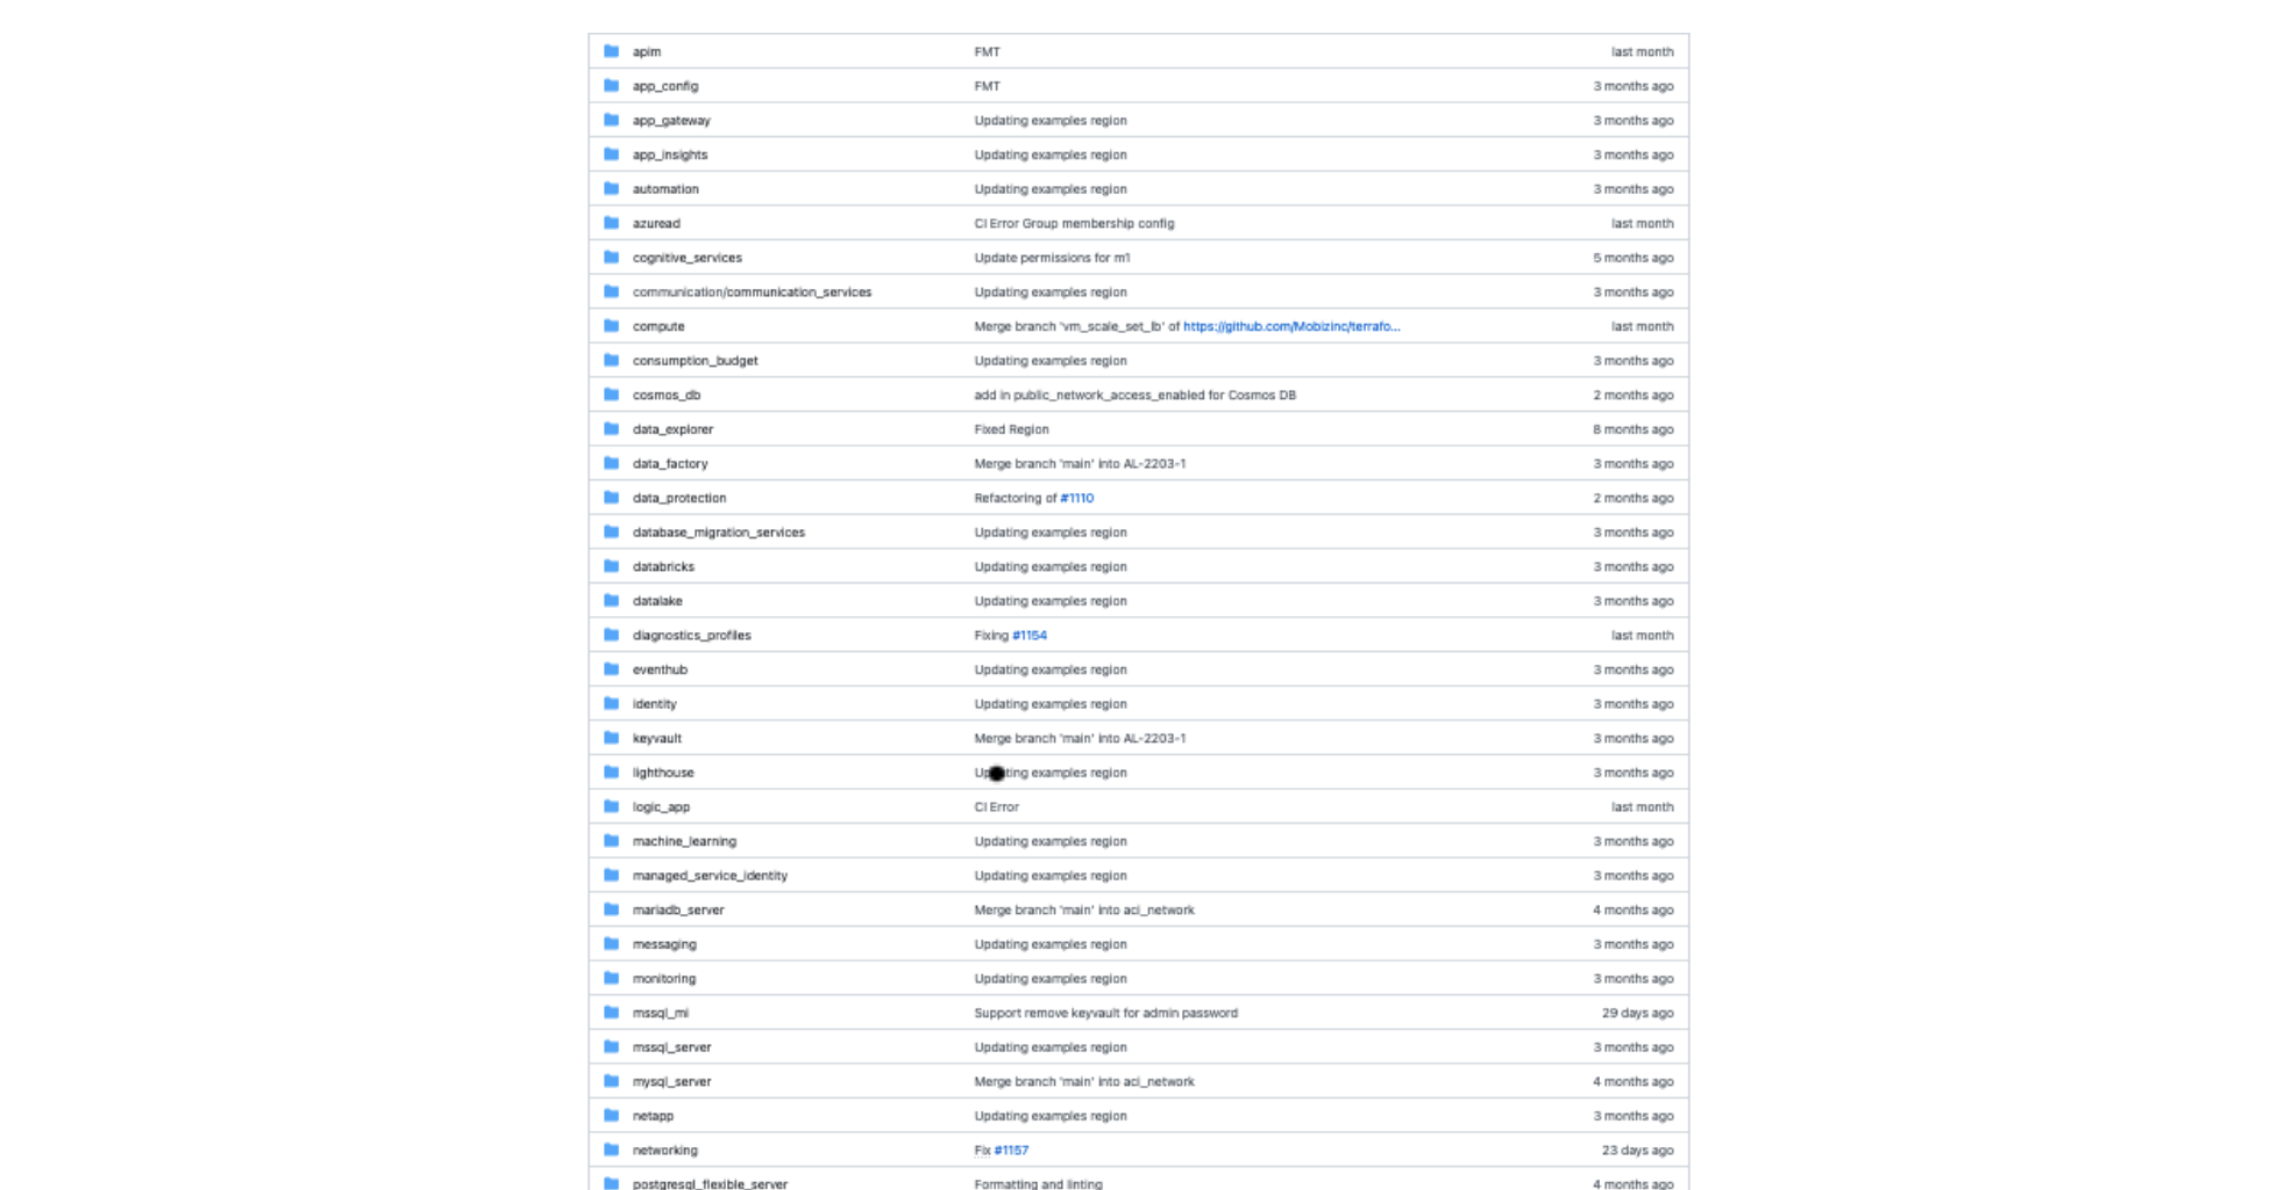
Each of these folders contains many scenario-based workloads. In this case, we will deep dive into the compute folder, where we find the virtual_machine folder:
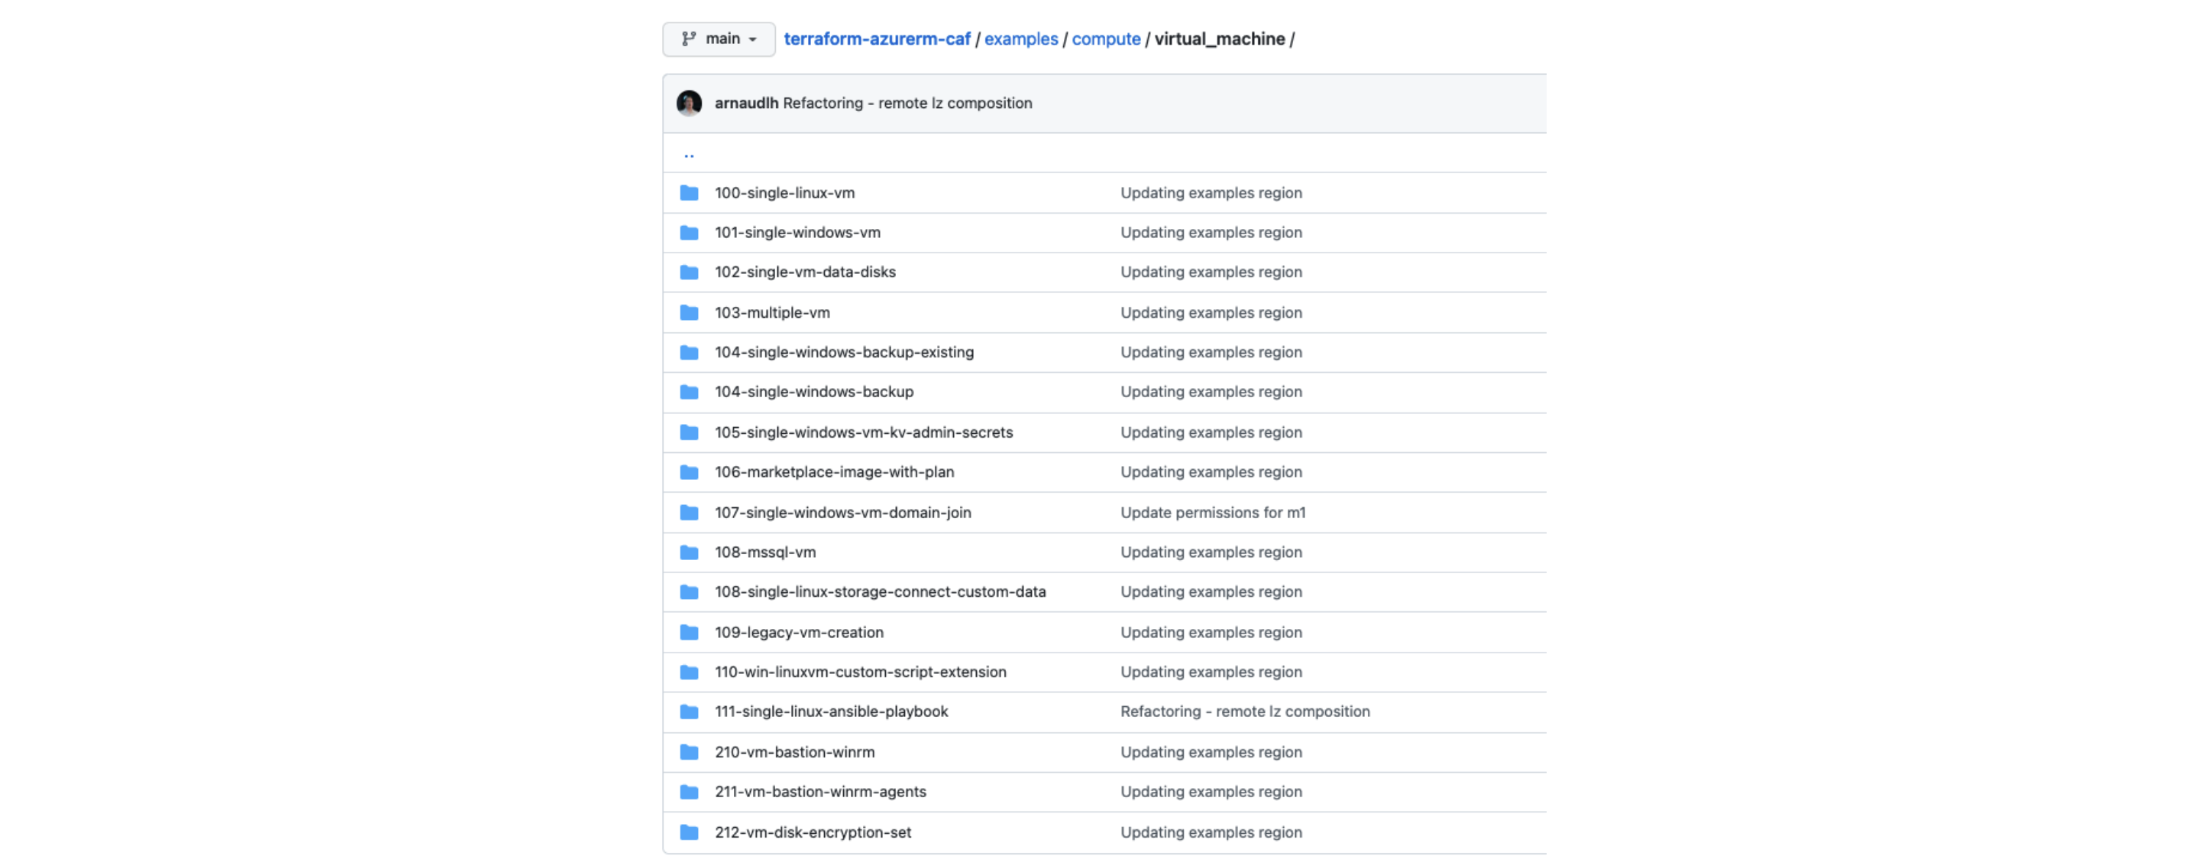
»Getting Started
From this list of virtual machines, there is a scenario to suit the majority of use cases. For this example, Let’s choose 108-mssql-vm to build a Microsoft SQL server and the environment to support it.
In the folder there is a configuration.tfvars file:
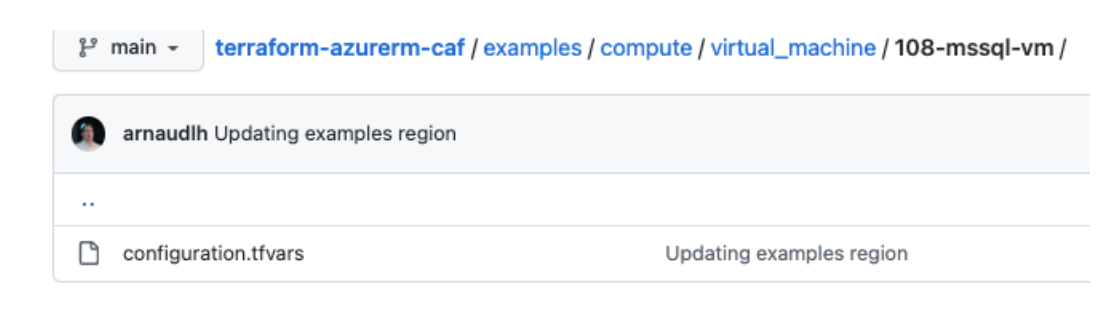
This is the key to building your pattern and builds quickly. This file has all the configuration values needed to setup the MSSQL server for our project:
global_settings = {
 default_region = "region1"
 regions = {
   region1 = "australiaeast"
 }
}

resource_groups = {
 rg1 = {
   name = "mssql-vm-rg"
 }
}

storage_accounts = {
 sa1 = {
   name                     = "backupsa"
   resource_group_key       = "rg1"
   account_kind             = "StorageV2"
   account_tier             = "Standard"
   account_replication_type = "LRS"
 }
}

keyvaults = {
 kv1 = {
   name                     = "vmsecretskv"
   resource_group_key       = "rg1"
   sku_name                 = "standard"
   soft_delete_enabled      = true
   purge_protection_enabled = false
   tags = {
     env = "Standalone"
   }
   creation_policies = {
     logged_in_user = {
       secret_permissions = ["Set", "Get", "List", "Delete", "Purge", "Recover"]
       key_permissions    = ["Get", "List", "Update", "Create", "Import", "Delete", "Recover", "Backup", "Restore", "Decrypt", "Encrypt", "UnwrapKey", "WrapKey", "Verify", "Sign", "Purge"]
     }
   }
 }
}
 Edited for Brevity
   data_disks = {
     data1 = {
       name                 = "datadisk1"
       storage_account_type = "Premium_LRS"
       create_option        = "Empty"
       disk_size_gb         = "10"
       lun                  = 1
       zones                = ["1"]
     }
   }

 }
}
»Deep Dive
So is that all you need? Not quite. There are a few other files that you will need to build the entire deployment. There is a file called standalone.md in the above directory, which contains the details to create the necessary minimal main.tf. Copy this code and the established variables.tf in this directory and then feed it the necessary configuration.tfvars copied for the 108-mssql-vm folder. Remember to rename the configuration.tfvars file to have an auto.tfvars extension and then add an output.tf to see the outcomes.
In my example repository called caf-tfc, I have put all of this together into one repository and simplified the directory so you can see only the files you need to deploy your new environment. I haven’t created any new code, just copied the existing patterns in a new repository. Let’s explore this example repository a little more to ensure you understand everything you need to deploy your environments.

»Main.tf
main.tf contains the heavy lift of the example build. This calls a module in the Terraform Registry and contains the necessary resource definitions to build the scenario. Modules can be used to create lightweight abstractions so that you can describe your infrastructure in terms of its architecture rather than directly in terms of physical objects.
module "caf" {
  source  = "aztfmod/caf/azurerm"
  version = "5.3.11"

  global_settings = var.global_settings
  resource_groups = var.resource_groups
  keyvaults       = var.keyvaults

  compute = {
    virtual_machines = var.virtual_machines
  }

  networking = {
    public_ip_addresses = var.public_ip_addresses
    vnets               = var.vnets
  }
}
»Variables.tf
This file contains the input variables you need to feed the module. These variables let you customize aspects of Terraform modules without altering the module's own source code. In this case, input variables allow you to use the CAF module across different build scenarios by leveraging the unique defined inputs in variables.tf. If you're familiar with traditional programming languages, it can be useful to compare Terraform modules to function definitions. Think of the input variables like function arguments.
variable "global_settings" {
 default = {
   default_region = "region1"
   regions = {
     region1 = "eastus2"
     region2 = "centralus"
   }
 }
}

variable "landingzone" {
 default = {
   backend_type        = "azurerm"
   global_settings_key = "launchpad"
   level               = "level0"
   key                 = "examples"
 }
}
Edited for brevity
variable "var_folder_path" {
 default = {}
}

variable "api_management" {
 default = {}
}
variable "api_management_api" {
 default = {}
}
variable "api_management_api_diagnostic" {
 default = {}
}
variable "api_management_logger" {
 default = {}
}
»Outputs.tf
Output values are a way to expose information about the provisioned infrastructure to the user of your module. Output values are similar to return values in programming languages. Any Terraform resource when deployed can export attributes about itself as outputs. This allows them to be consumed as data inputs elsewhere in configuration. For more detail read about them in our Output Values documentation.
»CAF.auto.tfvars
In this case, I named the file caf.auto.tfvars. However, you can name it anything you like, as long as you keep the .auto.tfvars extensions at the end. This variable definitions file uses the same basic syntax as Terraform language files, but consists only of variable name assignments needed to establish our desired end state. We use the context from the configuration.tfvars that we looked at earlier and these inputs to define our end state.
»Velocity Building
As I mentioned before, in an earlier blog post we discussed getting started with Terraform Cloud and CAF. Here I will outline the elements to deploy this in an existing Terraform Cloud organization.
The first thing I did was create a repository in my VCS to store all the files discussed and manage my code.
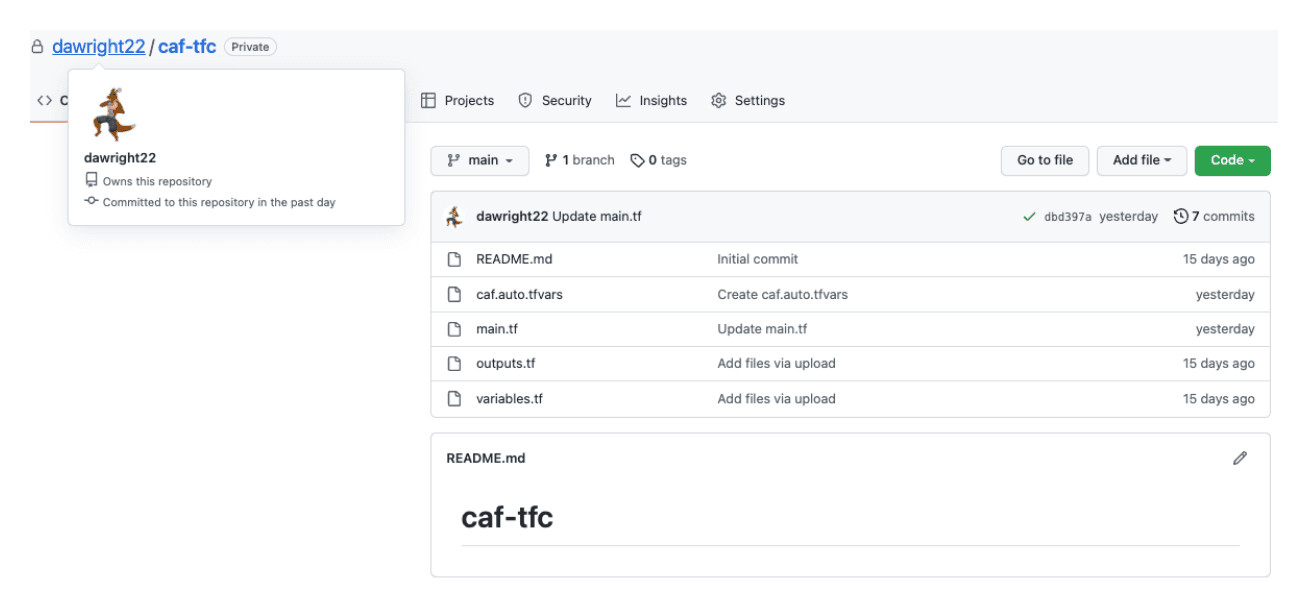
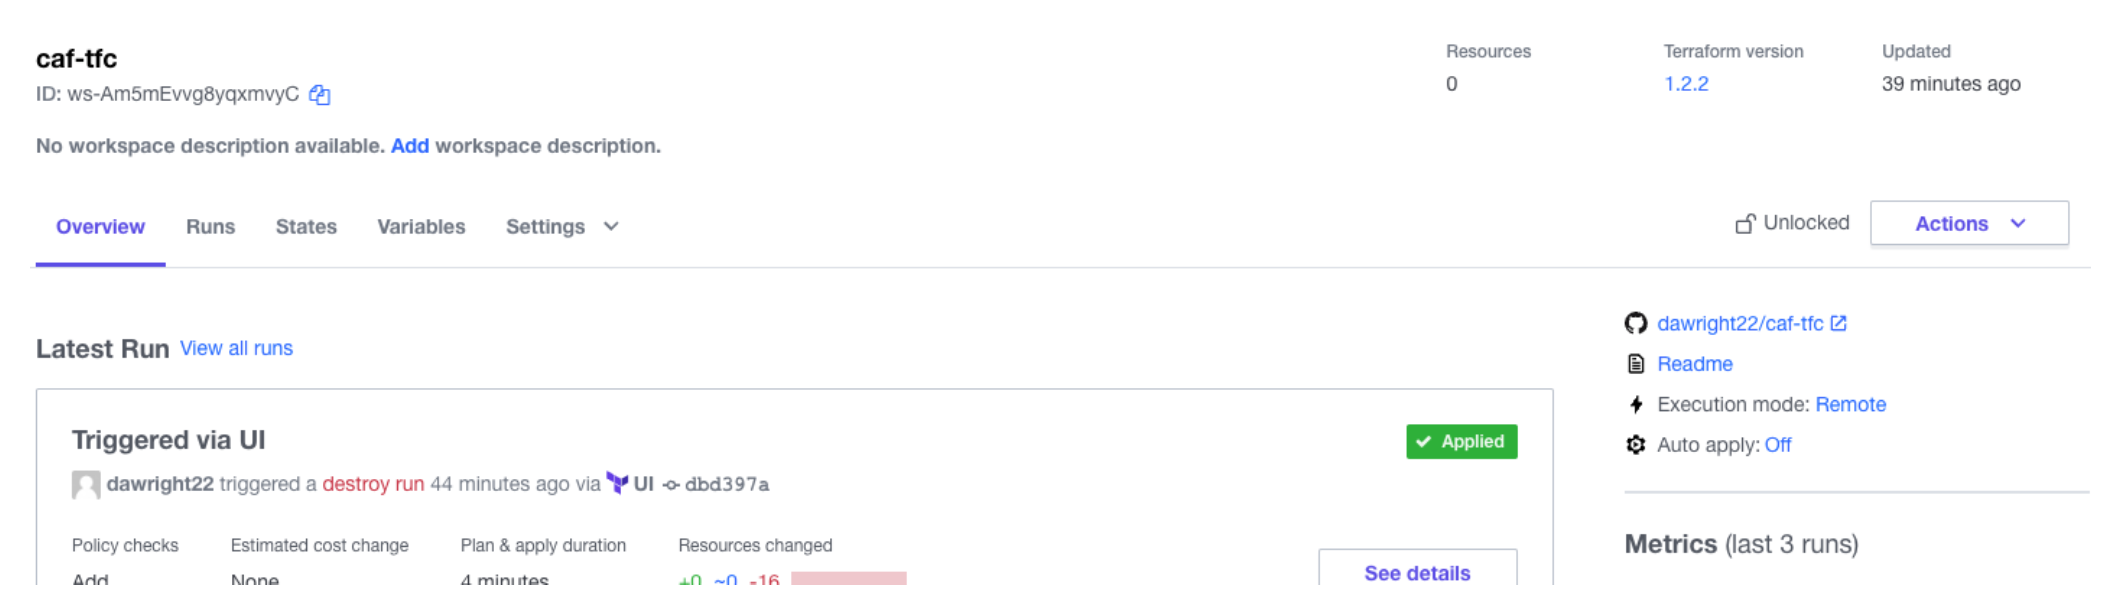
Here are the four files we discussed. I now create a new Terraform Cloud workspace with a linked VCS to the Github repository above. If you are new to this, then follow this Use VCS-Driven Workflow tutorial.
I then need to add credentials to my workspace that allows Terraform Cloud to build the resources in my Azure account. To simplify this, I take advantage of a great feature called variable sets. Following this example you could build out an Azure variable set like this, which allows resources to be deployed:
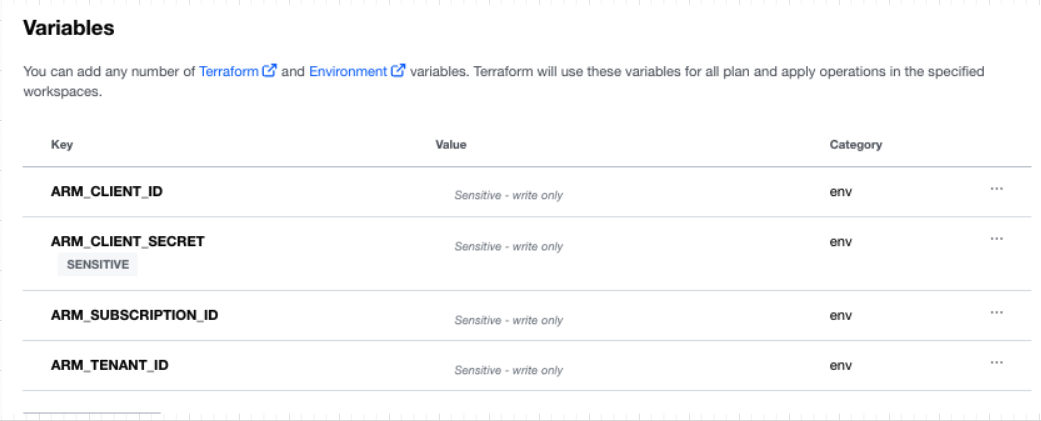
Variable sets allow you to avoid redefining the same variables across workspaces to standardize common configurations throughout your organization. By defining a variable set for my credentials, you can easily reuse the same variables across multiple workspaces and efficiently and securely rotate your credentials.
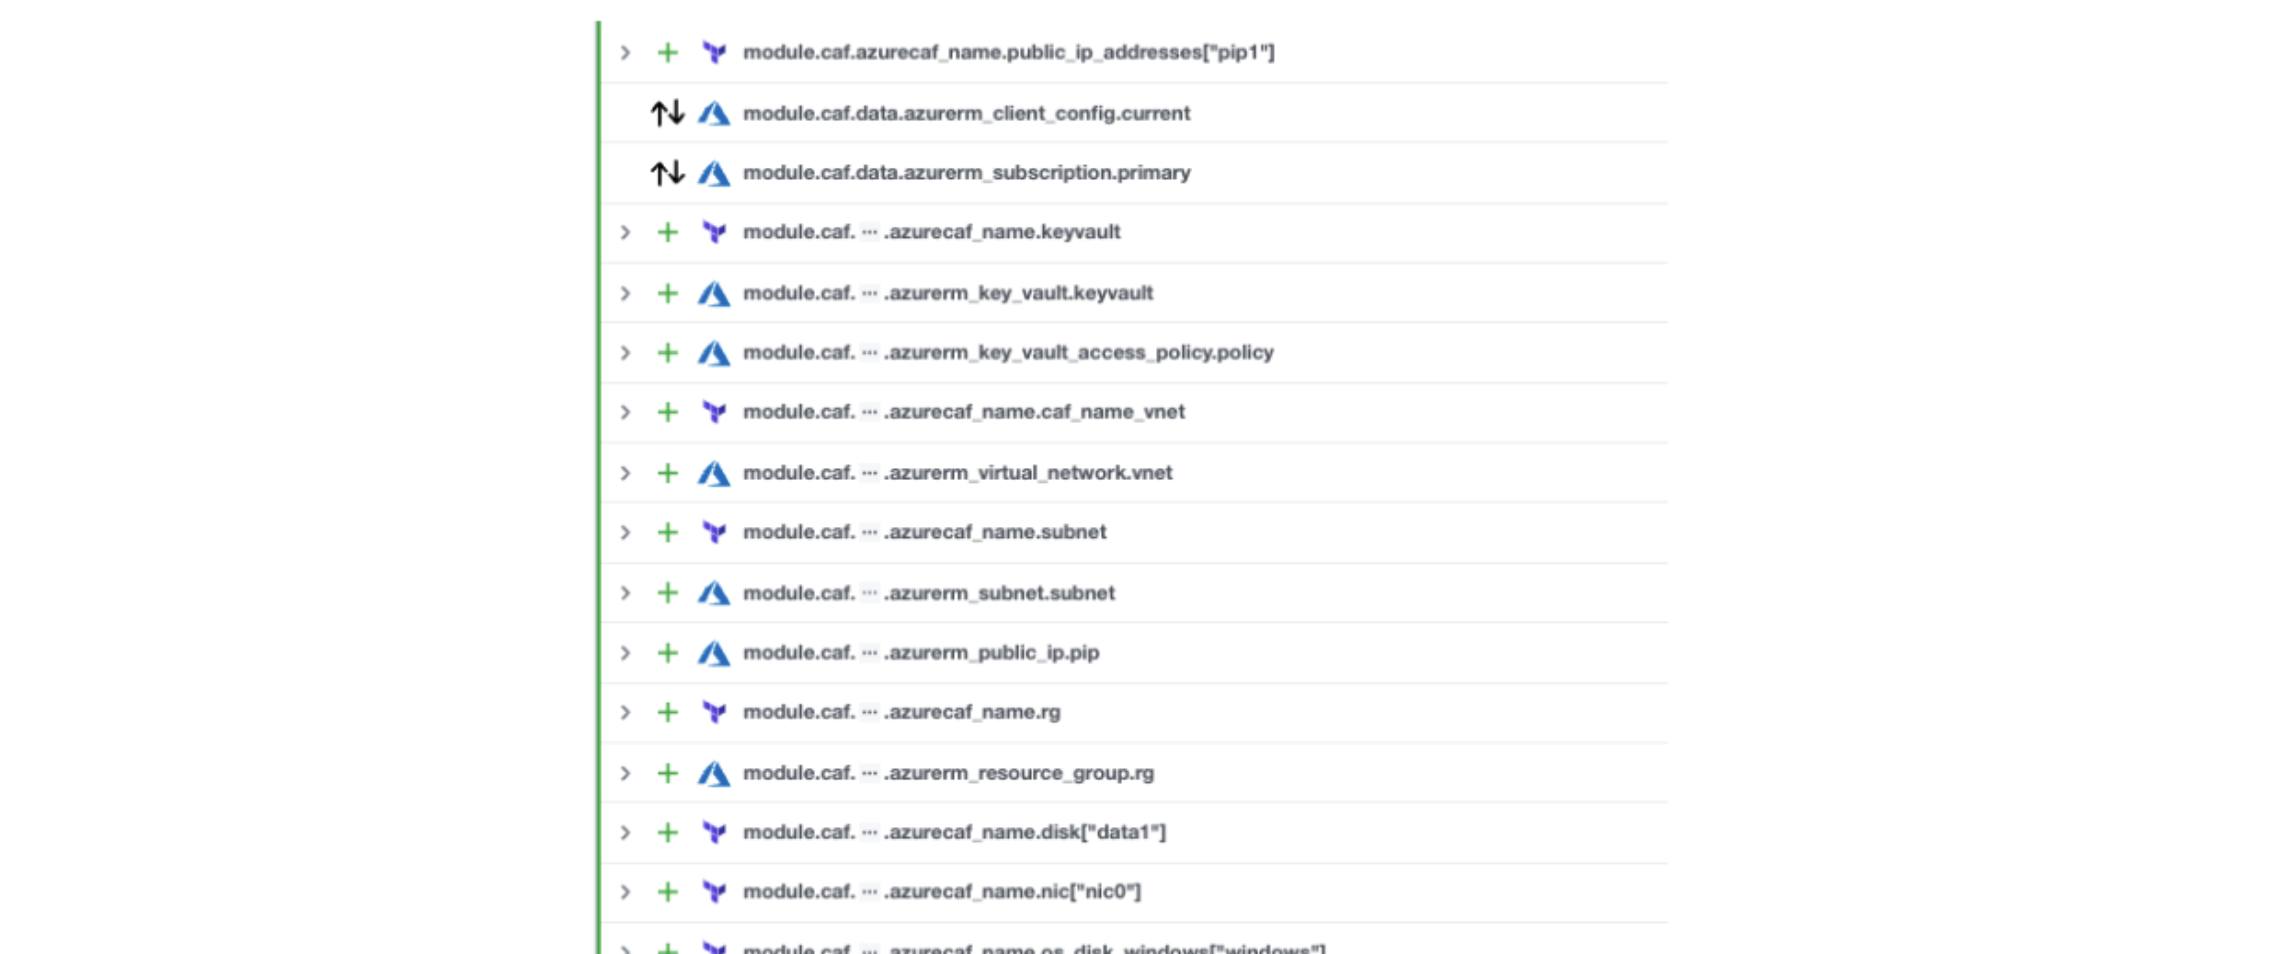
I now kick off a build by clicking “Action > Start new run” via the GUI as shown below:
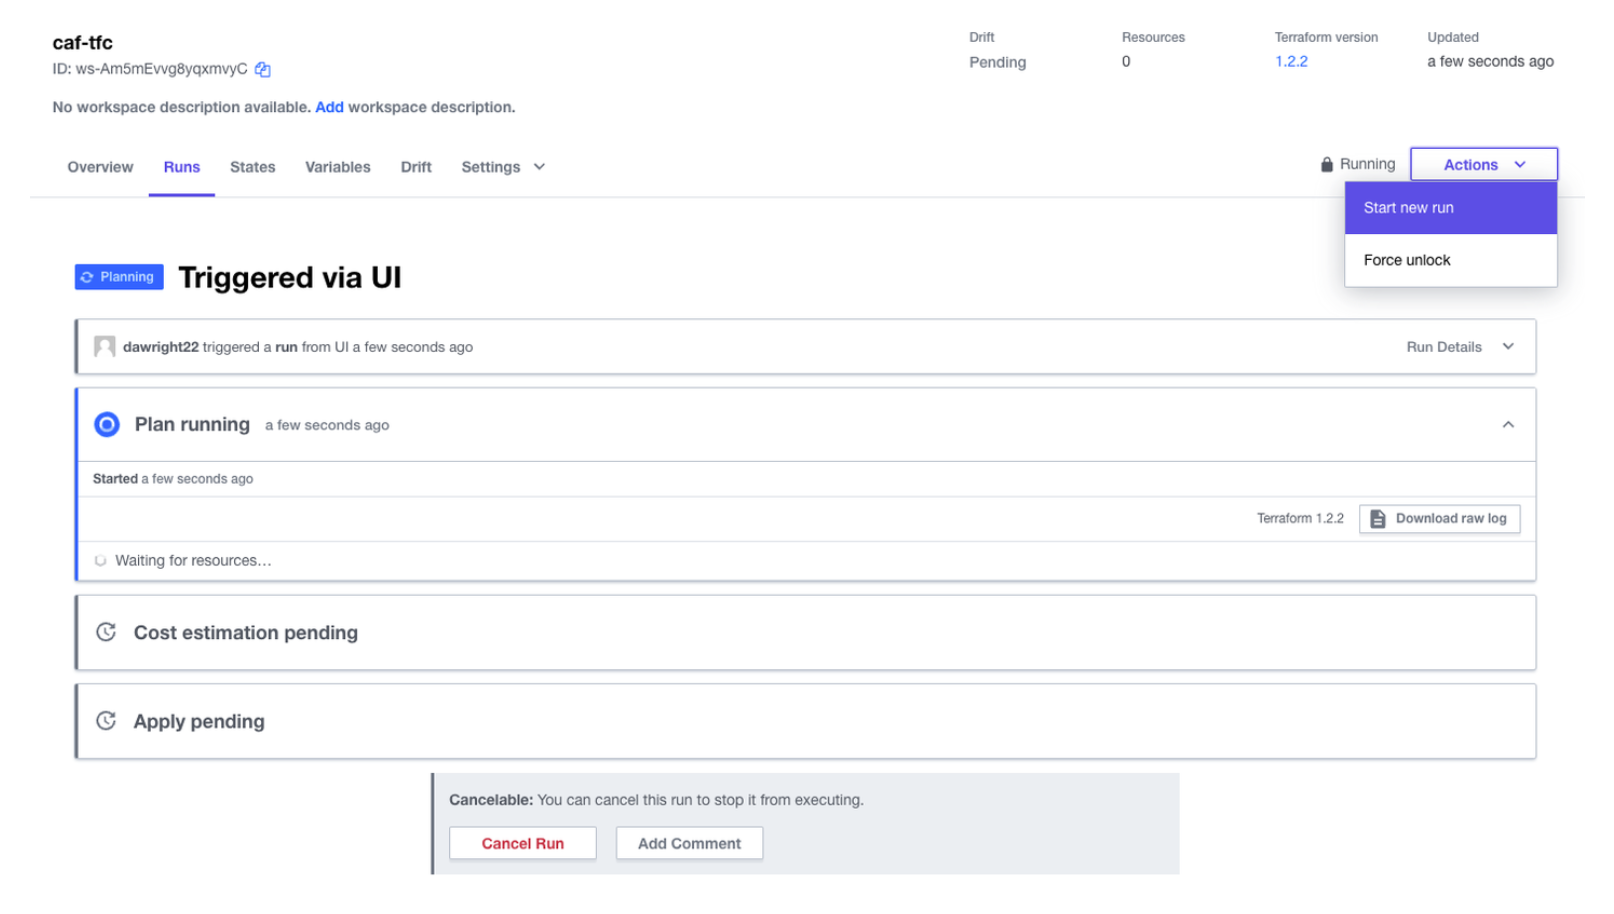
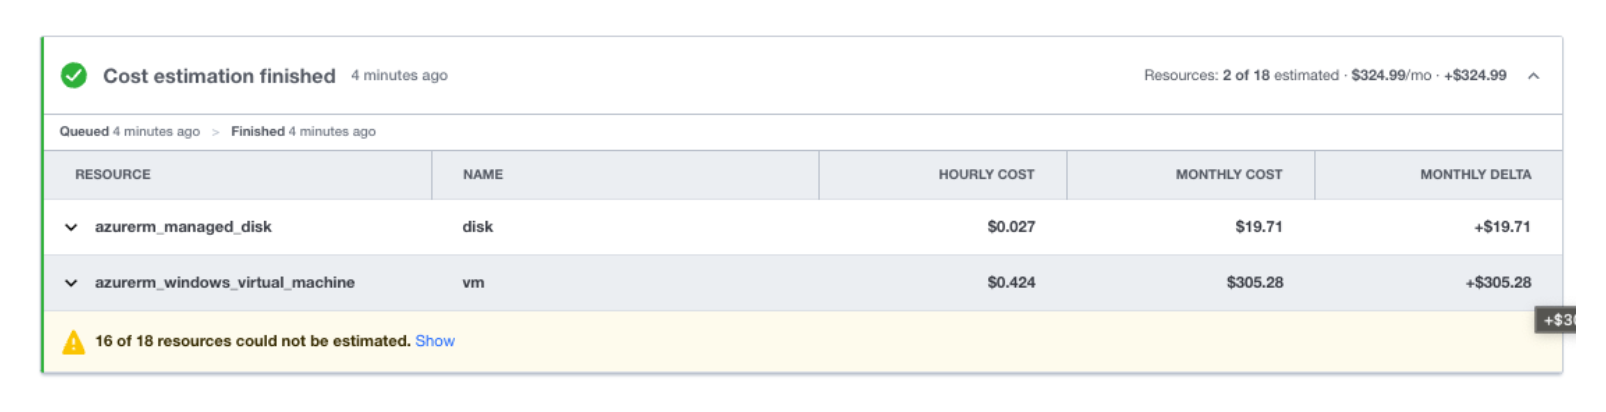
This creates a plan of the infrastructure that will be built. Since I have cost estimation enabled on this workspace, I am able to see an estimate of the monthly cost.
Then, I simply have to confirm and apply to build these resources and we are done.
»Takeaways
How easy and quick was that? A few things to think about in the example:
We did not have to write any Terraform code
We did not have to understand any Terraform code
We did not need any Azure platform knowledge
The outcome complies with Microsoft best practices
Hopefully you can see how easy it is to use Terraform Cloud to deploy an outcome on Azure with little to no knowledge of either platform. So how does this help you with the challenges discussed at the start of this post?
The first advantage is having one common tool across the entire organization to use for deploying resources. This reduces the skill gap and, as I showed, simplifies the process considerably.
The second is that this addresses infrastructure sprawl. By having all the resources under management within Terraform Cloud, you centralize and monitor who and what is being deployed. By using SSO and Sentinel policies, you can further tighten security and enforce things like tagging to track owners.
This leads to dealing with our final challenge: controlling cost. With this approach, you now have a defined owner. This means you can allocate cost to business units. With cost estimation enabled as shown above, you can even make a Sentinel policy that controls deployments.
»Wrapping Up
Remember that if you want to avoid unnecessary costs, you will need to delete the run when you’re finished with it. To destroy the infrastructure you provisioned in these tutorials, go to your workspace in the Terraform Cloud UI, then, from the top menu, select "Settings > Destruction and Deletion".
Here are some additional useful resources to further your understanding of Terraform and Microsoft CAF:
»Terraform Resources
»Cloud Adoption Framework Resources
Understand cloud platform functions: Understand cloud platform functions, including the source, the scope, and the deliverable.
Understand cloud adoption functions: Understand how cloud adoption functions enable technical solutions so that you can staff your teams appropriately.
Get started: Align your organization: Recommended steps for aligning your organization so that you're ready for successful cloud adoption.
Get started: Build a cloud operations team: This guide helps a cloud operations team understand scope, deliverables, and the functionality that the team is responsible for.